Crankcase ventilation cylinder head cover: Difference between revisions
mNo edit summary |
|||
| (11 intermediate revisions by 2 users not shown) | |||
| Line 5: | Line 5: | ||
== Crankcase ventilation == | == Crankcase ventilation == | ||
=== Oil leaks === | |||
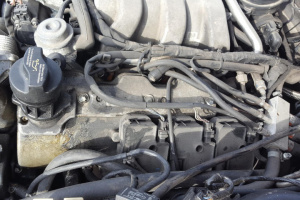
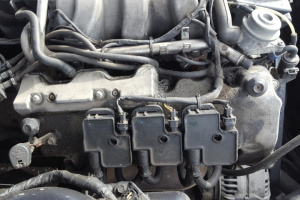
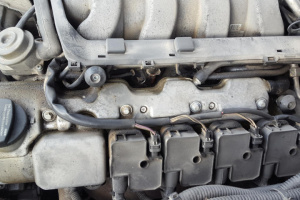
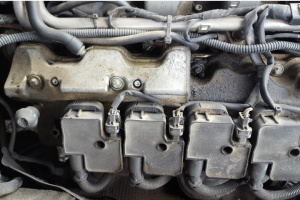
Crankcase ventilation cover (engine breather cover) is a very common source for oil leaks on Mercedes M112 V6 and M113 V8 engines. Just pull the top cover off your engine and look. Even cars with low mileage may have oil seeping out the breather covers on the top of the heads. When the oil gets on exhaust manifold, it creates smell that can be felt even in the cabin. Resealing the leaking breather chamber covers on top of engine is easy way to fix oil leak. | |||
This is the job any owner of a 1998 to 2006 Mercedes with a V6 (M112) or a V8 (M113) engine will have to deal with at some point. Doing a proper reseal on these covers is not hard but it is tedious if you don't want them to leak again. This is one job if you want it done right you should consider doing it yourself! | |||
{| | |||
|[[File:W220_engine_breather_cover_oil_leak_M112_left_side.jpg|thumb|none|Breather cover oil leak (M112 - left side)]] | |||
|[[File:W220_engine_breather_cover_oil_leak_M112_right_side.jpg|thumb|none|Breather cover oil leak (M112 - right side)]] | |||
|[[File:W220_engine_breather_cover_oil_leak_M113_left_side.jpg|thumb|none|Breather cover oil leak (M113 - left side)]] | |||
|[[File:W220_engine_breather_cover_oil_leak_M113_right_side.jpg|thumb|none|Breather cover oil leak (M113 - right side)]] | |||
|} | |||
=== Clogged ventilation valve === | |||
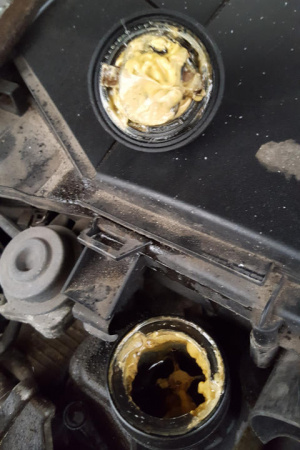
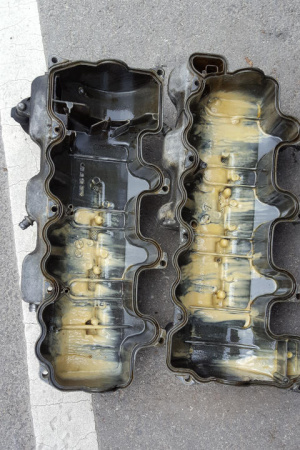
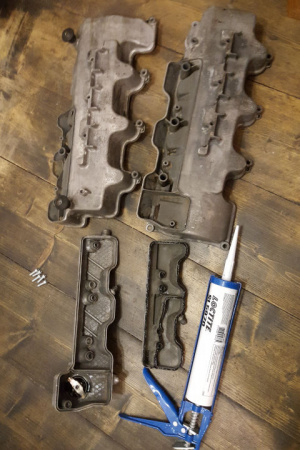
If engine oil is not regularly changed, the ventilation breather valve hole can become clogged which will result in water condensate being accumulated on the top of crankcase and visible on the engine oil cap. Proper cleaning of the milky water residue requires it to be cleaned also from the cylinder head cover. This may be a good moment to also replace the cylinder head cover gaskets. | |||
{| | |||
|[[File:W220_engine_oil_cap_milky_water_residue.jpg|thumb|none|Milky water residue on the engine oil cap (M112 engine)]] | |||
|[[File:W220_engine_head_cover_milky_water_residue.jpg|thumb|none|Milky water residue on the cylinder head cover (M112 engine)]] | |||
|[[File:W220_engine_head_cover_crankcase_ventilation_sealing.jpg|thumb|none|Resealing ventilation breather cover (M112 engine)]] | |||
|} | |||
=== Parts === | |||
Several parts will be needed for replacement. Several resealing kits are available: | |||
* https://mercedessource.com/store/1998-2006-v6-and-v8-engine-breather-cover-oil-leak-fix-kit | |||
* https://www.fcpeuro.com/products/mercedes-breather-cover-reseal-kit-m112-m113-oem-m112bcvr | |||
Below are the part numbers for each part. | |||
==== Bolts ==== | |||
The 5 original aluminium bolts will have to be replaced with updated stainless steel ones as the old will snap if trying to reuse them. | |||
The replacement stainless steel bolts have a 5 mm hex head rather than a torx head. | |||
The bolts correspond to M5x18 specification and their part number is N000000004436 (~2 EUR/piece). | |||
[[File:N000000004436.jpg|thumb|none|M5x18 bolt (N000000004436)]] | |||
==== Sealant ==== | |||
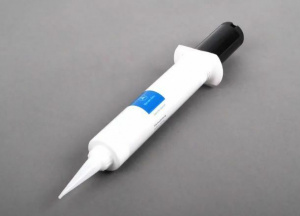
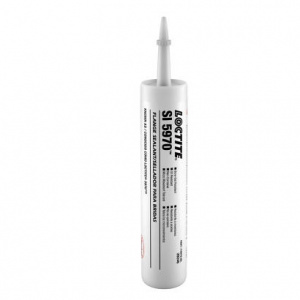
Proper sealant must be used. OEM sealant is Loctite 5970 which is a silicone sealant and cures on exposure to moisture in the air to form a tough rubber gasket. The product is designed primarily for flexible flange sealing. It is ideally used where high vibration or flexing occurs. It is tack-free after just 25 min. The product can be used on machined or cast surfaces, metal, plastic or painted parts. | |||
* A003989982010 50ml (OE) - EUR 26 | |||
* Loctite 5970 300ml (OEM) - EUR 18 | |||
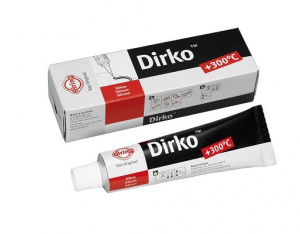
* Elring Dirko 70ml - EUR 5 | |||
{| | |||
|[[File:A003989982010_sealant_compound_50ml.jpg|thumb|none|A003989982010 sealing compound 50ml]] | |||
|[[File:Loctite_SI_5970_sealant_300ml.jpg|thumb|none|Loctite 5970 sealing compound 300ml]] | |||
|[[File:Elring_dirko_sealant_black.jpg|thumb|none|Elring Dirko sealant 70ml]] | |||
|} | |||
==== Cleaner ==== | |||
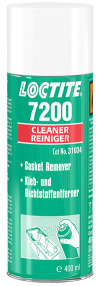
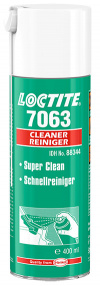
It must be made sure that the sealing surfaces are ABSOLUTELY clean of any dirt, oil, or moisture BEFORE applying the new sealant. Mercedes instructions recommend using Loctite 7200 to remove old pieces of gasket sealant and Loctite 7063 to prepare surface for the new sealant. | |||
{| | |||
| | |||
{| | |||
| | |||
* Loctite 7200 (EUR 15) 400 ml spray - Parts Cleaner - gasket remover. Removes gasket sealants in 10-15 minutes. | |||
Removes all types of chemical gaskets eliminating excessive scraping. Softens chemical gaskets quickly. Will not run, even on vertical surfaces. Removes cured chemical gaskets by softening the gasket material on the flanges, avoiding excessive scraping. Dissolves also sealants, adhesives, carbon deposits, and dried oils. Once applied the product foams, preventing run off from the desired location. Application: Protect painted surfaces, as Gasket Remover attacks the paint. Hold can upright and spray from distance of about 20 - 30 cm onto the flange or surface. Allow 10 - 15 minutes to soften the gasket, for silicone gaskets 30 minutes are necessary. Remove gasket with a soft scraper. Wipe the surface with a rag. Repeat procedure if it is necessary. | |||
|} | |||
{| | |||
| | |||
* Loctite 7063 (EUR 12) 400 ml spray - Parts Cleaner - general purpose. For use prior to bonding and sealing applications. Leaves no residue. | |||
** A001986717110 (EUR 10) 150ml spray | |||
Excellent for surface preparation. High cleaning power. Rapid flash off. Use to prepare surfaces to be bonded. The product flashes off very quickly and it allows cleaning directly prior to adhesive/sealant application. It is non-corrosive and non toxic. Application: Spray a sufficient amount of product on the surface to be cleaned and wipe while still wet to ensure heavy contamination and excess solvent is removed. | |||
|} | |||
| | |||
|[[File:Loctite-sf-7200.jpg|100px]] | |||
|[[File:Loctite-sf-7063.jpg|100px]] | |||
|} | |||
==== Breather hoses ==== | |||
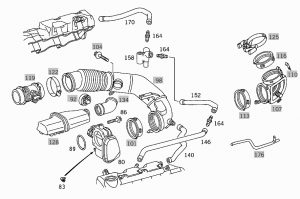
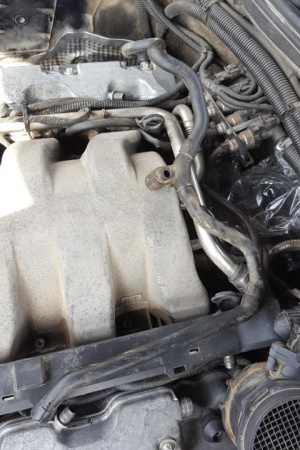
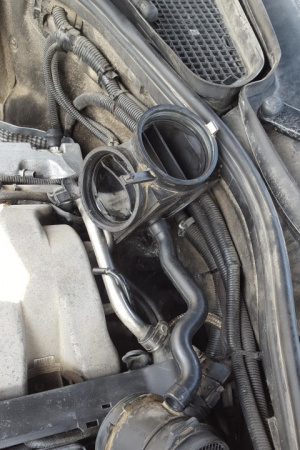
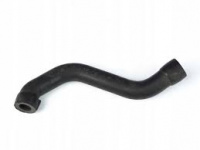
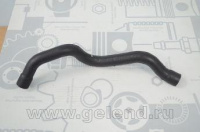
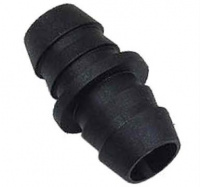
Over time the rubber hoses get hard and cannot be removed without breaking. It is therefore recommended to replace 4 hoses and 3 connectors. Connectors are usual in good condition and require no replacement. For some of the hoses FEBI BILSTEIN is OE mananufacturer. | |||
{| | |||
|{{#ev:youtube|https://youtu.be/_yhebTmn8K8|320|center|W220/W210 Breather Hoses Replacement (By Masood)|frame}} | |||
|} | |||
[[File:W220_engine_112_intake_manifold_EPC.png|thumb|none|Parts in [[EPC]] related to intake manifold (Engine 112)]] | |||
{| | |||
|[[File:W220_A1120180182_A1120180282_A1120180382_A1179901578_Part_load_crankcase_ventilation_hoses_connected_together.jpg|thumb|none|A1120180182, A1120180282, A1120180382 hoses joined together]] | |||
|[[File:W220_A1120180482_Full-load_crankcase_ventilation_hose_connected.jpg|thumb|none|A1120180482 hose one side connected to engine air intake cover]] | |||
|} | |||
Engine 112 and 113 (S350/S500): | |||
{| | |||
|[[File:A1120180482_full_load_crankcase_ventilation_hose.jpg|200px]] | |||
| | |||
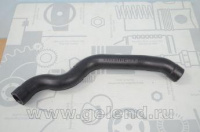
* A1120180482 (140) - Full-load crankcase ventilation hose - EUR 11 | |||
** Trucktec automotive 0218048 - EUR 4 | |||
** Topran 407867 - EUR 5 | |||
|} | |||
{| | {| | ||
|{ | |[[File:A1120180182_part_load_crankcase_ventilation_hose.jpg|200px]] | ||
| | | | ||
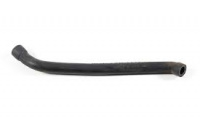
* A1120180182 (146) - Part load crankcase ventilation hose - EUR 9 | |||
** Febi bilstein 33850 - EUR 4 | |||
** Swag 10933850 - EUR 4 | |||
|} | |||
{| | |||
|[[File:A1120180282_part_load_crankcase_ventilation_hose.jpg|200px]] | |||
| | |||
* A1120180282 (152) - Part load crankcase ventilation hose - EUR 6 | |||
** Febi bilstein 33851 - EUR 3 | |||
** Topran 407865 - EUR 3 | |||
|} | |||
{| | |||
|[[File:A1120180382_part_load_crankcase_ventilation_hose.jpg|200px]] | |||
| | |||
* A1120180382 (170) - Part load crankcase ventilation hose - EUR 9 | |||
** Febi bilstein 33852 - EUR 3 | |||
** Swag 10933852 - EUR 3 | |||
|} | |||
{| | |||
|[[File:A1179901578_part_load_crankcase_ventilation_connector.jpg|200px]] | |||
| | |||
* A1179901578 (164) - Part load crankcase ventilation connector x3 - EUR 2 | |||
|} | |} | ||
=== Remove/install cover for crankcase ventilation (WIS instruction) === | |||
<!-- AR01.20-P-0003A Remove/install cover for crankcase ventilation 24.6.10 | <!-- AR01.20-P-0003A Remove/install cover for crankcase ventilation 24.6.10 | ||
ENGINES 112, 113 --> | ENGINES 112, 113 --> | ||
ENGINES 112, 113 | ENGINES 112, 113 | ||
| Line 68: | Line 151: | ||
Work instructions: | Work instructions: | ||
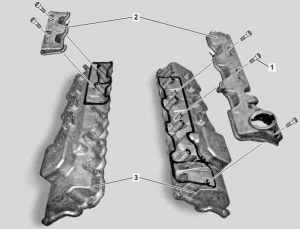
* Aluminum bolts (1). Installation: Install new bolts. | * Aluminum bolts (1). Installation: Install new bolts. | ||
* Clean. When cylinder head covers are installed, cover oil ducts with rags. Do not use any sharp-edged tools or abrasive paper as this will damage the sealing surfaces. Oil channels clogged with sealant will damage the engine. Cleaning materials: Loctite 7200 | * Clean. When cylinder head covers are installed, cover oil ducts with rags. Do not use any sharp-edged tools or abrasive paper as this will damage the sealing surfaces. Oil channels clogged with sealant will damage the engine. Cleaning materials: Loctite 7200 and Loctite 7063 cleaning spray 150 ml (A001986717110). | ||
* Sealant. Apply a 2.0 mm thick bead of sealant (A), observing the bolt holes (arrow). Do not spread the silicone bead. Process sealant within 10 minutes. To avoid leaks, use only the silicone sealant specified in the repair materials - Loctite 5970 sealant (A0039899820)! | * Sealant. Apply a 2.0 mm thick bead of sealant (A), observing the bolt holes (arrow). Do not spread the silicone bead. Process sealant within 10 minutes. To avoid leaks, use only the silicone sealant specified in the repair materials - Loctite 5970 sealant (A0039899820)! | ||
Torque specification: | Torque specification: | ||
* Bolt, crankcase ventilation cover to the cylinder head valve cover: 4 Nm (Engine 112 and 113) | * Bolt, crankcase ventilation cover to the cylinder head valve cover: 4 Nm (Engine 112 and 113) | ||
{| | |||
|{{#ev:youtube|https://www.youtube.com/watch?v=Lo_-nrhoRyU|320|left|Mercedes M112 M113 Engine Breather Oil Leak Fix Kit|frame}} | |||
|{{#ev:youtube|https://www.youtube.com/watch?v=m316C8PmCcY|320|left|Mercedes M112 V6, M113 V8 oil breather resealing|frame}} | |||
|} | |||
== Cylinder head cover == | == Cylinder head cover == | ||
Cylinder head cover is also popular source for oil leaks on M112 and M113 engines. It is highly recommended to use OE gasket as it provides the best quality and requires no additional sealant. | |||
=== Cylinder head cover gaskets === | |||
Engine 112 (S350): | |||
* A1120160221 Cylinder head cover gasket (left) - EUR 20 | |||
* A1120160321 Cylinder head cover gasket (right) - EUR 20 | |||
[[File:W220_gasket_A1120160221_A1120160321.jpg|thumb|none|Engine 112 cylinder head cover gaskets (left and right)]] | |||
Engine 113 (S500): | |||
* A1120160221 Cylinder head cover gasket (left) - EUR 22 | |||
* A1120160321 Cylinder head cover gasket (right) - EUR 22 | |||
[[File:W220_gasket_A1130160221_A1130160321.jpg|thumb|none|Engine 113 cylinder head cover gaskets (left and right)]] | |||
=== Remove/install cylinder head cover (WIS instruction) === | === Remove/install cylinder head cover (WIS instruction) === | ||
| Line 84: | Line 187: | ||
ENGINES 113.962 in MODEL 463.206 /240 /241 /247 /248 /249 /254 | ENGINES 113.962 in MODEL 463.206 /240 /241 /247 /248 /249 /254 | ||
ENGINES 113.982 in MODEL 463.243 /246 --> | ENGINES 113.982 in MODEL 463.243 /246 --> | ||
{| | {| | ||
| Line 130: | Line 232: | ||
# Inspect gasket (arrows) of cylinder head cover to ensure it is correctly located in the sealing groove of the cylinder head cover, particularly at the rear of the cylinder head. | # Inspect gasket (arrows) of cylinder head cover to ensure it is correctly located in the sealing groove of the cylinder head cover, particularly at the rear of the cylinder head. | ||
|[[File:W220_ensure_gasket_on_cilinder_cover_correctly_installed.png|300px]] | |[[File:W220_ensure_gasket_on_cilinder_cover_correctly_installed.png|300px]] | ||
|} | |||
{| | |||
|{{#ev:youtube|https://youtu.be/5StLcC-RoI0|320|center|W220 - Valve/Breather Covers, Spark Plugs, Coils DIY - PART 1 (By Masood)|frame}} | |||
|} | |||
{| | |||
|{{#ev:youtube|https://youtu.be/-ySR9tLAW-s|320|center|W220 - Valve/Breather Covers, Spark Plugs, Coils DIY - PART 2 (By Masood)|frame}} | |||
|} | |||
{| | |||
|{{#ev:youtube|https://youtu.be/dSTbh8fDHtc|320|center|W220 - Valve/Breather Covers, Spark Plugs, Coils DIY - PART 3 (By Masood)|frame}} | |||
|} | |} | ||
Latest revision as of 20:41, 18 June 2022
 |
 |
Crankcase ventilation
Oil leaks
Crankcase ventilation cover (engine breather cover) is a very common source for oil leaks on Mercedes M112 V6 and M113 V8 engines. Just pull the top cover off your engine and look. Even cars with low mileage may have oil seeping out the breather covers on the top of the heads. When the oil gets on exhaust manifold, it creates smell that can be felt even in the cabin. Resealing the leaking breather chamber covers on top of engine is easy way to fix oil leak.
This is the job any owner of a 1998 to 2006 Mercedes with a V6 (M112) or a V8 (M113) engine will have to deal with at some point. Doing a proper reseal on these covers is not hard but it is tedious if you don't want them to leak again. This is one job if you want it done right you should consider doing it yourself!
 |
 |
 |
 |
Clogged ventilation valve
If engine oil is not regularly changed, the ventilation breather valve hole can become clogged which will result in water condensate being accumulated on the top of crankcase and visible on the engine oil cap. Proper cleaning of the milky water residue requires it to be cleaned also from the cylinder head cover. This may be a good moment to also replace the cylinder head cover gaskets.
 |
 |
 |
Parts
Several parts will be needed for replacement. Several resealing kits are available:
- https://mercedessource.com/store/1998-2006-v6-and-v8-engine-breather-cover-oil-leak-fix-kit
- https://www.fcpeuro.com/products/mercedes-breather-cover-reseal-kit-m112-m113-oem-m112bcvr
Below are the part numbers for each part.
Bolts
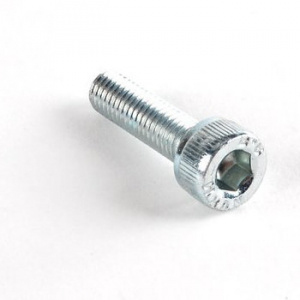
The 5 original aluminium bolts will have to be replaced with updated stainless steel ones as the old will snap if trying to reuse them. The replacement stainless steel bolts have a 5 mm hex head rather than a torx head.
The bolts correspond to M5x18 specification and their part number is N000000004436 (~2 EUR/piece).
Sealant
Proper sealant must be used. OEM sealant is Loctite 5970 which is a silicone sealant and cures on exposure to moisture in the air to form a tough rubber gasket. The product is designed primarily for flexible flange sealing. It is ideally used where high vibration or flexing occurs. It is tack-free after just 25 min. The product can be used on machined or cast surfaces, metal, plastic or painted parts.
- A003989982010 50ml (OE) - EUR 26
- Loctite 5970 300ml (OEM) - EUR 18
- Elring Dirko 70ml - EUR 5
 |
 |
 |
Cleaner
It must be made sure that the sealing surfaces are ABSOLUTELY clean of any dirt, oil, or moisture BEFORE applying the new sealant. Mercedes instructions recommend using Loctite 7200 to remove old pieces of gasket sealant and Loctite 7063 to prepare surface for the new sealant.
Breather hoses
Over time the rubber hoses get hard and cannot be removed without breaking. It is therefore recommended to replace 4 hoses and 3 connectors. Connectors are usual in good condition and require no replacement. For some of the hoses FEBI BILSTEIN is OE mananufacturer.
 |
 |
Engine 112 and 113 (S350/S500):
|
|
|
|
|
|
|
|
|
|
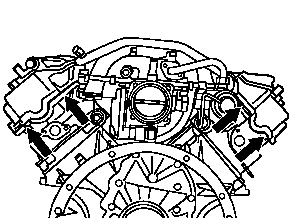
Remove/install cover for crankcase ventilation (WIS instruction)
ENGINES 112, 113
Shown on engine 113:
|
|
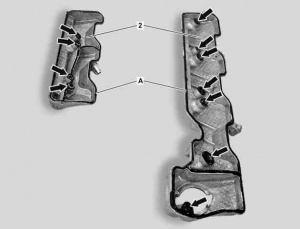
Sealant path - Shown on engine 113:
|
|
Work instructions:
- Aluminum bolts (1). Installation: Install new bolts.
- Clean. When cylinder head covers are installed, cover oil ducts with rags. Do not use any sharp-edged tools or abrasive paper as this will damage the sealing surfaces. Oil channels clogged with sealant will damage the engine. Cleaning materials: Loctite 7200 and Loctite 7063 cleaning spray 150 ml (A001986717110).
- Sealant. Apply a 2.0 mm thick bead of sealant (A), observing the bolt holes (arrow). Do not spread the silicone bead. Process sealant within 10 minutes. To avoid leaks, use only the silicone sealant specified in the repair materials - Loctite 5970 sealant (A0039899820)!
Torque specification:
- Bolt, crankcase ventilation cover to the cylinder head valve cover: 4 Nm (Engine 112 and 113)
Cylinder head cover
Cylinder head cover is also popular source for oil leaks on M112 and M113 engines. It is highly recommended to use OE gasket as it provides the best quality and requires no additional sealant.
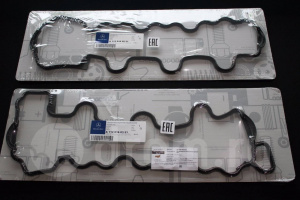
Cylinder head cover gaskets
Engine 112 (S350):
- A1120160221 Cylinder head cover gasket (left) - EUR 20
- A1120160321 Cylinder head cover gasket (right) - EUR 20
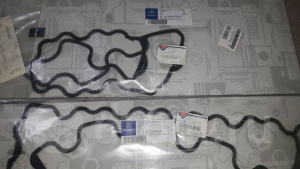
Engine 113 (S500):
- A1120160221 Cylinder head cover gasket (left) - EUR 22
- A1120160321 Cylinder head cover gasket (right) - EUR 22
Remove/install cylinder head cover (WIS instruction)
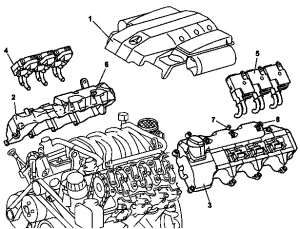
Shown on engine 112.945:
|
|
Remove/install:
- Remove engine trim panel with integrated air filter (1). Unclip covering on front side of engine. Remove air filter by pulling vertically up and off the cylinder head covers.
- Remove air filter (Model 215.374, 220.074/174)
- Unscrew guide tube for the automatic transmission oil dipstick
- Detach right ignition coils (4), left ignition coils (5) on right cylinder head cover (2) and left cylinder head cover (3). Except engines 112.911/914/915/917/954, Engine 113.969.
- Disconnect spark plug connectors. Installation: Observe marking for spark plug connectors on the cylinder head covers and ignition coils.
- Pull off vent hoses on right connector (6) and on left connector (7) of the right cylinder head cover (2) and left cylinder head cover (3).
- Pull off engine vent hose on left connector (8) of left cylinder head cover (3).
- Disconnect fuel line at fuel rail. Only on vehicles with rigid fuel line and: Model 211.061/065/070/076/276, Model 215.374, Model 220.074, Model 230.474/475. Release fuel pressure through service valve!
- Remove right cylinder head cover (2) and left cylinder head cover (3). Installation: Check cylinder head covers for leaks, see: Ensure cylinder head cover gasket is correctly installed.
- Install in the reverse order
- Check for leaks with engine running
Torque specifications:
- Cylinder head cover bolt: 9 Nm (Engine 112 and 113)
- Bolt, ignition coils to cylinder head cover: 8 Nm (Engine 112 and 113)
- Fuel feed line to fuel distributor: 38 Nm (Engine 112 except 112.945/951/960/961)
- Fuel feed line to fuel distributor: 38 Nm (Engine 112.945)
- Fuel feed line to fuel distributor: 35 Nm (Engine 112.960/961 AMG)
- Fuel feed line to fuel distributor: 38 Nm (Engine 113.940/941/942/943/944/945/946/948/960/961/962/963/964/965/966/967/968/969/971/980/981/982/984/986/988)
- Fuel feed line to fuel distributor: 38 Nm (Engine 113.987)
- Fuel feed line to fuel distributor: 38 Nm (Engine 113.990/991)
- Fuel feed line to fuel distributor: 38 Nm (Engine 113.992/993/995)
Ensure gasket of cylinder head cover is correctly installed:
|
|
