Engine oil: Difference between revisions
(moved oil change here) |
(→Check oil pressure: added instructions) |
||
| (8 intermediate revisions by the same user not shown) | |||
| Line 41: | Line 41: | ||
* Forget about refilling the new oil via the Oil Filler Cap. While you have the [[oil filter]] assembly out, pour the fresh oil down that huge hole. Less chance to spill, no funnel needed and no funnel to clean up afterwards. | * Forget about refilling the new oil via the Oil Filler Cap. While you have the [[oil filter]] assembly out, pour the fresh oil down that huge hole. Less chance to spill, no funnel needed and no funnel to clean up afterwards. | ||
* If using the oil drain method be sure to put the drain plug back before refilling. | * If using the oil drain method be sure to put the drain plug back before refilling. | ||
== Oil cooler == | |||
=== Remove/install oil-water heat exchanger at oil filter === | |||
<!-- AR18.30-P-3481CA | |||
Remove/install oil-water heat exchanger at oil filter | |||
ENGINE | |||
112 in MODEL 170, 202, 203, 208.365 /465, 209, 210, 220 | |||
ENGINE | |||
113 in MODEL 220 | |||
ENGINE | |||
113.981 in MODEL 163.174 | |||
ENGINE | |||
113.968 in MODEL 209.375 /475 | |||
ENGINE | |||
112.913 in MODEL 211.061 /261 | |||
ENGINE | |||
112.949 in MODEL 211.065 /265 | |||
ENGINE | |||
113.967 in MODEL 211.070 /270 | |||
ENGINE | |||
113.963 in MODEL 230.475 | |||
ENGINE | |||
113.987 in MODEL 209.376 /476 | |||
ENGINE | |||
113.965 in MODEL 163.175 | |||
ENGINE | |||
112.917 in MODEL 211.080 /280 | |||
ENGINE | |||
112.954 in MODEL 211.082 /282 | |||
ENGINE | |||
113.969 in MODEL 211.083 /283 | |||
ENGINE | |||
113.988 in MODEL 203.076 /276 | |||
22.1.09 --> | |||
{| | |||
|[[File:W220_remote_oil_heat_exchanger.png|500px]] | |||
|Shown on engine 112 without air pump: | |||
* 2 - Fan shroud | |||
* 3 - Oil filter housing cap | |||
* 4 - Coolant line | |||
* 5 - Coolant line | |||
* 6 - Oil/water heat exchanger | |||
* 7 - Sealing rings | |||
|} | |||
# Unclip cover on front side of engine | |||
# Remove engine cover with integrated air filter. Remove engine cover or air filter by pulling it vertically up and off the cylinder head covers. | |||
# Remove fan shroud (2) together with electric fan. Before removal of fan shroud (2) disconnect connector for electric fan. | |||
# Remove electric fan | |||
# Unscrew oil filter housing cover (3) | |||
# Drain coolant at radiator. Do not open cooling system unless coolant temperature is below 90°C. Open cap slowly and release the pressure. Do not pour coolant into beverage containers. Wear protective gloves, protective clothing and safety glasses. | |||
# Detach coolant lines (4, 5) from oil-water heat exchanger (6) | |||
# Remove [[air pump]] | |||
# Detach oil-water heat exchanger (6) from oil filter housing. Installation: Install new sealing rings (7). | |||
# Install in the reverse order | |||
# Inspect cooling system for leaks | |||
Torque specifications: | |||
* Screw cap on oil filter: 25 Nm | |||
* Oil-water heat exchanger on oil filter housing: M112 11 Nm; M113 9 Nm | |||
=== Replacing heat exchanger and oil filter housing seals === | |||
{| | |||
|[[File:W220_EPC_oil_heater.png|thumb|Heat exchanger and oil filter]] | |||
|} | |||
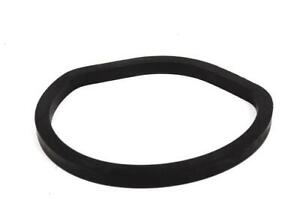
A common source of engine oil leaks are faulty seals at heat exchanger (17 and 23) and oil filter housing (35). | |||
They can be easily replaced during regular oil flush, but require a 46mm socket. | |||
Parts: | |||
* Sealing ring: heat exchanger on oil filter hoising: A1121840261 (Elring 130240 / Febi bilstein 49403 / Swag 10949403) | |||
* Sealing ring: heat exchanger on oil filter hoising: A1121840361 (Elring 130250 / Febi bilstein 49402) | |||
* Sealing ring: oil filter housing on timing case: A1121840061 (Elring 137100 / Febi bilstein 173982) | |||
''If an oil leak occurs a year after replacing these seals, you need to check the crankcase ventilation system - there may be overpressure in the crankcase.'' | |||
{| | |||
|[[File:W220_oil_heat_exchanger_sealing_ring_A1121840261.jpg|thumb|none|Oil heat exchanger sealing ring A1121840261]] | |||
|[[File:W220_oil_heat_exchanger_sealing_ring_A1121840361.jpg|thumb|none|Oil heat exchanger sealing ring A1121840361]] | |||
|[[File:W220_oil_filter_housing_sealing_ring_A1121840061.jpg|thumb|none|Oil filter housing sealing ring A1121840061]] | |||
|} | |||
{| | |||
|{{#ev:youtube|https://www.youtube.com/watch?v=vxgAL0dX96I?t=337|320|left||frame}} | |||
|{{#ev:youtube|https://www.youtube.com/watch?v=mWnkp1J4aNE|320|left||frame}} | |||
|{{#ev:youtube|https://www.youtube.com/watch?v=yU4K-mBDSeQ?t=379|320|left||frame}} | |||
|{{#ev:youtube|https://www.youtube.com/watch?v=dsg1eWzN2Uo|320|left||frame}} | |||
|} | |||
=== Replacing pressure port seal on timing cover === | |||
{| | |||
|[[File:W220_M113_engine_timing_case_oil_pressure_cover.jpg|thumb|none|Oil pressure cover on M113 engine]] | |||
|[[File:W220_A1120150630_cover_timing_case_on_engine.jpg|thumb|none|Cover timing case on engine]] | |||
|[[File:W220_M113_engine_timing_case_EPC.png|thumb|none|Engine timing case ([[EPC]])]] | |||
|} | |||
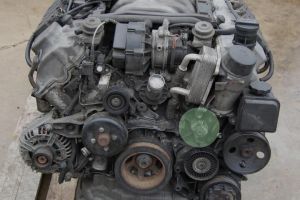
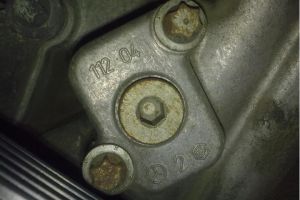
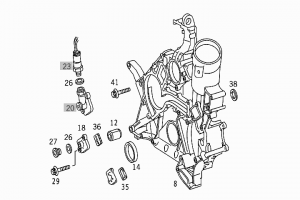
Faulty gasket on the oil pressure port can result in oil leaks. | |||
To replace gasket, remove two bolts (Torx E10 socket), pop-off pressure port cover and replace the square seal. | |||
Parts: | |||
* Pressure port cover A1120150630 8 EUR | |||
* Pressure port seal A1121840280 6 EUR / Elring 131050 2 EUR | |||
{| | |||
|[[File:W220_A1120150630_cover_timing_case.jpg|thumb|none|Pressure port cover A1120150630]] | |||
|[[File:W220_A1121840280_gasket_timing_case.jpg|thumb|none|Pressure port gasket A1121840280]] | |||
|} | |||
== Check oil pressure == | |||
<!-- Check oil pressure, AR18.00-P-1250DA, 9.8.11 | |||
ENGINES 112 in MODELS 170, 202, 203, 208.365 /465, 209.361 /365 /461 /465, 210, 211.080 /280 /082 /282, 220, 230.467 | |||
ENGINES 113 in MODELS 211.083 /283, 220, 230.474 /475 | |||
ENGINES 113.981 in MODEL 163.174 | |||
ENGINES 113.968 in MODEL 209.375 /475 | |||
ENGINES 112.913 in MODEL 211.061 /261 | |||
ENGINES 112.949 in MODEL 211.065 /265 | |||
ENGINES 113.967 in MODEL 211.070 /270 | |||
ENGINES 113.987 in MODEL 209.376 /476 | |||
--> | |||
{| | |||
|[[File:W220_check_oil_pressure.png|500px]] | |||
|Shown on engine 112: | |||
* 1 - Oil pressure gauge | |||
* 2 - Connection fitting | |||
* 3 - Sealing ring | |||
* 4 - Screw plug | |||
* 5 - Sealing ring | |||
* 6 - Remote thermometer | |||
* 7 - Dipstick | |||
* 9 - Fan shroud | |||
|} | |||
# Wait until engine is stone cold | |||
# Unscrew oil pressure screw using 6mm hex | |||
# Screw in fuel pressure gauge with 12mm x 1.5 adapter | |||
# Start the engine | |||
# Bring engine up to operating temperature (approx. 80 °C). | |||
# Note down the pressure readings | |||
## When the throttle is opened, the oil pressure must rise without any delay. | |||
## At idle ~700 RPM oil pressure should read >=0.7bar, at 3000 RPM oil pressure should read >=3.0bar. | |||
# Wait until engine cools down | |||
# Screw back the plug | |||
# Run engine and check for leaks | |||
Torque specification: | |||
* Screw plug to crankcase: 20 Nm | |||
{| | |||
|{{#ev:youtube|https://www.youtube.com/watch?v=uBeLLtg0yaE|320|left||frame}} | |||
|} | |||
Latest revision as of 16:41, 20 September 2023
Oil filter
Part numbers
Very important: The correct filter is a fleece filter. Do not make the mistake of buying the cheaper paper filter.
- OE - A0001802609 (18 EUR)
- OEM - MANN-FILTER HU 718/5 x (8 EUR)

Oil change
Oil specification
MB approved engine oils and other fluids (Gasoline, Diesel, Transmission, Engine, Gear, Differential, Brake, Refrigerant, Compressor, Windshield Washer, Wax): http://bevo.mercedes-benz.com/bevolistenmain.php?entercustomer=true&language_id=1
Oil change interval
Extended Oil Change Interval: http://www.benzworld.org/forums/w220-s-class/2056753-servicing-w220.html
Engine oil change procedure
See below for the correct type of oil filter.
Tips
- M112/M113 oil capacity is 8 liters.
- Oil should be 140°F-160° F [60°-71°C].
- If using the suction method, cut the end of the tube at a 45 degree angle.
- Warm the engine slightly so the oil flows easily and then it usually won't suck the tube closed.
- Run the engine for 5 to 10 minutes to heat up and thin the oil.
- Turn off engine prior to removing oil.
- Make sure the car is level. If not, you won't be getting all of the oil out of the pan, no matter which method you use.
- Forget about refilling the new oil via the Oil Filler Cap. While you have the oil filter assembly out, pour the fresh oil down that huge hole. Less chance to spill, no funnel needed and no funnel to clean up afterwards.
- If using the oil drain method be sure to put the drain plug back before refilling.
Oil cooler
Remove/install oil-water heat exchanger at oil filter
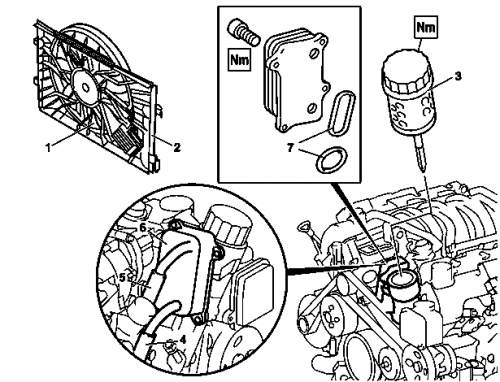
|
Shown on engine 112 without air pump:
|
- Unclip cover on front side of engine
- Remove engine cover with integrated air filter. Remove engine cover or air filter by pulling it vertically up and off the cylinder head covers.
- Remove fan shroud (2) together with electric fan. Before removal of fan shroud (2) disconnect connector for electric fan.
- Remove electric fan
- Unscrew oil filter housing cover (3)
- Drain coolant at radiator. Do not open cooling system unless coolant temperature is below 90°C. Open cap slowly and release the pressure. Do not pour coolant into beverage containers. Wear protective gloves, protective clothing and safety glasses.
- Detach coolant lines (4, 5) from oil-water heat exchanger (6)
- Remove air pump
- Detach oil-water heat exchanger (6) from oil filter housing. Installation: Install new sealing rings (7).
- Install in the reverse order
- Inspect cooling system for leaks
Torque specifications:
- Screw cap on oil filter: 25 Nm
- Oil-water heat exchanger on oil filter housing: M112 11 Nm; M113 9 Nm
Replacing heat exchanger and oil filter housing seals
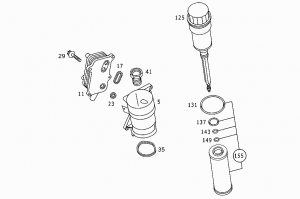 |
A common source of engine oil leaks are faulty seals at heat exchanger (17 and 23) and oil filter housing (35). They can be easily replaced during regular oil flush, but require a 46mm socket.
Parts:
- Sealing ring: heat exchanger on oil filter hoising: A1121840261 (Elring 130240 / Febi bilstein 49403 / Swag 10949403)
- Sealing ring: heat exchanger on oil filter hoising: A1121840361 (Elring 130250 / Febi bilstein 49402)
- Sealing ring: oil filter housing on timing case: A1121840061 (Elring 137100 / Febi bilstein 173982)
If an oil leak occurs a year after replacing these seals, you need to check the crankcase ventilation system - there may be overpressure in the crankcase.
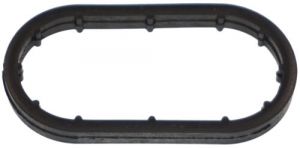 |
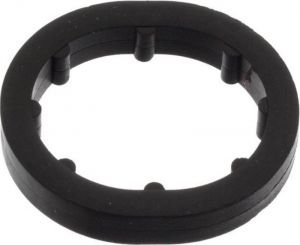 |
 |
Replacing pressure port seal on timing cover
 |
 |
 |
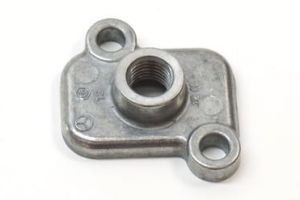
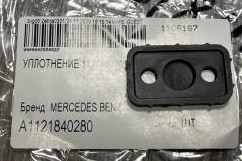
Faulty gasket on the oil pressure port can result in oil leaks. To replace gasket, remove two bolts (Torx E10 socket), pop-off pressure port cover and replace the square seal.
Parts:
- Pressure port cover A1120150630 8 EUR
- Pressure port seal A1121840280 6 EUR / Elring 131050 2 EUR
 |
 |
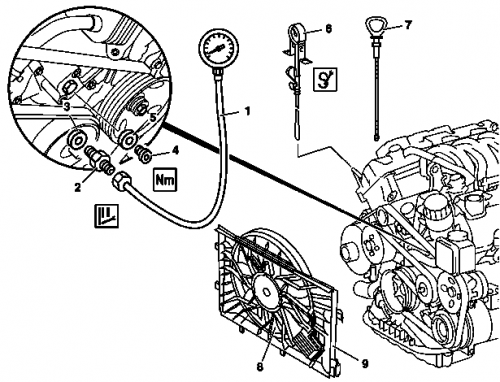
Check oil pressure
|
Shown on engine 112:
|
- Wait until engine is stone cold
- Unscrew oil pressure screw using 6mm hex
- Screw in fuel pressure gauge with 12mm x 1.5 adapter
- Start the engine
- Bring engine up to operating temperature (approx. 80 °C).
- Note down the pressure readings
- When the throttle is opened, the oil pressure must rise without any delay.
- At idle ~700 RPM oil pressure should read >=0.7bar, at 3000 RPM oil pressure should read >=3.0bar.
- Wait until engine cools down
- Screw back the plug
- Run engine and check for leaks
Torque specification:
- Screw plug to crankcase: 20 Nm