Ignition system: Difference between revisions
(→Parts) |
(Remove/install ignition coils) |
||
| Line 207: | Line 207: | ||
* To save your back jack up the car front, or run up onto ramps the night before. | * To save your back jack up the car front, or run up onto ramps the night before. | ||
* Time saver tip - if valve and breather cover gaskets need to be refreshed, combine with the spark plug change out. Do one side each day over the weekend. | * Time saver tip - if valve and breather cover gaskets need to be refreshed, combine with the spark plug change out. Do one side each day over the weekend. | ||
== Remove/install ignition coils == | |||
<!-- AR15.12-P-2003A | |||
Remove/install ignition coils | |||
6.11.09 | |||
ENGINES 112.910 in MODEL 202.026 /086 | |||
ENGINES 112.920 in MODEL 202.029 /089 | |||
ENGINES 112.921 in MODEL 210.063 /081 /263 /281 | |||
ENGINES 112.922 in MODEL 220.063 /163 | |||
ENGINES 112.923 in MODEL 129.059 | |||
ENGINES 112.940 in MODEL 208.365 /465 | |||
ENGINES 112.941 in MODEL 210.065 /082 /265 /282 | |||
ENGINES 112.942 in MODEL 163.154 | |||
ENGINES 112.943 in MODEL 129.064 | |||
ENGINES 112.944 in MODEL 220.065 /165 | |||
ENGINES 112.945 in MODEL 463 | |||
ENGINES 113.940 in MODEL 210.070 /270 | |||
ENGINES 113.941 in MODEL 220.070 /170 | |||
ENGINES 113.960 in MODEL 215.375, 220.075 /175 /875 | |||
ENGINES 113.961 in MODEL 129.068 | |||
ENGINES 113.962 /982 in MODEL 463 | |||
ENGINES 113.980 in MODEL 210.074 /274 | |||
ENGINES 113.944 in MODEL 202.033 /093 | |||
ENGINES 113.942 in MODEL 163.172 | |||
ENGINES 113.943 in MODEL 208.370 /470 | |||
ENGINES 113.984 in MODEL 208.374 /474 | |||
ENGINES 113.981 in MODEL 163.174 | |||
ENGINES 112.912 in MODEL 203.061 /261, 209.361 /461 | |||
ENGINES 112.946 in MODEL 203.064 /264 | |||
ENGINES 112.947 in MODEL 170.465 | |||
ENGINES 112.960 in MODEL 170.466 | |||
ENGINES 113.986 in MODEL 215.373, 220.073 /173 | |||
ENGINES 112.961 in MODEL 203.065 /265 | |||
ENGINES 113.965 in MODEL 163.175 | |||
ENGINES 113.963 in MODEL 230.475 | |||
ENGINES 113.968 in MODEL 209.375 /475 | |||
ENGINES 112.913 in MODEL 211.061 /261 | |||
ENGINES 112.949 in MODEL 211.065 /265 | |||
ENGINES 113.967 in MODEL 211.070 /270 | |||
ENGINES 113.992 in MODEL 230.474 | |||
ENGINES 113.987 in MODEL 209.376 /476 | |||
ENGINES 112.955 in MODEL 209.365 /465 | |||
ENGINES 113.990 in MODEL 211.076 /276 | |||
ENGINES 113.991 in MODEL 215.374, 220.074 /174 | |||
ENGINES 112.916 in MODEL 203.081 /281 | |||
ENGINES 112.953 in MODEL 203.084 /284 | |||
ENGINES 112.972 in MODEL 220.067 /167 | |||
ENGINES 112.973 in MODEL 230.467 | |||
ENGINES 112.970 in MODEL 163.157 | |||
ENGINES 112.975 in MODEL 220.087 /187 | |||
ENGINES 113.948 in MODEL 220.083 /183 | |||
ENGINES 113.966 in MODEL 220.084 /184 | |||
ENGINES 112.917 in MODELS 211.080 /280 | |||
ENGINES 112.954 in MODEL 211.082 /282 | |||
ENGINES 113.969 in MODEL 211.083 /283 | |||
ENGINES 113.988 in MODEL 203.076 /276 | |||
ENGINES 113.993 in MODEL 463.270 /271 | |||
ENGINES 113.989 in MODEL 171.473 | |||
ENGINES 113.995 in MODEL 230.472 | |||
--> | |||
{| | |||
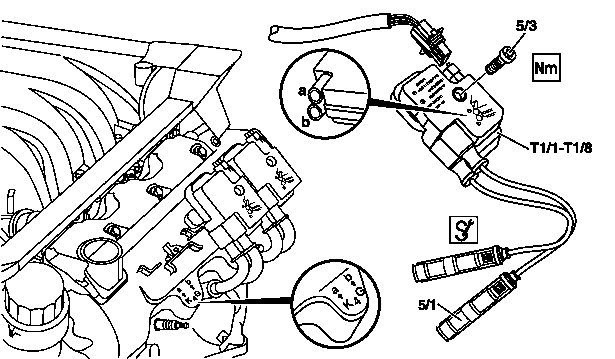
|Shown on engine 112 | |||
* 5/1 - Spark plug connector | |||
* 5/3 - Screw | |||
* T1/1 - Cylinder 1 ignition coil | |||
* T1/2 - Cylinder 2 ignition coil | |||
* T1/3 - Cylinder 3 ignition coil | |||
* T1/4 - Cylinder 4 ignition coil | |||
* T1/5 - Cylinder 5 ignition coil | |||
* T1/6 - Cylinder 6 ignition coil | |||
* T1/7 - Cylinder 7 ignition coil | |||
* T1/8 - Cylinder 8 ignition coil | |||
Arrow: Identification of the connector | |||
|[[File:W220_remove_install_ignition_coils.png]] | |||
|} | |||
# Unclip cover on front side of engine | |||
# Remove engine cover with integrated air filter. The air filter is integrated in the engine cover. Remove the engine cover or the air filter housing by pulling it from the cylinder head covers vertically in the upward direction. | |||
# Remove air filter housing. | |||
# Remove screw (5/3) | |||
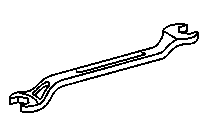
# Detach spark plug connector (5/1) from the spark plugs. Pry off spark plug connector (5/1) using open-end wrench, double over the cylinder head cover of the spark plugs. Installation: Observe the identification of the connector (arrow) on the cylinder head cover and the ignition coil of cylinders 1 to 6 or 1 to 8 for the corresponding spark plug connector (5/1). | |||
# Separate electrical connector of ignition coil of cylinder 1 to 6 (T1/1 to T1/6) or 1 to 8 (T1/1 to T1/8). Installation: Install new cable ties. | |||
# Remove ignition coil of cylinder 1 to 6 (T1/1 to T1/6) or 1 to 8 (T1/1 to T1/8) | |||
# Install in the reverse order | |||
Torque specification: | |||
* Bolt, ignition coil to cylinder head cover (Engine 112, 113): 8 Nm | |||
[[File:Open_ended_wrench_double_110589010100.png|thumb|none|Open-end wrench, double (110 589 01 01 00)]] | |||
Revision as of 12:18, 19 July 2021
Back to Index
Ignition System
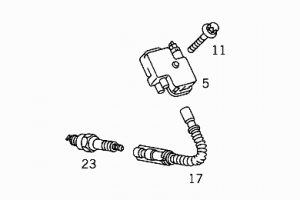
The W220 S Class series uses a twin-spark ignition coil with kV pickup (a test connector on each coil pack) and dual spark plugs per cylinder.
Warning: No tests such as holding an ignition HT Wire at a distance from ground and observing a spark must be performed.
Warning: Do not operate the ignition system at starting speed unless all of the HT Wires are connected.
Warning: Before working at cranking speed eg to check compression pressure, switch off ignition and disconnect Ignition Control Unit from 12V.
Spark Plugs
Parts
Make sure that the spark plugs are for the correct engine. The plugs listed above are for facelift S350 and S500.
- Bosch FR8DPP33+.

- Denso 3275 PK16PR-L11 (EUR 8).
- NGK 4292 PFR5R-11 (EUR 8).
- BRISK DR17YS-9 specially suited for Liquefied Petroleum Gas (LPG) (EUR 3).
- NGK LPG1 1496 - iridium spark plug specially suited for Liquefied Petroleum Gas (LPG).
Service
- M-B specifies replacement of plugs at every 100,000Km or 4 Years. Spark plug HT wires don't last much longer than that either.
- The resistance of the spark plug (electrode to HT connector) is about 4.5K to 6K ohms.
- There should be extremely high resistance between the electrode and the plug metal thread.
- Set the spark plug electrode gap to 0.039” or 1mm.
- Tightening torque 15 - 22 ftlbs or 20 - 30Nm.
Issues
- Old spark plugs can show worn electrodes and a wider than specification gap.
- Broken insulators are common during removal of seized OEM plugs.
- Fouled spark plugs.
- Corroded spark plug threads make it difficult to remove an old plug. Solution is to use high temperature anti-seize grease available from autoparts stores when re-installing new plugs.
Ignition Coils
The W220 uses a twin-spark ignition system for each cylinder and thus the V8 has eight ignition coils (or ignition plug packs).
It is possible to perform basic tests on an ignition coil using a digital multi meter (DMM).
Each coil secondary resistance measured from the plug cable to any of the three pins in the input electrical connector is approximately 4.8 M Ω (Mega Ohms).
The cable circuit is isolated from ground thus the resistance between the cable pin and ground is infinity Ohms or open circuit.
Parts
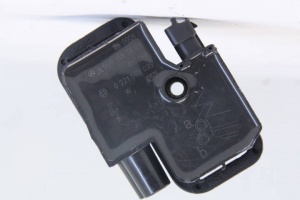
- OE A0001587303 (replaced by A0001587803).
- BOSCH 0221503035 (40 EUR)
 |
 |
Issues
- Burnt coil.
- Cracked Pack.
Article on fixing a burnt coil pack, right bank, on cylinder 4 which threw the following codes:
- P2050 Misfiring , Damages TWC (P0300) STORED
- P2056 Misfiring of cylinder 4, damages TWC (P0304) STORED
- P205B Misfiring of cylinder 8, damages TWC (P0308) STORED
Ignition Cables
Parts
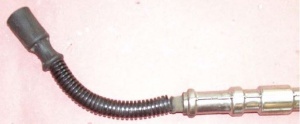
The spark plug high tension (HT) wires come in sets of sixteen. The resistance for new plug wire is approximately 2.18K ohms.
 |
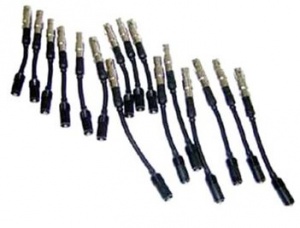 |
For a W220 with Engine Number: 113.960 xxxx the lengths of the spark plug wires are as follows:
- Cylinder - 1, Ignition Coil Port - a; HT wire size - L.
- Cylinder - 1, Ignition Coil Port - b; HT wire size - G.
- Cylinder - 2, Ignition Coil Port - a; HT wire size - H.
- Cylinder - 2, Ignition Coil Port - b; HT wire size - G.
- Cylinder - 3, Ignition Coil Port - a; HT wire size - K.
- Cylinder - 3, Ignition Coil Port - b; HT wire size - G.
- Cylinder - 4, Ignition Coil Port - a; HT wire size - K.
- Cylinder - 4, Ignition Coil Port - b; HT wire size - G.
- Cylinder - 5, Ignition Coil Port - a; HT wire size - H.
- Cylinder - 5, Ignition Coil Port - b; HT wire size - G.
- Cylinder - 6, Ignition Coil Port - a; HT wire size - K.
- Cylinder - 6, Ignition Coil Port - b; HT wire size - G.
- Cylinder - 7, Ignition Coil Port - a; HT wire size - G.
- Cylinder - 7, Ignition Coil Port - b; HT wire size - G.
- Cylinder - 8, Ignition Coil Port - a; HT wire size - G.
- Cylinder - 8, Ignition Coil Port - b; HT wire size - K.
Where HT Wire Sizes (Tip to Tip) are (NB not in length sequence.):
- G: 245mm - x9 A1121500118 (45 EUR), BOSCH 0356912948 (14 EUR)
- K: 265mm - x4 A1121500218 (45 EUR), BOSCH 0356912950 (14 EUR)
- H: 290mm - x2 A1121500318 (56 EUR), BOSCH 0356912952 (30 EUR)
- L: 315mm - x1 A1121500418 (56 EUR), BOSCH 0356912954 (32 EUR)
Cable kits:
- HITACHI 134779
- NGK 7800 (221 EUR)
- MAGNETI MARELLI 941318111285 (80 EUR)
Issues
- Spark HT wires have a limited life.
- The resistance element in the HT wires often fails or goes high resistance due to fatigue.
- HT lead insulation can break down causing arcing to ground.
- A special spark plug wire removal tool is available. It is a 17mm, open ended tool with a 25mm off-set and is made by JTC with part number J-1308. It can be found in eBay for $20.
Tools

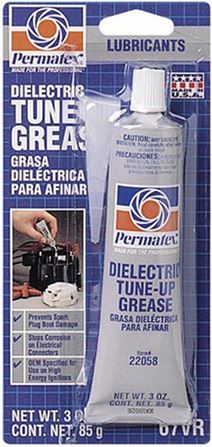
The rubber boot on the HT Wire is difficult to remove from a spark plug even when using the special removal tool. Solution is to apply a small quantity of dielectric grease to the top conductor and the ceramic insulator when re-installing new plugs. This helps keep moisture away and stops corrosion. Makes it infinitely easier to remove the HT Wire boot.
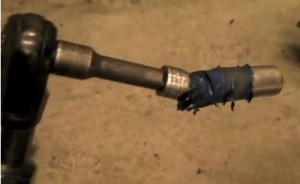
A regular 5/8" (15.8mm) spark plug socket with a rubber insert works well for removing spark plugs. However the secret is to use a variety of extensions e.g., a short 74mm 3/8" drive extension on the tight spots in conjunction with a with swivel head.
DIY Procedures
Replacing spark plugs and ignition wires
Summary of contributions at references.
- Step 1: Put Bonnet/Hood in Service Position
Push on the locks on the hinges at LH side and then the RH side and raise Bonnet/Hood to the Service Position.
- Step 2: Remove the Air Intake Tubes
- Step 3: Remove the Air Box
- Remove Front Cover. First pull it up and slide it forward.
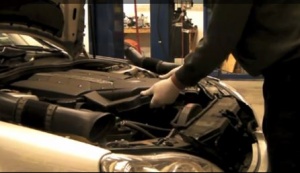
- Pull the Air Box Back Cover forward and up.
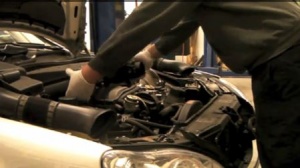
- Step 4: Remove Ignition Coil Packs and Spark Plug Wires
- Identify Ignition Coil Packs on the Valve Covers. Mark appropriately and do not mix them as the leads are different lengths.
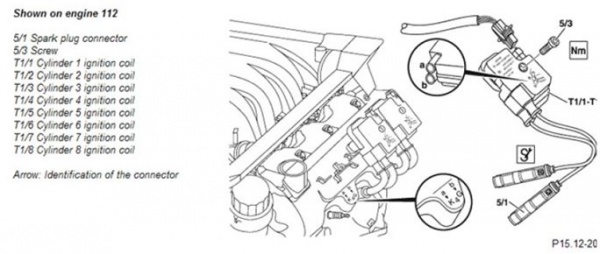
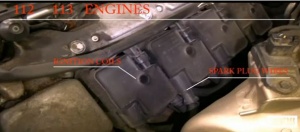
- Unhook electrical connectors on Coil Packs by squeezing in tabs and pull straight up.
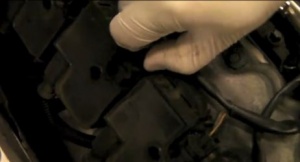
- Give the spark plug covers a slight tweak to rotate and loosen them a little first before attempting to lever them off. Use special tool to remove plug leads. When using a 17mm open ended spanner to pry off the spark plug covers, make sure you counter balance the leverage you're applying to ensure the cover comes off in line with the plug. Otherwise there's a tendency to push down on the cover which actually makes it very hard to remove.
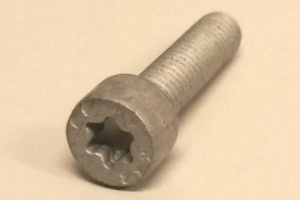
- Remove T30 Bolts that hold down the coil packs on the valve cover. One T30 Bolt per coil pack.
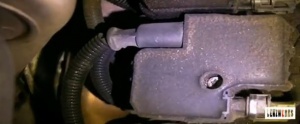
- Remove Coil Pack and keep in correct order as the wire lengths are all different. Do not mix them up. (Mark with masking tape.)
- Step 5: Remove Spark Plugs
- Use an air ratchet with a swivel extension and a 3/8" drive 5/8" spark plug socket.

- Step 6: Add anti seize to new plug threads
- Add some hi-temp anti-seize compound to the plug threads before installing. Just a little dab will do.
- Step 7: Start New Plugs by Hand
- Step 8: Remove the Spark Plug Wires from Coil Packs
- Just twist the Spark Plug Wires and pull straight out to remove from Coil Packs.
- Step 9: Identify New Plug Wires
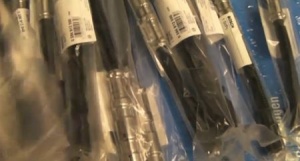
- Carefully observe new spark plug wire annotations. Sixteen Spark Plug Wires are labelled ‘A’, ‘B’.... ’O’, ‘P’.
These are the ‘G’ and ‘L’ Wires.
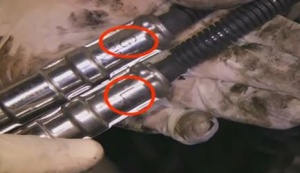
- Carefully observe new ignition coil pack annotations which are labelled on the top.
Eg this coil pack has ‘a’ and ‘b’ marked on the top.
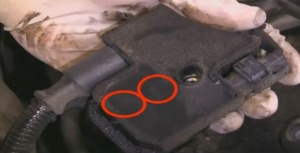
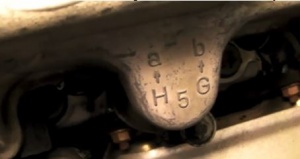
- Carefully observe valve cover annotations. The Valve Cover also has Coil Pack and Plug Wire Annotations for each cylinder.
W220 Valve cover annotations cylinder 5 H goes to a and G goes to b.
- Step 10: Install Plug Wires on Spark Plugs
- Put Plug Wires on before re-installing Coil Packs. Add dielectric grease or Silicon Spray to the plug end of the wires. This will make future plug changes easier and prevent any water problems.
- Use the Special Tool to put pressure on the plug wire to push it all the way on the plug. Listen for a click as it goes on properly.
- Step 11: Re-install Ignition Coil Packs
- Coil bolt is T-30, torque 71 in.lb. or 8Nm
Tips
- Most new spark plugs come pre-gapped and specify torque on the box.
- Always remove spark plugs on a stone cold engine or else risking stripping the threads.
- Ensure ignition wires "click" back onto new plugs or risk cylinder misfire.
- To save your back jack up the car front, or run up onto ramps the night before.
- Time saver tip - if valve and breather cover gaskets need to be refreshed, combine with the spark plug change out. Do one side each day over the weekend.
Remove/install ignition coils
- Unclip cover on front side of engine
- Remove engine cover with integrated air filter. The air filter is integrated in the engine cover. Remove the engine cover or the air filter housing by pulling it from the cylinder head covers vertically in the upward direction.
- Remove air filter housing.
- Remove screw (5/3)
- Detach spark plug connector (5/1) from the spark plugs. Pry off spark plug connector (5/1) using open-end wrench, double over the cylinder head cover of the spark plugs. Installation: Observe the identification of the connector (arrow) on the cylinder head cover and the ignition coil of cylinders 1 to 6 or 1 to 8 for the corresponding spark plug connector (5/1).
- Separate electrical connector of ignition coil of cylinder 1 to 6 (T1/1 to T1/6) or 1 to 8 (T1/1 to T1/8). Installation: Install new cable ties.
- Remove ignition coil of cylinder 1 to 6 (T1/1 to T1/6) or 1 to 8 (T1/1 to T1/8)
- Install in the reverse order
Torque specification:
- Bolt, ignition coil to cylinder head cover (Engine 112, 113): 8 Nm
