Windows: Difference between revisions
Jump to navigation
Jump to search
(added instructions for front door) |
|||
| Line 1: | Line 1: | ||
== | ==Remove/install crank window in front door== | ||
AR72.10-P-1900M, Remove/install front door crank window, 16.3.10 | |||
[[File: | MODEL 220 | ||
{| | |||
|[[File:W220_Remove_install_front_door_crank_window.png]] | |||
| | |||
* 1 - Crank window | |||
* 2 - Bolts | |||
* 3 - Power window guide rail | |||
* 4 - Power window | |||
* 5 - Assembly opening | |||
|} | |||
{| | |||
|[[File:W220_Remove_install_front_door_crank_window_2.jpg]] | |||
|[[File:W220_Remove_install_front_door_crank_window_3.jpg]] | |||
| | |||
* 1 - Crank window | |||
* 2 - Screw | |||
* 3 - Power window guide rail | |||
* 4 - Power window | |||
* M10/3 - Left front power window motor | |||
* M10/4 - Right front power window motor | |||
|} | |||
# Remove/install front door liner | |||
# Remove insulating mat in bottom area of inner door panel. Installation: Before installing insulating mat, check crank window (1) for easy motion. | |||
# Remove inner sealing rail | |||
# Remove trim strip with outer sealing rail | |||
# Unscrew bolt (2). Removal: Open crank window (1) until assembly openings (5) of inner door panel and mounting screws (2) are accessible. Installation: When installing screws (2): Adjust crank window (1) for front door. | |||
# Move crank window (1) out of mounts on power window (4). Thereby move crank window (1) upward until mounting lugs for crank window (1) slide out of power window mounts (4). | |||
# Remove crank window (1) out of door shaft. For this purpose tilt crank window (1) toward front and pull out of front window guide rail downward and turn until rear edge of crank window (1) can be removed from door shaft. Installation: Clean crank window (1) with MB auto glass cleaner. | |||
# Install in the reverse order | |||
==Adjusting crank window in front door== | |||
<!-- | |||
AR72.10-P-1950M, Adjusting crank window in front door, 16.9.97 | |||
MODEL 220 | |||
--> | |||
[[File:W220_Adjusting_crank_window_in_front_door.png]] | |||
{| | |||
|[[File:W220_Remove_install_front_door_crank_window_2.jpg]] | |||
| | |||
* 1 - Crank window | |||
* 2 - Bolt | |||
* 3 - Guide rails | |||
|} | |||
{| | |||
|[[File:W220_Remove_install_front_door_crank_window_3.jpg]] | |||
| | |||
* 2 - Bolt | |||
* 4 - Window lift mechanism | |||
* M10/3 - Left front power window motor | |||
* M10/4 - Right front power window motor | |||
|} | |||
Checking: | |||
# Check installed position of crank window on window frame. When the crank window is adjusted correctly, the edge of the glass runs parallel to the contour of the front wall pillar and roof panelling, illustration on left. The crank window should not be completely closed. | |||
# Check installed position on vertical window guide rail. Illustration on left, the crank window (1) should fit in the window guide rail completely. | |||
Removing, installing: | |||
# Remove door lining on front door | |||
# Pull off sound deadening mat | |||
Adjusting: | |||
# Loosen bolts (2), correct crank window (1) upwards or downwards, at the same time press backwards into the vertical window guide rail and tighten bolts (2). | |||
# Check crank window for ease of movement | |||
# Install in reverse order | |||
==Remove/install power window on front door== | |||
<!-- | |||
AR72.10-P-1800M, Remove/install power window on front door, 11.9.97 | |||
MODEL 220 | |||
--> | |||
{| | |||
|[[File:W220_Remove_install_power_window_on_front_door.png]] | |||
| | |||
* 1 - Power window | |||
* M10/3x1 - Left front power window motor connector | |||
* M10/4x1 - Right front power window motor connector | |||
|} | |||
# Remove/install front door liner | |||
# Remove insulating mat from inner door panel, glue on | |||
# Remove crank window | |||
# Remove left/right front power window motor connector (M10/3x1, M10/4x1) from power window motor | |||
# Drill pop rivets (arrows) out of inner door panel or cut out. To drill out use 4.8 mm dia. bit and do not damage inner door panel. Use punch to drive out remaining rivet residues. Remove rivet residues and chips from door, danger of rust. Installation: Rivet power window (1) to inner door panel flush with new pop rivets. | |||
# Unhook power window (1) out of inner door panel and remove downward through assembly opening. Installation: Hook window lift mechanism onto inner door panel with the four assembly hooks. | |||
# Install in the reverse order | |||
== Remove/install crank window in rear door == | == Remove/install crank window in rear door == | ||
| Line 138: | Line 229: | ||
# Connect battery to top left and right contacts | # Connect battery to top left and right contacts | ||
# Switch polarity to raise or lower as needed | # Switch polarity to raise or lower as needed | ||
== Glass delamination problem == | |||
Popular problem with IR glass is that it becomes delaminated. | |||
[[File:W220_IR_window_delamination.jpg|thumb|none|Window glass delamination.]] | |||
== Resources == | == Resources == | ||
* http://www.benzworld.org/forums/w220-s-class/2806666-rear-door-glass-quarter-glass-removal-2.html | * http://www.benzworld.org/forums/w220-s-class/2806666-rear-door-glass-quarter-glass-removal-2.html | ||
Revision as of 11:04, 7 August 2017
Remove/install crank window in front door
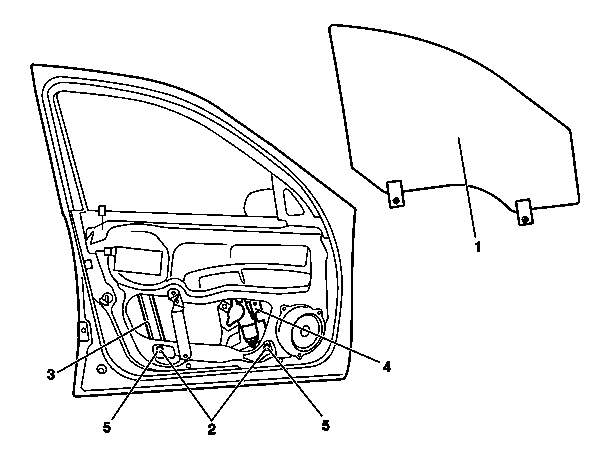
AR72.10-P-1900M, Remove/install front door crank window, 16.3.10 MODEL 220
|
|
|
|
|
- Remove/install front door liner
- Remove insulating mat in bottom area of inner door panel. Installation: Before installing insulating mat, check crank window (1) for easy motion.
- Remove inner sealing rail
- Remove trim strip with outer sealing rail
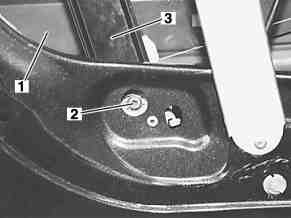
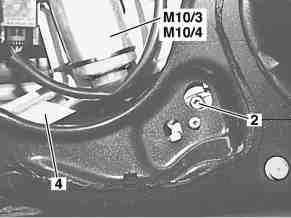
- Unscrew bolt (2). Removal: Open crank window (1) until assembly openings (5) of inner door panel and mounting screws (2) are accessible. Installation: When installing screws (2): Adjust crank window (1) for front door.
- Move crank window (1) out of mounts on power window (4). Thereby move crank window (1) upward until mounting lugs for crank window (1) slide out of power window mounts (4).
- Remove crank window (1) out of door shaft. For this purpose tilt crank window (1) toward front and pull out of front window guide rail downward and turn until rear edge of crank window (1) can be removed from door shaft. Installation: Clean crank window (1) with MB auto glass cleaner.
- Install in the reverse order
Adjusting crank window in front door

|
|

|
|
Checking:
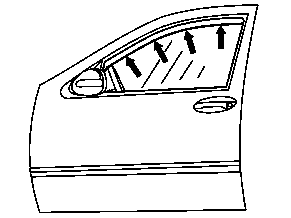
- Check installed position of crank window on window frame. When the crank window is adjusted correctly, the edge of the glass runs parallel to the contour of the front wall pillar and roof panelling, illustration on left. The crank window should not be completely closed.
- Check installed position on vertical window guide rail. Illustration on left, the crank window (1) should fit in the window guide rail completely.
Removing, installing:
- Remove door lining on front door
- Pull off sound deadening mat
Adjusting:
- Loosen bolts (2), correct crank window (1) upwards or downwards, at the same time press backwards into the vertical window guide rail and tighten bolts (2).
- Check crank window for ease of movement
- Install in reverse order
Remove/install power window on front door
|
|
- Remove/install front door liner
- Remove insulating mat from inner door panel, glue on
- Remove crank window
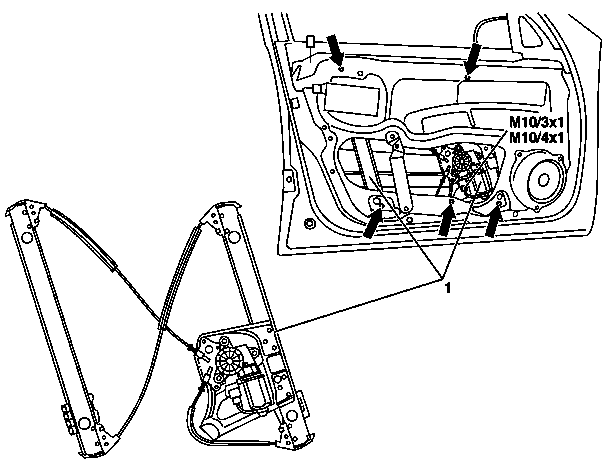
- Remove left/right front power window motor connector (M10/3x1, M10/4x1) from power window motor
- Drill pop rivets (arrows) out of inner door panel or cut out. To drill out use 4.8 mm dia. bit and do not damage inner door panel. Use punch to drive out remaining rivet residues. Remove rivet residues and chips from door, danger of rust. Installation: Rivet power window (1) to inner door panel flush with new pop rivets.
- Unhook power window (1) out of inner door panel and remove downward through assembly opening. Installation: Hook window lift mechanism onto inner door panel with the four assembly hooks.
- Install in the reverse order
Remove/install crank window in rear door
|
|
- Remove door liner from rear door
- Remove insulating mat from inner door panel. Installation: Before installing insulating mat, check crank window for easy motion. Replace damaged insulating mat.
- Remove inner sealing rail
- Remove trim strip with outer sealing rail
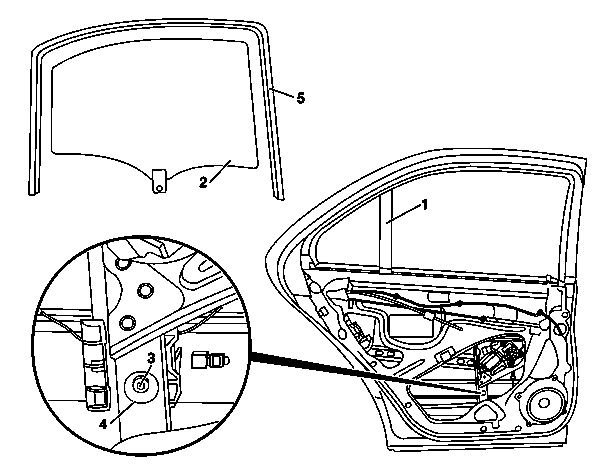
- Unscrew bolt (3). Removal: Open crank window (2) until the mounting screw (3) of the window guide rail in the assembly opening (4) is accessible. Installation: Install screw (3) so that the crank window (2) can be moved up and down properly.
- Slide crank window (2) downward and position in door. First move crank window (2) out of window guide rail.
- Remove window rail guide (5) together with window stay (1). Remove window guide rail (5) only in area of window stay. Installation: Coat window guide rail (5) with soap solution.
- Turn crank window (2) until it can be removed out of window shaft upward.
- Install in the reverse order
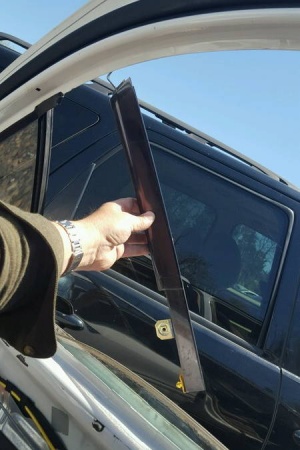
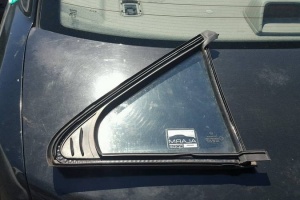
Remove/install fixed window in rear door
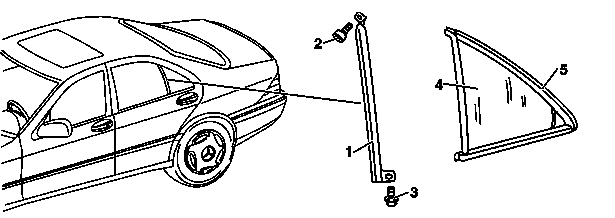
|
|
- Remove door liner from rear door
- Remove insulating mat from inner door panel. Installation: Before installing insulating mat, check crank window for easy motion. Replace damaged insulating mat.
- Remove inner sealing rail
- Remove trim strip with outer sealing rail
- Slide crank window downward and position in door.
- Remove window guide rail from window stay (1). Installation: Coat window guide rail with soap solution.
- Unscrew screws (2 and 3)
- Remove window stay (1). Avoid damaging paint.
- Pull fixed window (4) out toward front together with rubber frame (5). Before installing coat rubber frame (5) with soap solution.
- Install in the reverse order.
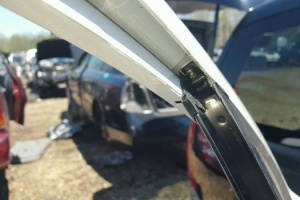 |
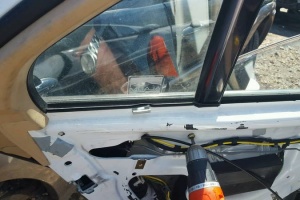 |
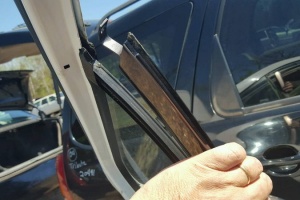 |
 |
 |
 |
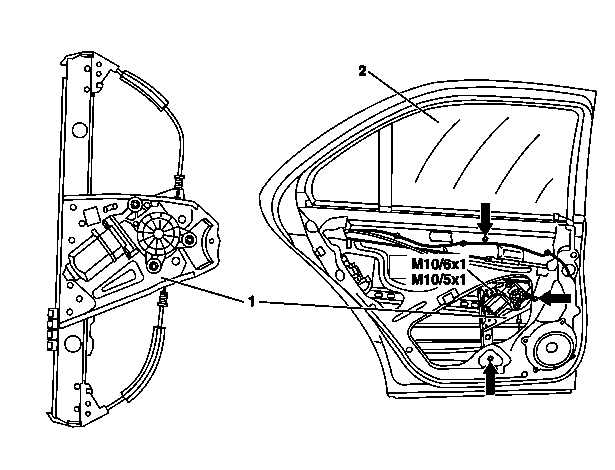
Remove/install power window on rear door
|
|
|
|
- Remove/install door liner on rear door
- Remove insulating mat from inner door panel
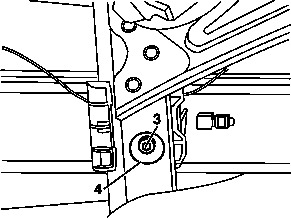
- Unscrew mounting screw (3). Removal: Open crank window (2) until the mounting screw (3) is accessible in the assembly opening (4) of the power window guide rail. Installation: Install screw (3) so that the crank window (2) can be moved up and down properly.
- Move crank window (2) completely upward. Secure against falling down with assembly wedges.
- Drill pop rivet (arrows) out of inner door panel or cut out. To drill out use 4.8 mm dia. bit and do not damage inner door panel. Use punch to drive out remaining rivet residues. Remove rivet residues and chips from door, danger of rust. Installation: Rivet power window (1) to inner door panel flush with new pop rivets.
- Remove power window motor connector (M10/6x1, M10/5x1) from power window motor.
- Unhook power window (1) from inner door panel and remove through assembly opening. Installation: Hook power window in at inner door panel with assembly hook.
- Install in the reverse order
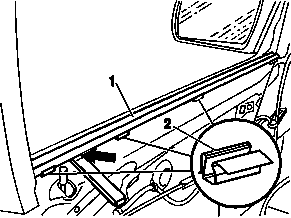
Remove/install inner sealing rail
Shown on model 202:
|
|
- Open crank window
- Remove door lining
- Press sealing rail (1) off of inner door panel with assembly wedge. Insert assembly wedge directly next to clips (2).
- Check clips (2), replace if necessary. Clips (2) are attached to inner door panel.
- Install in the reverse order.
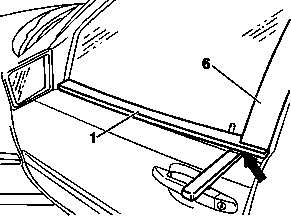
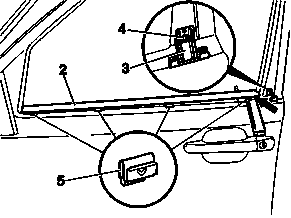
Remove/install outer sealing rail
Illustrated on driver's door on model 202
|
|
|
- Open window
- Press trim strip (1) off of outer window ledge. Avoid damaging paint.
- Press sealing rail (2) off of window shaft. Insert installation wedge directly next to clip.
- Check retaining clips (3 and 5) and replace, if necessary. Clip (3) is riveted on. Clips (5) are installed on window shaft.
- Install in the reverse order
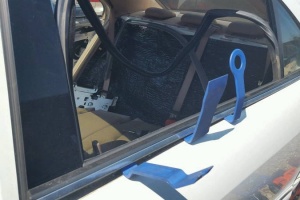
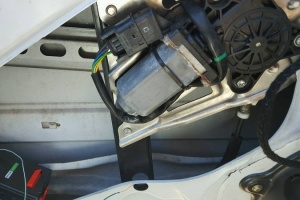
Powering window motor from handheld battery
 |
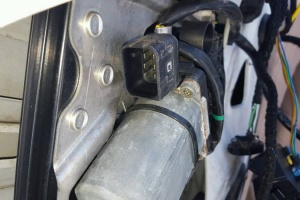 |
- Locate power window motor
- Disconnect plug
- Connect battery to top left and right contacts
- Switch polarity to raise or lower as needed
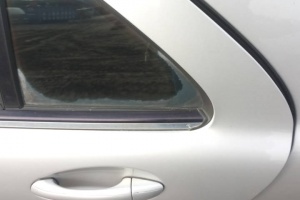
Glass delamination problem
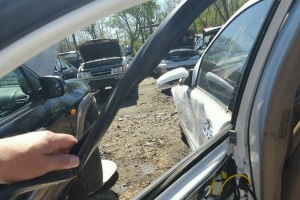
Popular problem with IR glass is that it becomes delaminated.
