Coolant Circulation Pump
Back to: WIS 83.40 Automatic Climate Control (ACC) or Heating Ventilation and Air Conditioning (HVAC)
Description - Coolant Circulation Pump
The Coolant Circulation Pump (A31/m1) is also known as - "Auxiliary Water Pump".
Edit required.
Issues - Coolant Circulation Pump
A common issue is a failed circulation pump which is part of the Duo Valve Assembly.
- It may be hard to notice that your coolant circulation pump (A31/m1) is not working properly.
- If the pump is dead, then in cold weather the car could not be heated more than 30C even if ACC was set to "HI".
- Another indication is the lack of heating when the residual heat option is activated with the engine off although heating is available with the engine running. To see how to activate the residual heat option go to the Section "Residual Heating/Cooling" under Heading "Function - Automatic Climate Control (ACC)" in
WIS 83.40 Automatic Climate Control (ACC) or Heating Ventilation and Air Conditioning (HVAC)
Several failure mechanisms are possible for a failed circulation pump including;
- Blown or damaged electrical circuit supplying power to the Circulation Pump.
- Seized Circulation Pump.
- Worn brushes in the Circulation Pump Motor.
The next figure shows an example of a Coolant Circulation Pump with very badly worn brushes.
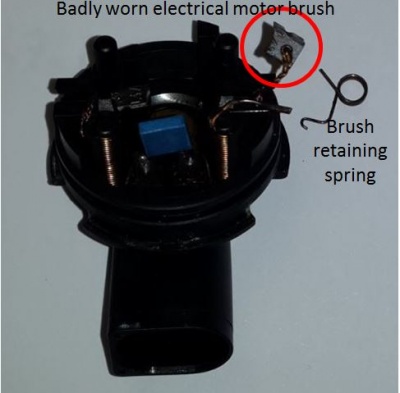
A new pump is expensive (about US$200) but a DIY fix is possible if the failure is due to worn brushes. See below.
Parts - Coolant Circulation Pump
- 0 392 020 066 or 0392020066
- A2208350064
Diagnosis - Coolant Circulation Pump
| Error Code | Description |
|---|---|
| B1416 | The component or the signal line to the component A31m1 (Coolant circulation pump) has Short circuit to positive or Overload. |
- Note: error code B1416 is thrown if coolant circulation pump draws >5A current.
Testing - Coolant Circulation Pump
- I removed the pump and connected it to 12V DC. The pump did not spin at all (it was completely stuck and I could not rotate it even by hand) and the multimeter showed that it consumed 5.5A current.
Conclusion:
While you can buy a brand new pump for 140 EUR you might as well try to repair it. The reference shows how you can do it.
DIY Procedures - Coolant Circulation Pump
DIY Renew Brushes in Duovalve Circulation Pump
Mark the wiper blade positions (parked) on masking tape on the windscreen.
Remove the wiper blades via three covered nuts.
Remove the plastic cover panel below windscreen.
Remove Wiper Assembly.
Slide the the Duo Valve Assembly from its mounting plate. The next Figure shows what the sliding holes look like after removal.
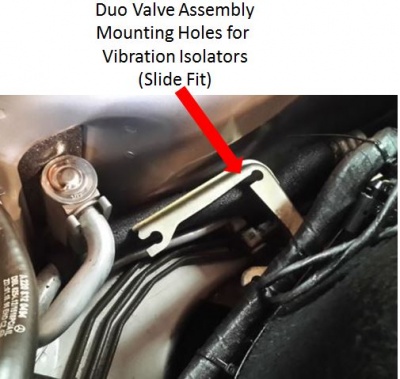
Drain the engine coolant.
Use masking tape to mark the location of the three coolant hoses on the Duo Valve Assembly (eg Top, Front and Rear) just for ease of reassembly.
Remove the three coolant hoses from the Duo Valve Assembly.
Remove the Duo Valve Assembly from the car.
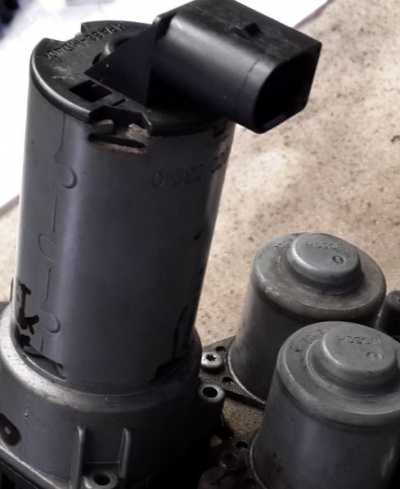
Prise open the three metal tabs to release the Motor End Plate.
Remove the End Plate from the Motor.
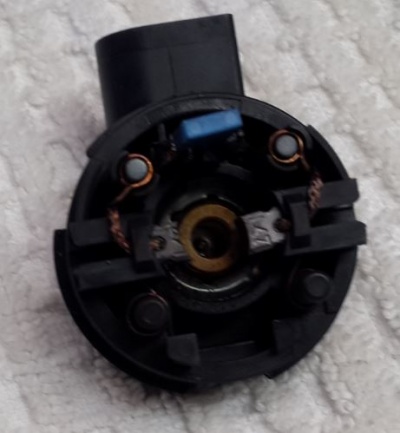
Check the dimensions of the worn OEM brushes.
- OEM brush width 5mm
- OEM brush thickness 5mm
- OEM worn brush length about 6mm.
- OEM original brush length about 11mm.
Purchase new brushes to suit these dimensions.
The author could not find exact replacement brushes but the Carbon Brushes for a MAKITA electrical tool with part number CB325 30-00-325-H can be modified to suit the Duovalve Circulation Pump. They are available for about $10 for a set of two.
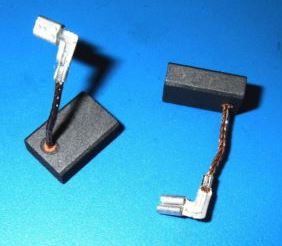
The MAKITA brushes have:
- a side entry lead
- an 18mm long lead
- brush width 5mm
- brush thickness 11mm
- brush length 15.8mm.
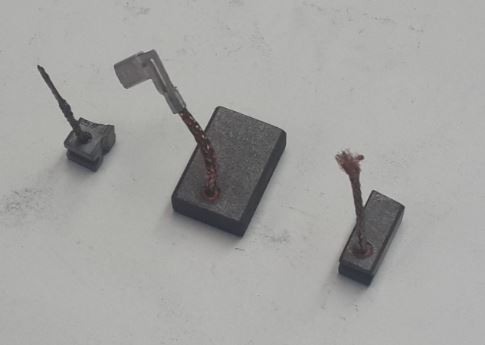
Sand down the MAKITA brush thickness (sand both sides evenly) to produce a brush with thickness 5mm.
Sand down the MAKITA brush length to produce a brush with length 10.5mm with a square end. Running the pump will soon remove the square end to match the commutator 13mm diameter.
Using a triangular file, file a small groove about 1mm deep across the MAKITA Brush (at 90 degrees to the lead entry) to locate the Brush Retaining Spring.
Carefully take off the connector on the MAKITA leads.
The next figure shows from Left to right;
Worn OEM Brush: MAKITA Brush as supplied: MAKITA Brush modified to suit Circulation Pump
Solder each MAKITA brush lead to the electrical connections in the Duovalve Circulation Pump.
Make two loops of sewing cotton thread to hold the brushes in the fully withdrawn position.
Hook the cotton loop over the curved end of the brush retaining spring and wrap the other end around the End Plate body.
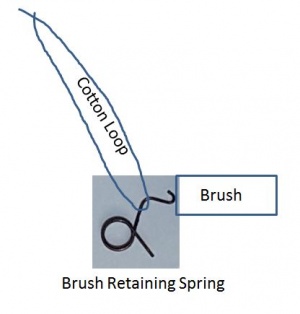
Repeat for the other brush.
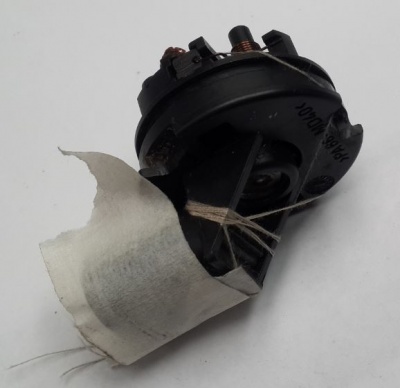
Start to reassemble the End Plate on to the Motor.
Once the End Plate is fully inserted cut one of the cotton loops and pull the thread out while wriggling and twisting the End Plate.
Repeat for the other cotton loop thus freeing both brushes to contact the commutator.
Do a bench test of the Circulation Pump Motor. (Note: The Pump End Plate is marked with a '+' sign. It is shown on the right (red lead) in the next Figure.) It should draw about 0.4A at 12V DC ie about 5W. (Note: Do this test BEFORE crimping the motor tabs just in case you need to open up the pump again.)
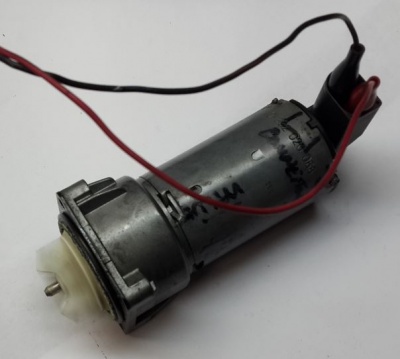
Using a centre punch crimp the tabs in place to hold the End Plate on the Motor.
Reassemble the Circulation Pump to the Duo Valve Assembly and mount in the car. (A small amount of silicon grease on the anti-vibration mounts allows them to slide onto the mounting plate easily.)
Repair a Seized Coolant Circulation Pump
Acknowledgement of contribution by BenzWorld Member, Pokseva.