Pneumatic System Equipment (PSE)
If you're reading this, you must be having problems with your closing assist system. Probably it doesn't work at all. You may have experienced the slow door by door failure that many seem to report. One door stops working. Then over the course of a week or so, all the doors and the trunk stop working one by one until eventually nothing works. Before you let a less knowledgeable person convince you that you need a new pump, allow me to see if I can convince you otherwise.
The PSE pump performs several functions including locking/unlocking of doors, inflation of lumbar support bladders, extension and retraction of the trunk handle. This pump is located in left side in the trunk.
Understanding pump function
Understanding how the pump functions is central to identifying any problems with your system. The heart of the pump is a sizeable electric motor that directly drives the air pump. What is neat about the design is that the pump can both pull a vacuum or develop pressure on any of the door or trunk lines independently and at the same time. That way only the door or doors that need it get pulled closed. This is accomplished by electric solenoids that switch each line between pressure and vacuum. The solenoids are controlled by the pump electronics which receive signals from micro switches in the door latches and trunk latch telling the pump that a door has partially closed and needs to be pulled shut.
The pump does the closing of the doors and trunk with pressure. It pressurizes the lines causing the extension of pistons in actuators, which in turn move levers in the various latches, which pull the doors or trunk closed. The pump runs until one of two things happens:
- It reaches a pre-set shut-off pressure (at which point the pump "thinks" it has properly done its job of closing the door or trunk), or
- It never reaches its pre-set shut-off pressure and then runs for a set amount of time and turns off (that is, it "times out").
After pressurizing the line and doing the auto-closing, the pump then pulls a vacuum on the line, presumably to ensure retraction of the actuator piston. The pistons are spring loaded, but I suppose occasionally, they may not retract fully when the pump releases pressure.
Case 2 is where a lot of problems arise. If the pump times out twice on the same door or trunk line, the pump electronics permanently turn off function for that line. That's just the way the system is programmed, and it's usually why just one door stops working. The pump specifically turned off that line because it timed out twice. Back to why the pump timed out - because it couldn't reach the pre-set shut-off pressure. Why couldn't it reach its pre-set shut-off pressure? Two reasons:
- Because an air leak has prevented build up of enough pressure or
- Because the shut-off pressure is set too high.
So the course of action is clear. If you don't have an obvious air leak, you'll want to address the shut-off pressure. The pump has a pressure sensing shut-off switch which is adjustable. The following troubleshooting section will show you how to reduce the shut-off pressure on your pump thereby preventing the pump from timing out and shutting down on its own. This very simple adjustment completely restored reliable function to my system. Hopefully, it can for yours, too, but there are many other failure possibilities, which I'll discuss in the next section.
Bringing Your Pump Back to Life
There are two reasons why a door may fail to close. Either your pump is not working, or your pump is not getting a signal telling it that a door has partially closed, i.e. the micro-switch is bad or out of adjustment, or the wiring from the switch to the pump is bad. Most likely, it's the pump that has shut down. First thing to do is to try pulling fuse F13 in the fuse and relay box in engine compartment left. This fuse is labeled for the power locking. Pull it out, wait several seconds and replace it. Alternatively you can unplug the power line from the pump if it is freely accessible in trunk.
Try a door or the trunk to see if the pump turns on. Completely cutting power to the pump resets the electronics so that it will again operate all lines until the two-time-out thing starts happening again. If you do nothing else, your pump may work for a while, but it will again eventually shut down because of the same reasons that caused it to time out in the first place.
If your pump comes back to life, congratulations. You very likely don't need a new pump. If it doesn't, I probably can't help you. Perhaps the electric motor has shorted out. It works hard and gets hot very fast inside the pump housing. Or maybe the brushes have simply worn out. It may be possible to replace the brushes, but I don’t know. If you're electronically inclined, maybe you can tackle the problem. There is also a printed circuit board inside the pump. Plenty of components can fail there, but I cannot address this.
If you have a door that works intermittently (sometimes a door works and sometimes it doesn't, seemingly at random) your problem may be a micro switch issue. Sometimes the micro switch gets tripped and sometimes it doesn't when you close the door. You can check if micro switch value is read correctly with DAS by connecting to door control module and observing actuations. Intermittent function is never a pump issue. Once the pump shuts down a line, it's off for good (until you completely electrically disconnect it by pulling the connector).
Once you have the pump on your trunk floor, you can observe the two-time-out-then-shut-down behavior of the pump. Disconnect the trunk line (HECK), and leave the nozzle open. Now, simulate the closing of the trunk by operating the catch in the lower trunk latch with your thumb. The trunk lights will turn off, the trunk handle will retract, and the line will hiss loudly with air pressure from the pump. The pump will run for around 10 seconds and then stop. All seems well. Do it again. All seems well. Do it a third time, and nothing will happen with the pump any longer. Unplug the electrical connector and plug it back in. Simulate trunk closing again. All back to normal.
Now, check your pressure shut-off mechanism. Put your thumb firmly over the HECK nozzle preventing any leaking, and then simulate trunk closing. The pump will start up, and it should shut off almost immediately. That is because it pressurized the trunk line, and with your thumb over the nozzle, it reached the shut-off pressure very quickly and turned off. You can repeat this indefinitely. As long as the pump reaches its shut-off pressure and doesn't time out, it operates just fine. If your pump doesn't shut off when you do this, you've got a more serious problem with the pressure shut-off switch.
OK, My pump works. Now what?
Leak checking is next. As mentioned earlier, air leaks will cause the pump to time out because a leak may prevent reaching the shut-off pressure. There are a couple of ways to find leaks. You can use a pressure device with a gauge (Mity-Vac or similar) to pressurize the line in question and watch for leak down. Alternatively, you can simply operate the door or trunk once you've reactivated the pump and listen carefully for the telltale hiss of a leak. The pump really moves a lot of air. I believe that any leak large enough to prevent the pump from reaching the shut-off pressure will be audible. Just listen.
There are myriad opportunities for leaks. Lines can separate inexplicably from connectors. Lines can get pinched and crack. Lines can get chaffed and worn through. The actuators are also a source of leaks. These have rubber o-ring seals that can get hard and crack with age. There may also be leaks internally inside the pump. These may be fixable or maybe not. More on this later.
It's time to evaluate your pump's pre-set shut-off pressure. You can use any door or the trunk. Partially close the door/trunk, and carefully watch the closing action. You'll hear an audible click when the latch catches, but then the door/trunk will be pulled shut for a period of time after the click of the latch. Finally, the pump will turn off and the door/trunk will relax to its normal fully closed position. First, time how long it takes for the door to audibly latch. This should be about 1-1.5 seconds. If it takes longer to latch the door, your pump is not providing enough pressure. Why? Leaks, or maybe a worn out pump head, or something else (??). If you can't find a leak, then I probably can't help you further.
Now, time how long the pump runs after the door or trunk has audibly latched (that is, how long it keeps the door "sucked" closed after it latches). I found my pump ran for almost 10 seconds after the latch had clicked, needing extra time to build up enough pressure to trip the automatic shut-off. This extra pumping time is unnecessary. If your pump takes more than 7-8 seconds to shut off, then you're a candidate for adjusting the shut-off pressure.
The pump only needs to run as long as it takes to latch the door. The risk of your pump running for too long is that every once in a while, before it reaches its shut-off pressure, it instead reaches the time-out time and charges a time-out to that line. After one more of these, that line is dead. The pressure shut-off is a balancing act. You want to set the shut-off pressure high enough so that enough pressure is developed to latch the door or trunk, but you don't want it set too high so that the pump takes too long to reach the set pressure and times out.
Adjusting the shut-off pressure
Pull out the pump and disconnect all the lines. Label them before disconnection if they aren't already. Unscrew 3 screws on the top of the pump, and pry off the cover.
Admire the dual manifold design with solenoid switching between pressure and vacuum for each door and trunk line. Kinda cool.
OK, here's the business end. Notice the dual contact switch that is operated by the white piston from the pressure sensing diaphragm. That white piston has a screw in the end of it which can be adjusted to adjust the shut-off pressure. The screw is the actual electrical contact that turns the pump off. If you screw it out a bit, then the piston will have to move less to open the switch; therefore, the pump will shut off at a lower threshold pressure.
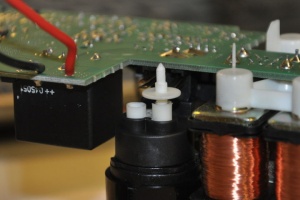
Just turn the screw to adjust it. I just used needle nosed pliers.
Now, your pump will shut down automatically in a lot less time after closing the doors and trunk. You can play with the adjustment a bit so that the pump run time is to your liking. I'd say 3-4 seconds after the latch closes is all that is needed, and you could probably set it for less than that. My closing assist system has run with 100% reliability for almost a year now, after performing the shut-off pressure adjustment. The obvious fringe benefit of this adjustment is that the pump runs for a much shorter time each time it closes a door, so it should also extend the life of the pump's motor.
A case of a bad pressure shut-off diaphragm
One person reported that his pump had quit running. When he dug into his pump, he found that the problem was not that the shut-off pressure was set too high, but that the white piston of the shut-off switch mechanism wasn't moving at all. So his pump was timing out every time it operated. He went farther than I ever had and disassembled the diaphragm eventually finding the root cause of the sticking piston. It turned out that the rubber diaphragm that pushes the white piston had developed a tear. The tear was on one side of the diaphragm such that as the pump pressurized, the diaphragm would push one side of the piston only causing the piston to cock sideways in the black housing. Since the pump develops quite a bit of pressure, the piston would get wedged in place tightly once it got started crookedly and become permanently stuck. He was able to take apart the diaphragm assembly and use the tip of a latex glove finger to re-seal the diaphragm and make it air tight again. Very ingenious, indeed. He said everything was back to normal, and he had also adjusted his shut-off pressure appropriately in the process.
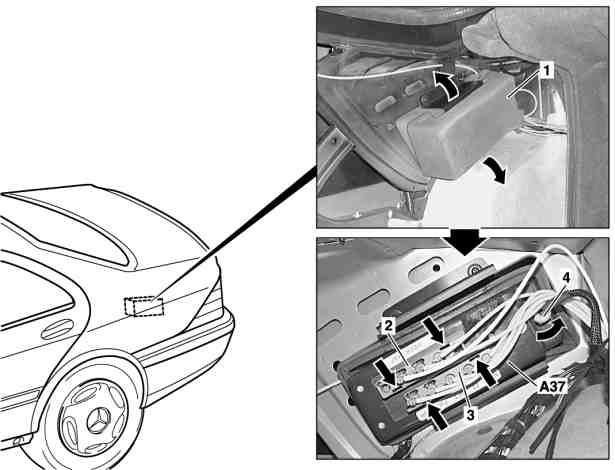
Removing and installing PSE control module
|
|
- Remove paneling in trunk (except right side paneling and rear wall paneling)
- Press apart plastic lugs (arrows) and remove foam cap (1)
- Unclip pneumatic strips (2, 3) on pneumatic control module with PSE control module (combined) (A37). Clips are located in the oblong holes marked with arrows. Unclip with flat tool, e.g. screwdriver.
- Loosen electrical connector (4) on PSE control module (combined) (A37) and remove lead. Turn in direction of arrow.
- Remove PSE control module (combined) (A37).
- Install in opposite order. If the PSE is replaced version coding must be accomplished via STAR DIAGNOSIS.
- Check central locking, lumbar support or multicontour backrest, power locking, head restraint extension and retraction for proper function.
Error codes
Error codes generated by PSE (pneumatic system equipment) control unit.
| Error Code | Description |
|---|---|
| B1436-012 | The safety time of the central locking has been exceeded for the following pneumatic branch: Driver's door |
| B1436-014 | The safety time of the central locking has been exceeded for the following pneumatic branch: Front passenger door or rear doors |
| B1436-015 | The safety time of the central locking has been exceeded for the following pneumatic branch: Passenger door |
| B1436-016 | The safety time of the central locking has been exceeded for the following pneumatic branch: Left rear door |
| B1436-017 | The safety time of the central locking has been exceeded for the following pneumatic branch: Right rear door |
| B1437 | The safety time has been exceeded for the following pneumatic branch: Lower or raise rear head restraints. |
| B1438-011 | The air demand of the multicontour backrest is too high. |
| B1438-012 | The safety time has been exceeded for the following pneumatic branch: Multicontour backrest |
| B1438-013 | Continuous cutoff of multicontour backrest: The safety time was exceeded 5 times. |
| B1440-010 | The safety time has been exceeded for the following pneumatic branch: Trunk lid remote release |
| B1440-011 | The operating time of the trunk lid external pushbutton was exceeded. |
| B1440-012 | The operating time of the trunk lid internal pushbutton was exceeded. |
| B1442-012 | The safety time of the power closing has been exceeded for the following pneumatic branch: Driver's door |
| B1442-015 | The safety time of the power closing has been exceeded for the following pneumatic branch: Passenger door |
| B1442-016 | The safety time of the power closing has been exceeded for the following pneumatic branch: Left rear door |
| B1442-017 | The safety time of the power closing has been exceeded for the following pneumatic branch: Right rear door |
| B1442-018 | The safety time of the power closing has been exceeded for the following pneumatic branch: Trunk lid |
| B1446-002 | Component Y65/3 (CL remote trunk lid release valve): Short circuit to ground or open circuit |
| B1447-002 | Fault in hydraulic unit of trunk lid: Function 'Close trunk lid.' has short circuit to ground or open circuit. |
| B1447-032 | Fault in hydraulic unit of trunk lid: Function 'Open trunk lid.' has short circuit to ground or open circuit. |
| B1447-064 | Fault in hydraulic unit of trunk lid: Timeout of on-period |
| B1448-001 | Component B24/16 (Trunk lid opening angle detection sensor) is not connected. |
| B1448-002 | The sensor cable or sensor supply of component B24/16 (Trunk lid opening angle detection sensor) has short circuit to ground or to battery voltage. |
| B1448-004 | The normalizing values of component B24/16 (Trunk lid opening angle detection sensor) are implausible or the sensor value is not within the normalizing range. |
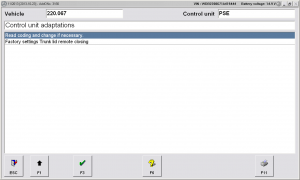
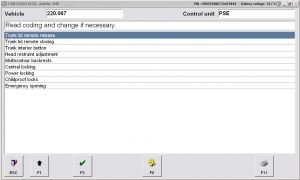
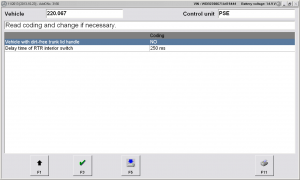
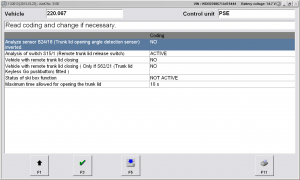
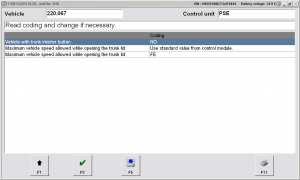
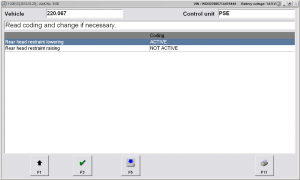
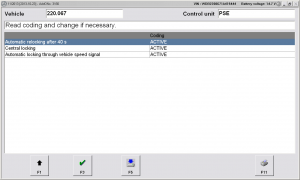
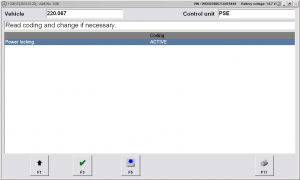
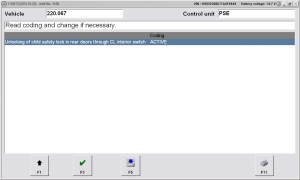
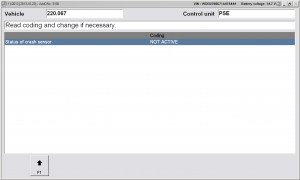
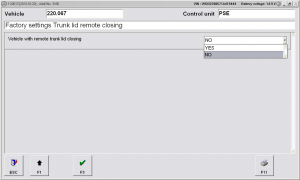
DAS adaptations
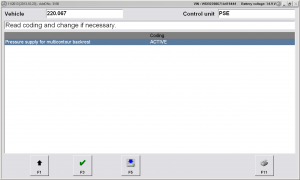
Adaptations available in DAS for PSE control unit (A2208001248).
 |
 |
 |
 |
 |
 |
 |
 |
 |
 |
 |
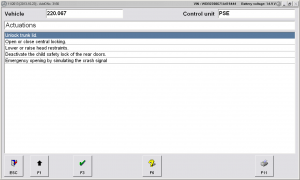
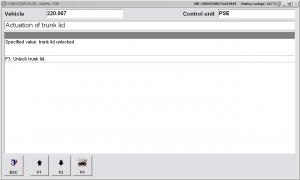
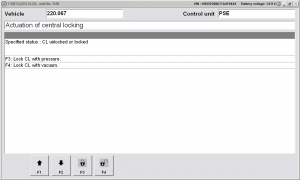
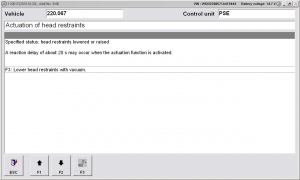
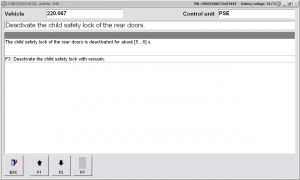
DAS actuations
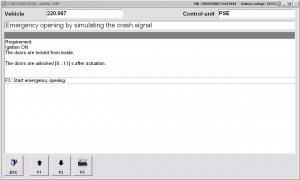
Actuations available in DAS for PSE control unit (A2208001248).
 |
 |
 |
 |
 |
 |
DAS actual values
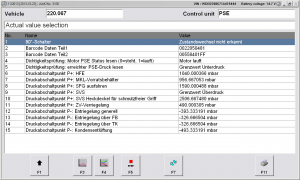
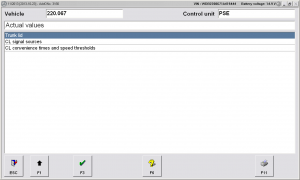
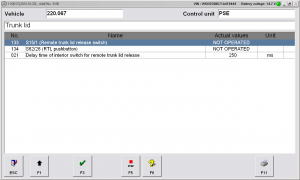
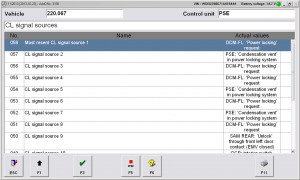
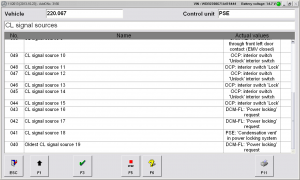
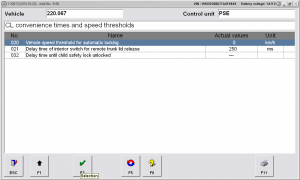
Actual values available in DAS for PSE control unit (A2208001248).
 |
 |
 |
 |
 |
DAS development data
Incomplete list of development data available in DAS for PSE control unit (A2208001248).
