From W220 S-Class Encyclopedia
Jump to navigation
Jump to search
Removing and installing PSE control module
|
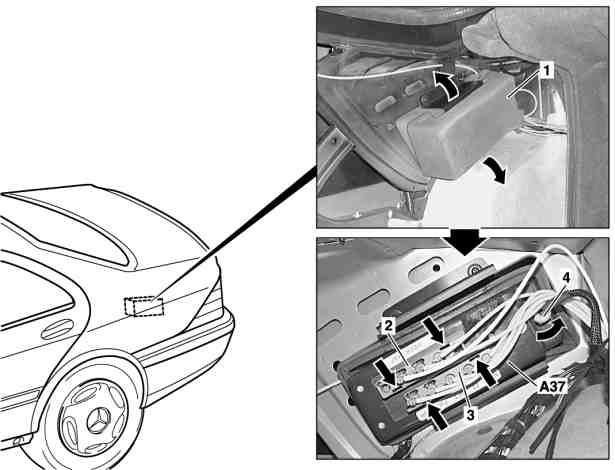
- 1 - Foam block
- 2 - Pneumatic strip
- 3 - Pneumatic strip
- 4 - Electrical connector
- A37 - PSE control module (combined)
|
- Remove paneling in trunk (except right side paneling and rear wall paneling)
- Press apart plastic lugs (arrows) and remove foam cap (1)
- Unclip pneumatic strips (2, 3) on pneumatic control module with PSE control module (combined) (A37). Clips are located in the oblong holes marked with arrows. Unclip with flat tool, e.g. screwdriver.
- Loosen electrical connector (4) on PSE control module (combined) (A37) and remove lead. Turn in direction of arrow.
- Remove PSE control module (combined) (A37).
- Install in opposite order. If the PSE is replaced version coding must be accomplished via STAR DIAGNOSIS.
- Check central locking, lumbar support or multicontour backrest, power locking, head restraint extension and retraction for proper function.
