From W220 S-Class Encyclopedia
Jump to navigation
Jump to search
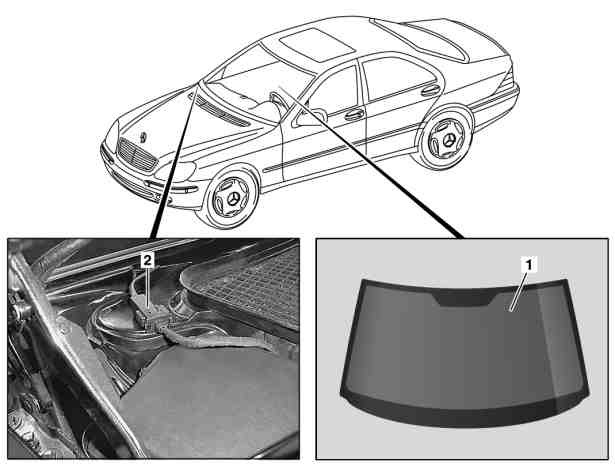
Installing Windshield
|
- 1 - Windshield
- 2 - Heated window connector
|
Remove
- Remove rain sensor (B38)
- Unclip automatic light switch daylight sensor (B32/1)
- Remove wiper arms. Always remove ignition key when working on windshield wiper mechanism.
- Remove water deflector over wiper system
- Disconnect electrical connector for heated window (2)
- Remove both panelings from outside of A-pillar
- Remove ornamental frame on windshield.
- Cut out windshield (1) with Roll Out 2004 window removal tool
- Remove windshield (1) from body with Cup suction tools
Install
- Prepare 1-component adhesive cartridge 000589866300
- Prepare body flange for installation of window
- Replace rubber spacers. Do not remove protective foil.
- Prepare windshield (1) for glazing.
- Align windshield (1) in the body opening. Observe gap - distance between top edge of window and front edge of roof. Dimension "A" mm 12.
- Remove protective foil from rubber spacers.
- Smooth sealing channel with hand roller.
- Apply adhesive material. Install windshield (1) within 10 minutes before adhesive force of adhesive material starts to decrease. Height of glue bead approx. 13 mm.
- Install windshield (1). Open a side window in the vehicle to prevent the windshield (1) from being pressed outward by air pressure when the door is closed.
- The waiting time (time before vehicle can be driven) is approx. 1 h calculated from the time the windshield (1) is installed.
- Install ornamental frame on wind deflector.
- Install paneling on outside of A-pillar.
- Install water repellent over wiper system.
- Install wiper arms.
- Disconnect electric connector (2) for heated window.
- Install rain sensor.
- Clip in automatic light switch daylight sensor.
- Clean windshield (1).
- Code adaptation of rain sensor and light sensor amplification factor and select type of windshield. Engine hood and driver door must be closed. Connect STAR DIAGNOSIS and read out fault memory.
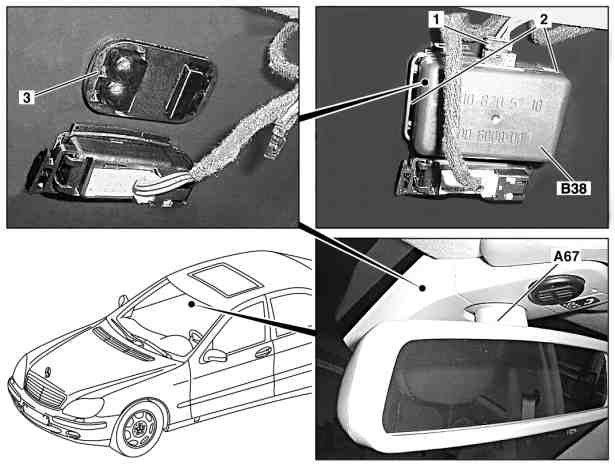
Rain Sensor
|
- 1 - Electrical connector
- 2 - Retaining clips
- 3 - Lens
- A67 - Inside rearview mirror unit
- B38 - Rain sensor
|
Remove/Install
- Disconnect ground cable of battery
- Remove inside rearview mirror unit (A67) with cover
- Detach electrical connector (1) at rain sensor (B38)
- Release retaining clamps (2) on rain sensor (B38) to left and right
- Remove rain sensor (B38). The lens (3) of the rain sensor (B38) is bonded to the windshield and must not be removed, otherwise the lens (3) will be damaged.
- Install in the reverse order.
- Perform function check
- Read coding of the windshield adaptation for rain sensor and of adaptation of the light sensor booster factor using STAR DIAGNOSIS and replace if necessary, select windshield variant.
- Connect STAR DIAGNOSIS, read out fault memory

