Interior Door Handle Illumination
Description - Interior Door Handle Illumination
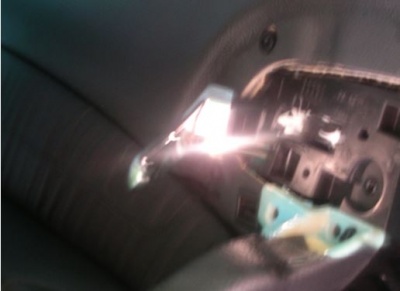
The next two Figure shows what the W220 interior door handle illumination looks like when working. This vehicle obviously has an orange LED illuminator. The light that you can see is emanating from a fibre optic bundle which is connected to a small module mounted behind the door handle on the inside of the door Panel.

Issues - Interior Door Handle Illumination
The OEM LEDs commonly fail and either do not produce any light or annoyingly flicker.
It is also common that a new owner doesn't even realise that they have Interior Door Handle Illumination because all four LEDs have failed.
The OEM circuit over-stresses the LEDs which causes them to fail.
It was a relatively easy job to diagnose/test the faulty Interior Door Handle Illumination Module and to replace either/both the resistor and the LED with new readily available general purpose electronic components.
The circuit shown here was redesigned slightly by an electronics engineer to ensure that the LED shouldn’t need ever replacing again.
DIY Repair/Replacement - Interior Door Handle Illumination
The mounting design changed slightly between early models of the W220. The method shown here is for a 2003 update W220 S500L.
Remove and Dismantle Interior Door Handle Illumination Module
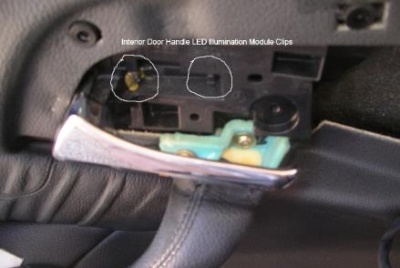
- Remove the Interior Door Panel on both front and rear doors. The Interior Door Handle Illumination Module is clipped to the Panel behind the Handle. You can just see the clips in the next Figure.
- It is not necessary to remove the window switch panel. Just leave the switch panel connected and in place.
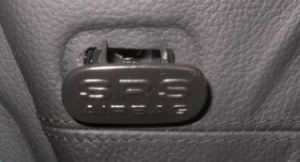
- Use a small wedge to remove the plate at the latch side of the door, which in the 2003 Update W220 S500L is marked ‘SRS AIRBAG’. The plate just snaps in at the top and is retained with a small plastic leader and just hangs there when removed.
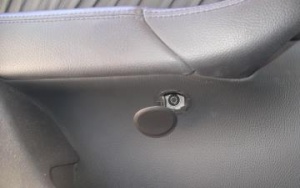
- Remove the large Torx screw behind a cover where the handle and arm rest meet
- Remove the rest of the Panel using plastic levers and wedges. (Note good descriptions of the process are available if required. See youtube video below and open a new tab here at Post #7 [1].
- Remove Seat Control Module. Note: the smaller connectors on the Seat Control Module can be really difficult to remove. The two large connectors have retaining clips, which must be pressed in while applying withdrawal pressure. The smaller ones do not have retaining clips and just come out with a lot of tugging. The good news is that they do not have to be withdrawn. The whole Seat Control Module can be unclipped from the Door Panel and left hanging in place. Best secure it with a plastic tie though. See next Figure.
- Remove Interior Door Handle Illumination Module. Control click to open a new tab to see Post 6 here [2] which has an excellent description of the Interior Door Handle Illumination Module and how to remove and open it up.
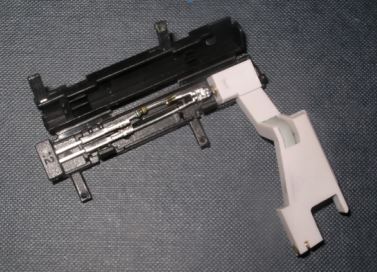
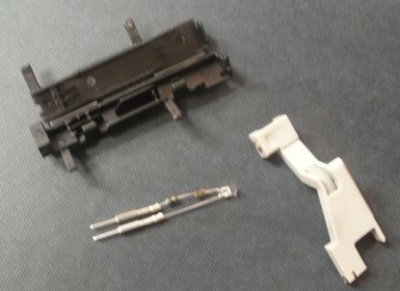
- Dismantle Interior Door Handle Illumination Module. Note: There are three plastic clips holding the Module together. Once opened the Module looks like the next Figure.
- Take the Module apart to reveal three components.
- The black plastic housing.
- The white plastic fibre optic bundle.
- The electrical circuit with connector pins, resistor, joining crimp and LED.
Test Interior Door Handle Illumination Module
In the car, the supply voltage is nominally +12V DC. Be aware of the polarity of the connector. The resistor is connected to 0V/ground/earth via connector plug and wire Yellow/Brown. The long lead on the OEM/M-B LED is connected to +12V via connector plug and wire Grey/Brown. See next Figure.
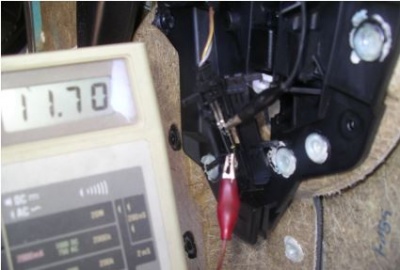
- Test the original LED Module by applying voltage to the connector pins shown at the left side of this Figure.
- The Module will work with any voltage from about 4V up to 15V. A 9V battery is a good test supply. Polarity is important so take care to follow the diagrams below.
- The Module should illuminate under test. If it doesn’t the LED is either ‘blown’ or the resistor is ‘blown’. The easiest method of testing the resistor is to use an electronic multimeter but if one is not available, the best way to test the resistor, is to place a new LED, which is available for a few cents from any electronics parts store, across the existing LED. Any 3mm or 5mm LED will do for testing purposes.
- Obviously if the module doesn't work either purchase a new OEM module (Be Warned they cost heaps) or purchase a new general purpose LED/LEDs.
- It is not absolutely necessary to replace the resistor if it tested OK above. In fact if the resistor has survived to date there is every chance it will now last the life of the vehicle. However the OEM design stresses the LED which causes them to fail.
Circuit Diagram and Analysis for OEM Interior Door Handle Illumination Module
The OEM M-B resistor in the Interior Door Handle Illumination Module is 300 Ohm, ¼ Watt (Resistor colour code for five bands, orange, black, black, black, gold).
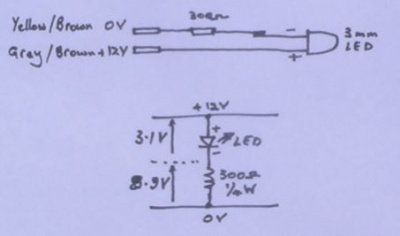
The failed OEM Interior Door Handle Illumination Module was tested with a new general purpose LED to determine the current draw.
With a replacement LED, the OEM Module drew 29.5mA when connected to 12V DC with the voltage across the LED being 3.1V and the voltage across the resistor being 8.9V. An OEM LED would have been nearly the same current draw of 29.5mA.
With 29.5mA current the LED is being stressed slightly and will get unnecessarily hot. As an electronics engineer the author is confidant that this is what caused it to fail in the first place as all four LEDs went open circuit and it is a common problem. Hence in the author's humble opinion the M-B design engineers did not factor in enough safety margin in their design.
Consequently to avoid future failure also purchase new resistors.
LED Specification
Purchase four 3mm warm white LEDs, which you can use as replacements for the OEM M-B ones. If you really want to change the colour, red, yellow, green, blue and daylight white are also available. Warm white is closest to the OEM colour.
The narrower the light emitting angle of the replacement LED the better, as it must couple as much light as possible into the end of the fibre optic bundle.
Note all electronic component LEDs have the long lead polarised as positive.
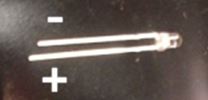
Resistor Specification
A good design current for a 3mm LED is 20mA (Note OEM 29.5mA) (See any specification for a 3mm warm white LED on the Internet).
The perfect commonly available resistor to give 20mA current at a nominal 12V is a 470 Ohm ¼ Watt or if you want to be really certain increase the safety margin slightly more and use a 520 Ohm ¼ Watt. The light output with both these resistors will be slightly lower than the OEM setup but hopefully the LED will now survive the distance.
Experience has shown that with either resistor in use you will not notice the difference in light output.
The author used a 470 Ohm ¼ Watt resistor in all four doors. (Resistor colour code for five bands, yellow, violet, black, black, gold, or resistor colour code for four bands, yellow, violet, brown, gold) and the light output is very pleasing.
The LEDs with 470 Ohm ¼ Watt resistors are still working well 4 years later in 2016.
Replacement of LED and Resistor in Interior Door Handle Illumination Module
Be Warned You must observe the correct polarity for the LED.
Be Warned Some basic soldering skills are required.
- Before cutting the new LED leads make a template to get the wire lengths correct.
- Lay out the original LED and resistor on a piece of paper and mark the various parts on the paper.
- Use the paper as a guide to where to cut the new LED and the new resistor.
- Place a small piece of heat shrink tubing over the longest wire to insulate it.
- Before soldering, mechanically join the component leads (twist them together slightly) using small pliers for extra strength.
- It is also a good idea to place a clip, or get someone to hold pointy nose pliers, on the lead adjacent to each component when you are soldering, to avoid excess heat transfer to that component.
- Solder the components together.
Test of Repaired Interior Door Handle Illumination Module
Test your handiwork, once again observing the correct polarity of the test supply/battery.
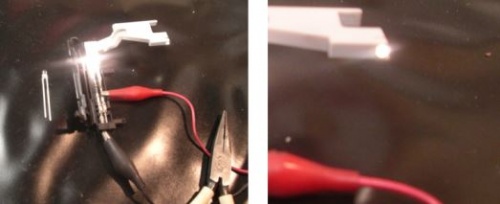
With a standard 3mm warm white LED and a 470 Ohm ¼ Watt the amount of light coming out of the fibre bundle was substantial. The current draw was just under 20mA with 12V applied. Note the red and black test lead polarity in the next Figure.
Installation - Interior Door Handle Illumination Module
Remount the new or repaired Interior Door Handle Illumination Module to the Door Interior Panel by reversing the removal procedure.
- If required use two blobs of white Silicon adhesive, applied to the clips on the handle side, to ensure they do not vibrate/work loose.
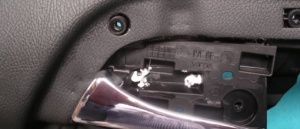
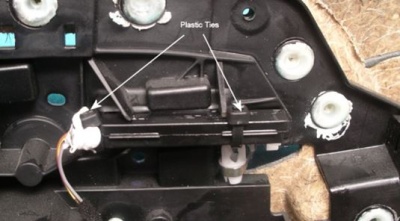
- Place two plastic ties around the actual Interior Door Handle Illumination Module to ensure the housing does not pop open and another dob of Silicon around the connector end for more reassurance.
- Before remounting the door panel back in the car, perform one last test using the cars supply to check the amount of light emitted.
Installation - Door Interior Panel
Reverse the removal procedure to reinstall the door interior panel into the vehicle and the job is completed.
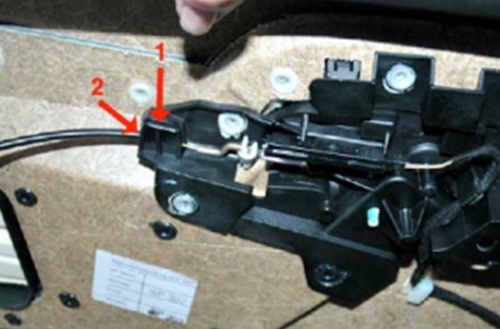
Be sure to observe the excellent advice given by BenzWorld Moderator 'Skylaw'. It states; “Last, and very important!!! On the back of the inner door handle there is a guide through which the cable between the door handle and the door latch mechanism must pass. There is an easy-to-miss slot for the cable at the top of the guide (1 below) and there is a round hole for the cable jacket at (2). The cable dislodges easily. If the cable is not back in place before replacing the panel, your inner handle will be loose and will not open the door”. See next Figure.
