Brakes: Difference between revisions
(→Rear axle wiring: Speed sensor rear) |
(→Brake fluid replacement: updated instructions) |
||
| (2 intermediate revisions by the same user not shown) | |||
| Line 207: | Line 207: | ||
[[File:W220_N910143006002_brake_wear_indicator_bolt.jpg|thumb|none|Rear right wear indicator bolt M6x20 (N91014300600)]] | [[File:W220_N910143006002_brake_wear_indicator_bolt.jpg|thumb|none|Rear right wear indicator bolt M6x20 (N91014300600)]] | ||
* | ==== Speed sensor ==== | ||
* | The OE sensors are manufactured by BOSCH. | ||
* Speed sensor rear left - A2205400417 / BOSCH 0265007008 | |||
* Speed sensor rear right - A2205400517 / BOSCH 0265007006 | |||
[[File:W220_rear_right_speed_sensor_A2205400517.jpg|thumb|none|Rear right speed sensor (A2205400517)]] | {| | ||
|[[File:W220_rear_right_speed_sensor_A2205400517.jpg|thumb|none|Rear right speed sensor (A2205400517)]] | |||
|[[File:W220_speed_sensor_rear_right_installed.jpg|thumb|none|Rear right speed sensor installed]] | |||
|} | |||
=== Rear brake caliper === | === Rear brake caliper === | ||
| Line 318: | Line 323: | ||
== Brake fluid replacement == | == Brake fluid replacement == | ||
Flush brake fluid regularly - every two years. Brake fluid DOT4 is hydroscopic (absorbs water) and needs to be exchanged every two years under the maintenance schedule. A local dealer quoted $95 for this task. Plan for between 1-1.5 hrs if you DIY. | |||
'''Warnings''' | '''Warnings''' | ||
* It is critically important to use the DOT rating specified in the | * It is critically important to use the DOT rating specified in the owner's manual (DOT4). | ||
* Brake fluid is hazardous. Wear latex gloves, safety glasses, and protect the paint of your car. | * Brake fluid is hazardous. Wear latex gloves, safety glasses, and protect the paint of your car. | ||
* CAUTION: DO NOT SPRAY THE FLUID, otherwise you will be getting a new paint job. | |||
* | |||
* Top off with NEW UNOPENED DOT-4 PLUS fluid ONLY! | * Top off with NEW UNOPENED DOT-4 PLUS fluid ONLY! | ||
* Bleed all four calipers one by one in the following sequence: rear right, rear left, front right, front left. | |||
* Check the fluid level in reservoar after every 20 brake pedal presses. | |||
* Bleed all four | |||
* Inspect for leaks. | * Inspect for leaks. | ||
* | * Record brake flush in maintenance records. | ||
* | * Dispose of old brake fluid responsibly. | ||
* | |||
* | Tools needed: | ||
* | * Transparent pipe with 6mm inner diamater ~75cm long. | ||
* 11mm wrench for unscrewing bleeding screw at brake caliper. | |||
Torque specification: | |||
* Bleed screw to brake caliper: 7 Nm | |||
TIP: If possible alternate brake fluid colour from one flush to the next. | |||
The difference in colour gives good confidence that everything is flushed out. | |||
<!-- AR42.10-P-0010I, Bleed brake system, 10.11.11 | |||
MODEL 215, 220 --> | |||
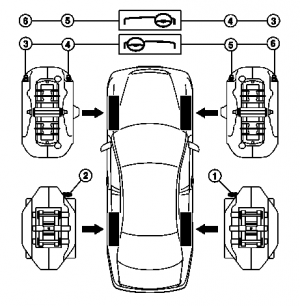
Quantity of | Brake fluid filling capacity on model 220 and 215 is 0.7 to 0.9 liters. Quantity of brake fluid required for a thorough flush will be about 3L in practice. | ||
{| | |||
|[[File:W220_brake_fluid_flushing_setup.jpg|thumb|none|Simple one-man brake fluid flush setup]] | |||
|[[File:W220_sequence_for_bleeding_brake_fluid.png|thumb|none|Sequence of bleeding operation for brake calipers with one bleed screw]] | |||
|[[File:W220_sequence_for_bleeding_brake_fluid_8piston_calipers.png|thumb|none|Sequence of bleeding operation for 8-piston brake calipers at front axle with two bleed screws. Observe different sequence of bleeding operation for left-hand and right-hand drive vehicles.]] | |||
|} | |||
The following video shows how to completely flush and replace the | The following video shows how to completely flush and replace the brake fluid using a simple bottle method vs the pressure vacuum method. | ||
{| | {| | ||
|{{#ev:youtube|https:// | |{{#ev:youtube|https://www.youtube.com/watch?v=TOF4vhblUvw|320|center|Simple brake fluid flush setup|frame}} | ||
|{{#ev:youtube|https://www.youtube.com/watch?v=GfosobLjGQE|320|center|Brake fluid flush using the pressure vacuum method|frame}} | |||
|} | |} | ||
Latest revision as of 14:48, 16 September 2023
Front brakes
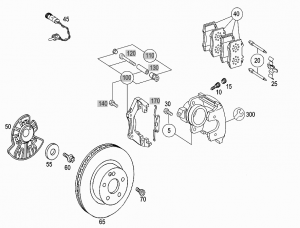
Front disk brake rotor
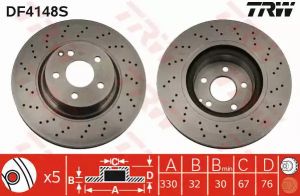
Front brake disks on vehicles with M113 engines (S430/S500) are larger and thicker compared to vehicles with M112 engines (S280/S320/S500).
Front disk brake pads
Brake pads are sold in pairs (for both sides).
- OE A0044209020 (112 EUR)
- ATE 13.0470-4990.2 (67 EUR)
- TRW GDB1543DTE (50 EUR)
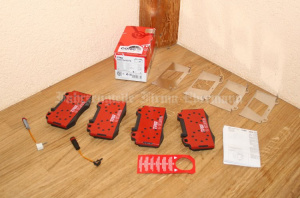
Accessory kit
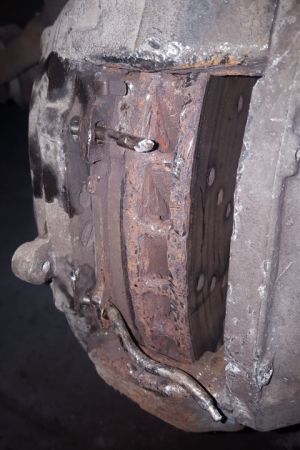
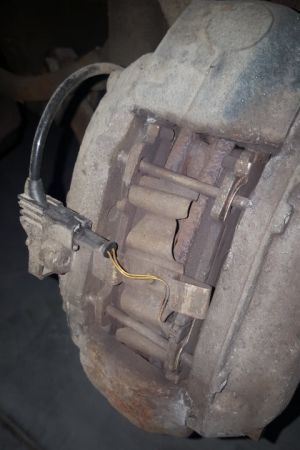
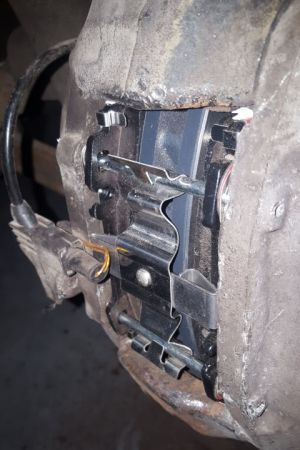
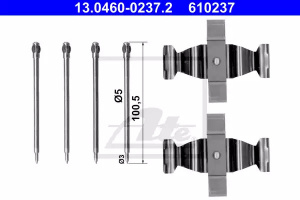
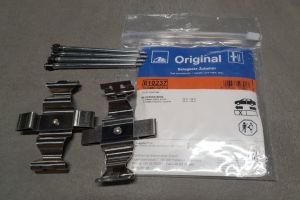
In case brake pads are changed after several years, the spring bolts become seized and to remove them they have to be bent and broken out (see photo below). When buying brake accessory kit, make sure to purchase spring that has bolt anchors (e.g., kit by ATE) to prevent spring from slipping off the bolts (see photos below).
 |
 |
 |
Part numbers:
- Spring - A0004217891 (replaced by A0004219791) (14 EUR)
- Bolts - A0019915160 (12 EUR)
- Kit - ATE 13.0460-0237.2 (9 EUR)
 |
 |
Front dust shield
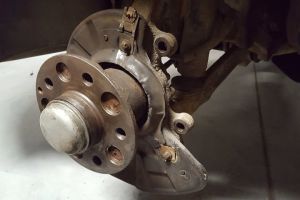
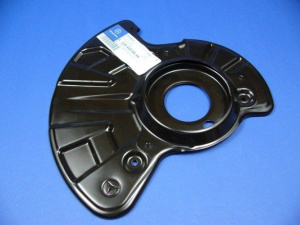
It is common for the dust shield (also known as a protective plate) to rust in the bolt holes resulting in the dust shield touching disk rotor. The original dust shields are quote expensive, unfortunately, aftermarket dust shields for the front axle are not available in the market.
 |
Part numbers:
- OE left: A2204200444 (124 EUR)
- OE right: A2204200544 (88 EUR)
 |
Remove/install brake disc (front axle)
|
|
Remove/install:
- Remove wheels
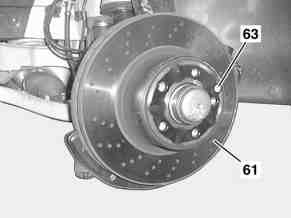
- Check brake lining thickness and brake disks (61). Inspect condition of brake disks. Check brake lining thickness. Only replace brake pads and brake disks (61) in complete sets if necessary. If the brake pads have worn down to beyond the wear limit, the bar between the sealing groove and dust cap may be damaged; therefore: Inspect brake system for leaks with pressure tester.
- Remove brake disk. Do not detach brake hose, instead attach brake caliper to vehicle so that it is free of tension. Do not kink or tension brake hose, as otherwise it will be damaged.
- Remove locking bolt (64) and remove brake disk (61). Installation: Replace securing bolt (64)
Clean:
- Clean contact surfaces and seat of brake disk (61) if necessary.
- Lightly grease seat of brake disk (61) using Hot lubricating paste.
- Install in the reverse order
Checking:
- Carry out brake test on the test stand
Torque specifications:
- Locking bolt of rear/front axle brake disk: Nm 10
Rear brakes
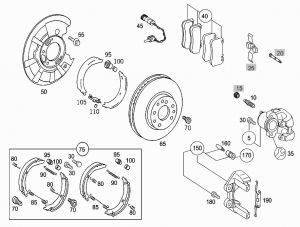
Rear disk brake rotor
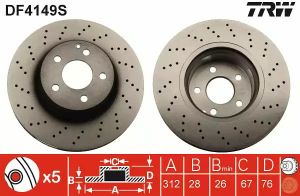
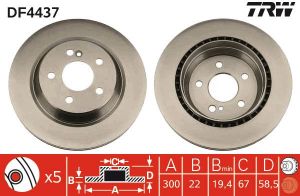
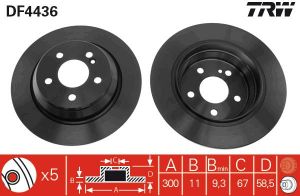
Note that for vehicles with M113 V8 engine (S500/S430) the rear caliper is around 1cm wider than on vehicles with M112 V6 engine (S350), therefore the rear disk rotor for M113 V8 engine is 22mm thick, while for M112 V6 engine only 11m.
|
S500/S430:
 |
S350:
 |
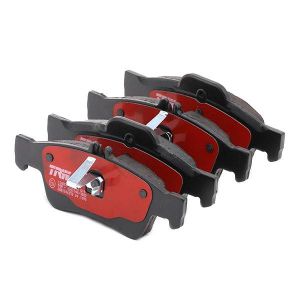
Rear disk brake pads
Brake pads are sold in pairs (for both sides).
- OE A0034205120 (87 EUR)
- TRW GDB1546DTE (35 EUR)
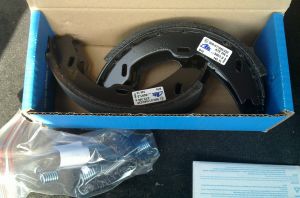
Brake shoes
For installation instructions see parking brake page.
Part numbers (set for both sides):
- OE - A2204200520 (87 EUR)
- Ate 03.0137-4016.2 (35 EUR) - comes with springs
- TRW GS8482 (30 EUR)
Brake shoe extension springs
Part numbers (number of pieces for both sides):
- Extension spring, brake shoe pull-back (x2) - A2104230092, FEBI BILSTEIN 02105 (0.23 EUR)
- Extension spring, brake shoe pull-back (x2) - A2014230692 (replaced by A1714230092), FEBI BILSTEIN 02104 (0.71 EUR)
- Extension spring, brake shoes to cover plates (x4) - A2014230592, FEBI BILSTEIN 02103 (0.24 EUR)
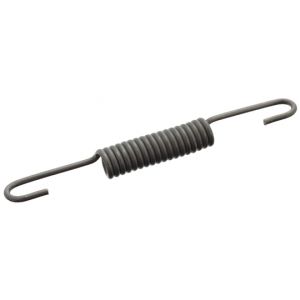 |
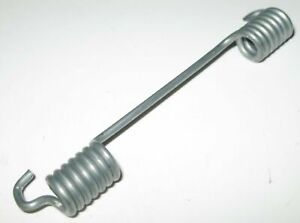 |
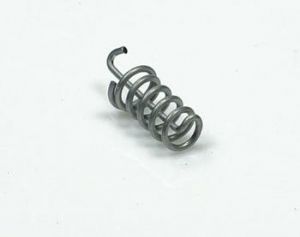 |
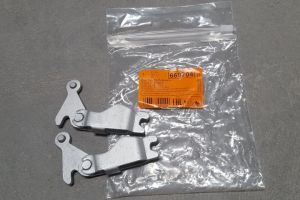
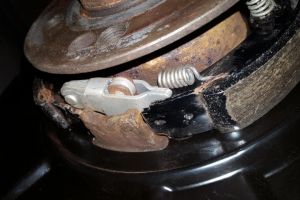
Brake shoe expansion lock
Part numbers (set for both sides):
- OE - A2014200589 (13 EUR)
- ATE 03.0137-9704.2 (6 EUR)
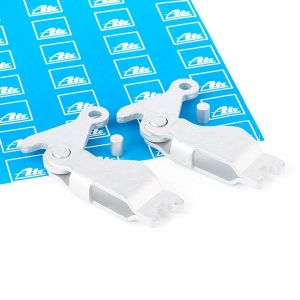 |
 |
 |
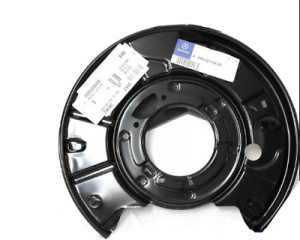
Rear dust shield
|
Part numbers (left):
|
Part numbers (right):
|
 |
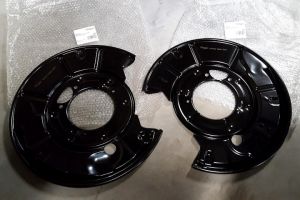 |
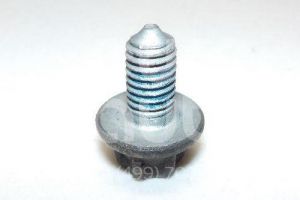
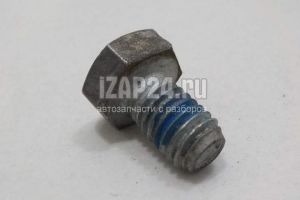
The dust shield is attached to the wheel carrier using two E10 (A2204230071) and two 13mm (A2204230371) bots.
 |
 |
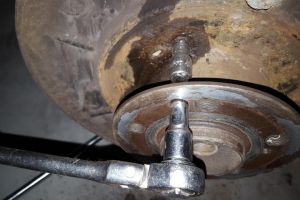
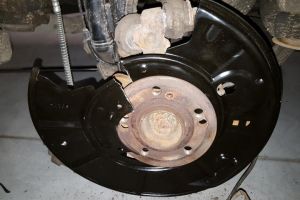
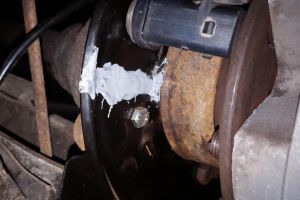
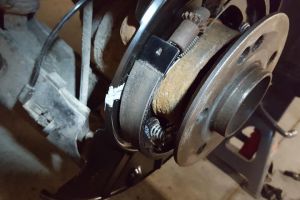
Removal of two E10 bolts may be challenging if the heads for the bolts are rusted. Access through the wheel hub is angled, hence it may be required to hammer on E10 socket to get grip. The original E10 bolts can be replaced with standard M6x12 bolts. To mount a new dust shield without removing wheel bearing (overly complex job), the dust shield has to be cut in two places and pushed over wheel hub (see below). The cut can be welded or glued using, e.g., Kafuter A+B glue. The cut will not be visible as it will be covered by brake caliper.
 |
 |
 |
 |
Rear axle wiring
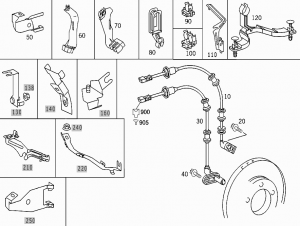
The rear brake pad wear sensor is the same part as for the front. The sensor attaches to the rear right inner brake pad.
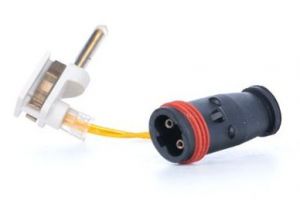
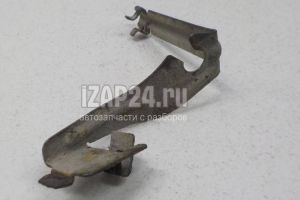
The wear sensor wiring bracket (A2205460843) is attached to the rear right dust shield.
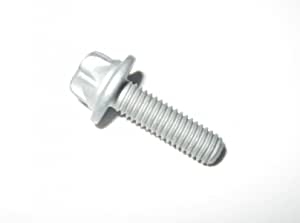
The rear wear indicator wire is attached to the right caliper using E10 torx bolt (N91014300600).
Speed sensor
The OE sensors are manufactured by BOSCH.
- Speed sensor rear left - A2205400417 / BOSCH 0265007008
- Speed sensor rear right - A2205400517 / BOSCH 0265007006
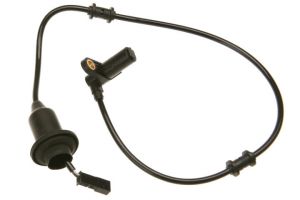 |
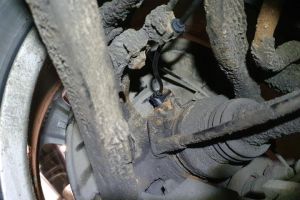 |
Rear brake caliper
Repair kit (facelift)
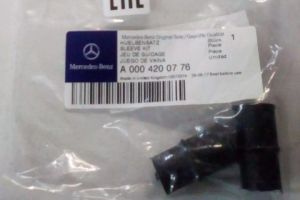
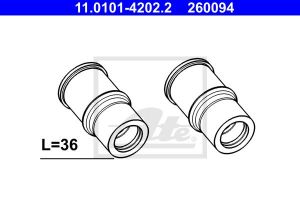
Guide sleeve kit:
- OE A0004200776 (20 EUR)
- ATE 11010142022 (8 EUR)
 |
 |
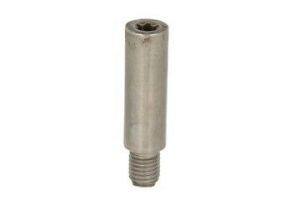
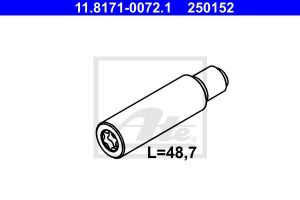
Guide bolt:
- OE A0004211018 (18 EUR)
- OEM ATE 11817100721 (8 EUR)
 |
 |
Please note that in ATE brake systems with open caliper guides the guides must not be lubricated!
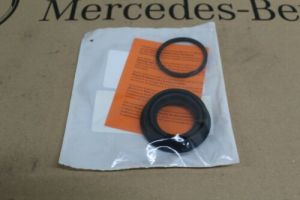
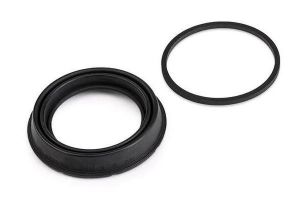
Gasket set:
- OE A0004219986 (25 EUR)
- OEM ATE 11044142032 (10 EUR)
 |
 |
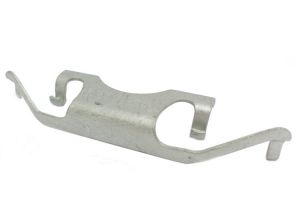
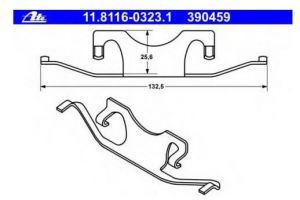
Retaining spring:
- OE A0004218591 (12 EUR)
- OEM ATE 11811603231 (5 EUR)
 |
 |
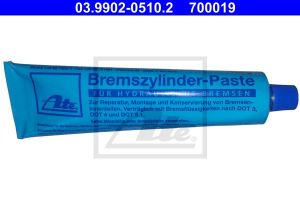
Brake cylinder paste:
- ATE 03990205102 (7 EUR)
The ATE brake cylinder paste ensures the necessary lubrication and preservation of hydraulic brake components and clutch parts. It is applied thinly and evenly to the cylinder surfaces, piston and sealing elements. - ATE brake cylinder paste is compatible with DOT 3, DOT 4 and DOT 5.1 brake fluids. - Easy installation of hydraulic brake parts - protects the treads from corrosion.
Rear brake pads replacement
This video shows how to replace front and rear brake pads. The video shows part numbers for the Brake Pads (Front and Rear) and Pad Wear Sensor. Torque values are also shown.
Rear driver brake caliper replacement
This video shows how to replace the rear driver caliper in a left steered car. The procedure is very similar for the other wheels.
Remove/install brake disc (rear axle)
|

|
Remove/install:
- Remove wheels
- Release parking brake
- Check brake lining thickness and brake disks (61). Inspect condition of brake disks. Check brake lining thickness. Only replace brake pads and brake disks (61) in complete sets if necessary. If the brake pads have worn down to beyond the wear limit, the bar between the sealing groove and dust cap may be damaged; therefore: Inspect brake system for leaks with pressure tester.
- Remove brake disk. Do not detach brake hose, instead attach brake caliper to vehicle so that it is free of tension. Do not kink or tension brake hose, as otherwise it will be damaged.
- Preloading automatic cable slack adjuster
- Remove locking bolt (64) and remove brake disk (61). If parking brake drums are run in, turn back the adjusting mechanism of the parking brake beforehand. Otherwise the brake shoes will be damaged. See: Adjusting parking brake. Installation: Replace securing bolt (64)
Clean:
- Clean contact surfaces and seat of brake disk (61) if necessary.
- Lightly grease seat of brake disk (61) using Hot lubricating paste.
- Check condition of brake shoes of parking brake. If necessary: replace parking brake brake shoes:
- Install in the reverse order
Checking:
- Check version of pedal assembly
- Adjust parking brake
- Release automatic slack adjuster
- Carry out brake test on the test stand
Torque specifications:
- Locking bolt of rear/front axle brake disk: Nm 10
- Bolt, brake cable at parking brake cable slack adjuster 12
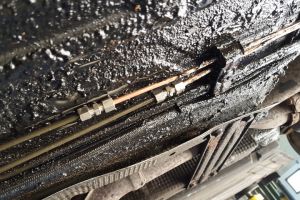
Brake lines
Brake fluid replacement
Flush brake fluid regularly - every two years. Brake fluid DOT4 is hydroscopic (absorbs water) and needs to be exchanged every two years under the maintenance schedule. A local dealer quoted $95 for this task. Plan for between 1-1.5 hrs if you DIY.
Warnings
- It is critically important to use the DOT rating specified in the owner's manual (DOT4).
- Brake fluid is hazardous. Wear latex gloves, safety glasses, and protect the paint of your car.
- CAUTION: DO NOT SPRAY THE FLUID, otherwise you will be getting a new paint job.
- Top off with NEW UNOPENED DOT-4 PLUS fluid ONLY!
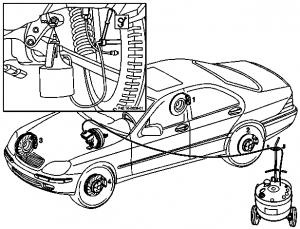
- Bleed all four calipers one by one in the following sequence: rear right, rear left, front right, front left.
- Check the fluid level in reservoar after every 20 brake pedal presses.
- Inspect for leaks.
- Record brake flush in maintenance records.
- Dispose of old brake fluid responsibly.
Tools needed:
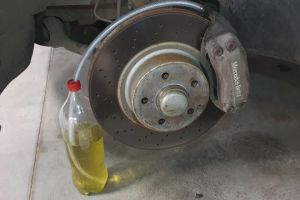
- Transparent pipe with 6mm inner diamater ~75cm long.
- 11mm wrench for unscrewing bleeding screw at brake caliper.
Torque specification:
- Bleed screw to brake caliper: 7 Nm
TIP: If possible alternate brake fluid colour from one flush to the next. The difference in colour gives good confidence that everything is flushed out.
Brake fluid filling capacity on model 220 and 215 is 0.7 to 0.9 liters. Quantity of brake fluid required for a thorough flush will be about 3L in practice.
The following video shows how to completely flush and replace the brake fluid using a simple bottle method vs the pressure vacuum method.
Parts
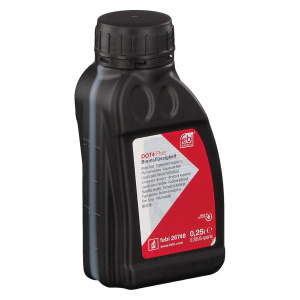
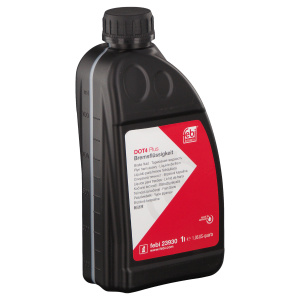
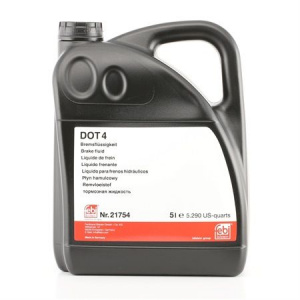
DOT 4 brake oils (MB 331.0 spec):
- FEBI BILSTEIN 26748 (0.25l) - 2.5 EUR
- FEBI BILSTEIN 23930 (1l) - 7.4 EUR
- FEBI BILSTEIN 23932 (5l) - 26.4 EUR
 |
 |
 |
Brake Light Switch
If you are getting the ABS and ESP lights with a VISIT WORKSHOP warning and the BAS ESP light, then look no further. Chances are your brake light switch needs to be replaced. This video is shot on an E320, but many Mercedes cars including SL500, SL55 AMG, SL600, CL500, CL55 AMG, CL600, S500 S430, CL65 AMG SL65 AMG, S350, S65 AMG, S55 AMG, SL550, SL63 AMG and S600 use the same Brake Light Switch and setup.
