Car Solutions RGB-LE-V3.1: Difference between revisions
Jump to navigation
Jump to search
(→Description: reference to video interface and rear view camera installation page) |
(improved installation instructions and photos) |
||
| Line 9: | Line 9: | ||
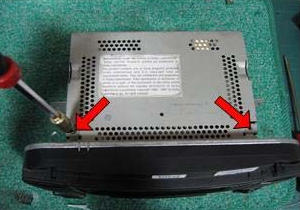
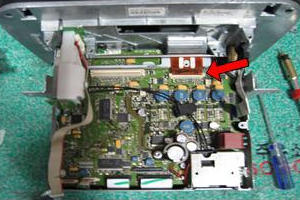
|[[File:W220_Car_Solutions_RGB-LE-V3.1_install1.jpg|thumb|none|Unscrew 2 chassis cover screws at top of radio.]] | |[[File:W220_Car_Solutions_RGB-LE-V3.1_install1.jpg|thumb|none|Unscrew 2 chassis cover screws at top of radio.]] | ||
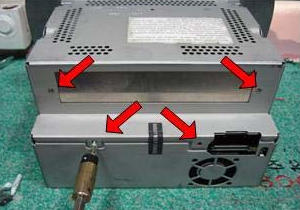
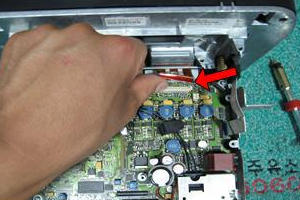
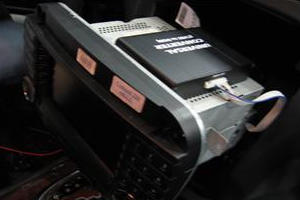
|[[File:W220_Car_Solutions_RGB-LE-V3.1_install2.jpg|thumb|none|Unscrew 4 on the rear of the unit, remove cover from top of unit.]] | |[[File:W220_Car_Solutions_RGB-LE-V3.1_install2.jpg|thumb|none|Unscrew 4 on the rear of the unit, remove cover from top of unit.]] | ||
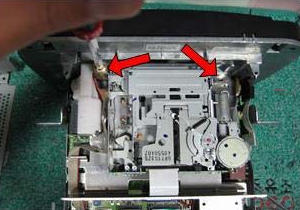
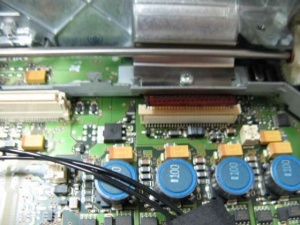
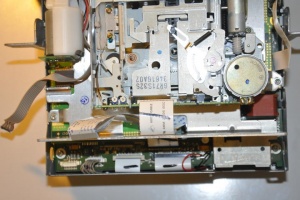
|[[File:W220_Car_Solutions_RGB-LE-V3.1_install3.jpg|thumb|none|Begin by unscrewing the | |[[File:W220_Car_Solutions_RGB-LE-V3.1_install3.jpg|thumb|none|Begin by unscrewing the cassette player mechanism from the unit. There are 2 screws holding it in place.]] | ||
|} | |} | ||
{| | {| | ||
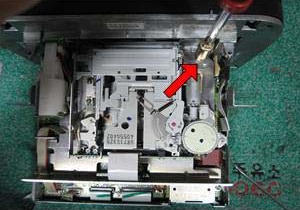
|[[File:W220_Car_Solutions_RGB-LE-V3.1_install4.jpg|thumb|none|Unscrew the mechanism's other mounting screw.]] | |[[File:W220_Car_Solutions_RGB-LE-V3.1_install4.jpg|thumb|none|Unscrew the mechanism's other mounting screw.]] | ||
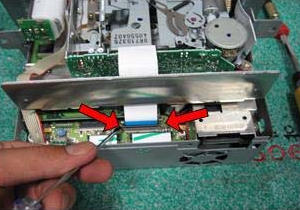
|[[File:W220_Car_Solutions_RGB-LE-V3.1_install5.jpg|thumb|none|Loosen the ribbon cable attachment clip with a small screwdriver and carefully remove the | |[[File:W220_Car_Solutions_RGB-LE-V3.1_install5.jpg|thumb|none|Loosen the ribbon cable attachment clip with a small screwdriver and carefully remove the cassette player mechanism.]] | ||
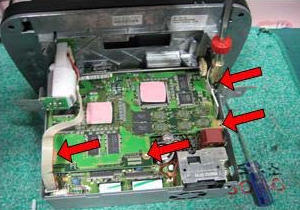
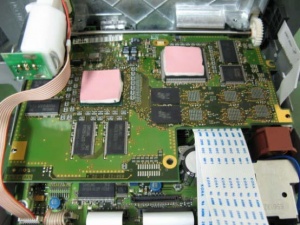
|[[File:W220_Car_Solutions_RGB-LE-V3.1_install6.jpg|thumb|none|Continue removing the remaining screws to remove the | |[[File:W220_Car_Solutions_RGB-LE-V3.1_install6.jpg|thumb|none|Continue removing the remaining screws to remove the upper motherboard.]] | ||
|} | |} | ||
{| | {| | ||
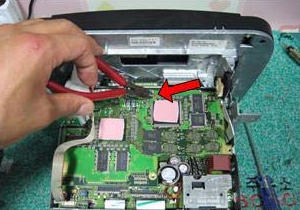
|[[File:W220_Car_Solutions_RGB-LE-V3.1_install7.jpg|thumb|none|Using needle nosed pliers twist the metal clip that attaches to the | |[[File:W220_Car_Solutions_RGB-LE-V3.1_install7.jpg|thumb|none|Using needle nosed pliers twist the metal clip that attaches to the upper motherboard.]] | ||
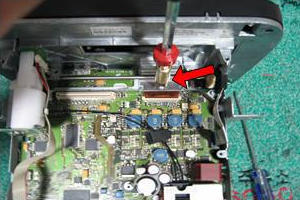
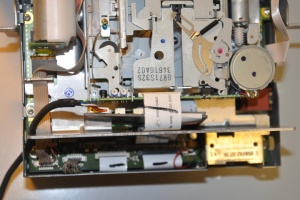
|[[File:W220_Car_Solutions_RGB-LE-V3.1_install8.jpg|thumb|none|Using a small screwdriver unscrew the ribbon cable from the | |[[File:W220_Car_Solutions_RGB-LE-V3.1_install8.jpg|thumb|none|Using a small screwdriver unscrew the ribbon cable from the motherboard.]] | ||
|[[File:W220_Car_Solutions_RGB-LE-V3.1_install9.jpg|thumb|none|Unclip the plastic connector from both sides.]] | |[[File:W220_Car_Solutions_RGB-LE-V3.1_install9.jpg|thumb|none|Unclip the plastic connector from both sides.]] | ||
|} | |} | ||
{| | {| | ||
|[[File:W220_Car_Solutions_RGB-LE-V3.1_install10.jpg|thumb|none|Disconnect ribbon cable from the | |[[File:W220_Car_Solutions_RGB-LE-V3.1_install10.jpg|thumb|none|Disconnect ribbon cable from the motherboard.]] | ||
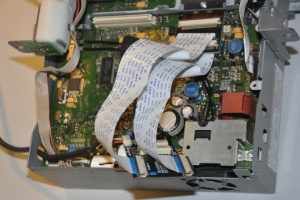
|[[File:W220_Car_Solutions_RGB-LE-V3.1_install10a.jpg|thumb|none|Leave the ribbon cable disconnected.]] | |[[File:W220_Car_Solutions_RGB-LE-V3.1_install10a.jpg|thumb|none|Leave the ribbon cable disconnected.]] | ||
|[[File:W220_Car_Solutions_RGB-LE-V3. | |[[File:W220_Car_Solutions_RGB-LE-V3.1_install_schema.jpg|thumb|none|Connect ribbon cables as shown above.]] | ||
|} | |} | ||
{| | {| | ||
|[[File:W220_Car_Solutions_RGB-LE-V3. | |[[File:W220_Car_Solutions_RGB-LE-V3.1_install15a.jpg|thumb|none|Reattach the upper motherboard and cassette player mechanism.]] | ||
|[[File:W220_Car_Solutions_RGB-LE-V3. | |[[File:W220_Car_Solutions_RGB-LE-V3.1_install_schema2.jpg|thumb|none|Pull ribbon cables through the cassette player case.]] | ||
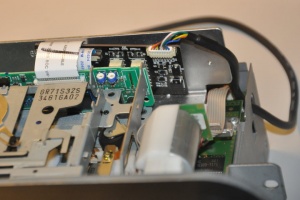
|[[File:W220_Car_Solutions_RGB-LE-V3. | |[[File:W220_Car_Solutions_RGB-LE-V3.1_install_schema3.jpg|thumb|none|Connect the RGB interface board.]] | ||
|} | |} | ||
{| | {| | ||
|[[File:W220_Car_Solutions_RGB-LE-V3.1_install15c.jpg|thumb|none|Connect RGB cable and run outside of unit.]] | |[[File:W220_Car_Solutions_RGB-LE-V3.1_install15c.jpg|thumb|none|Connect RGB cable and run outside of unit.]] | ||
|[[File:W220_Car_Solutions_RGB-LE-V3.1_install16.jpg|thumb|none|Mount converter on top of radio with 2 sided tape.]] | |[[File:W220_Car_Solutions_RGB-LE-V3.1_install16.jpg|thumb|none|Mount converter on top of radio with 2 sided tape.]] | ||
|} | |} | ||
<!-- | |||
[[File:W220_Car_Solutions_RGB-LE-V3.1_install12b.jpg|thumb|none|Using the supplied ribbon cable extender, connect the existing ribbon cable to the extended cable.]] | |||
[[File:W220_Car_Solutions_RGB-LE-V3.1_install12a.jpg|thumb|none|Connect the supplied 2nd ribbon cable to the board, lock clips in place.]] | |||
[[File:W220_Car_Solutions_RGB-LE-V3.1_install15b.jpg|thumb|none|Connect ribbon cables to the interface board as shown above.]] | |||
[[File:W220_CT90-MC04_RGB_cable_installation.jpg|thumb|none|Disconnect the wires from the connector to pull the cable through the hole.]] | |||
--> | |||
Revision as of 20:34, 5 December 2016
Description
Yet another video input interface for Mercedes S-Class W220. Useful for rear view camera installation.
Price: USD 190.
Installation
Remove the COMAND from the vehicle using COMAND removal instructions.
 |
 |
 |
 |
 |
 |
 |
 |
