Headlights: Difference between revisions
| Line 155: | Line 155: | ||
To switch on rear fog lamp make sure the low beam headlamps are switched on. Pull out exterior lamp switch to second stop. | To switch on rear fog lamp make sure the low beam headlamps are switched on. Pull out exterior lamp switch to second stop. | ||
The yellow indicator lamp in the lamp switch comes on. | The yellow indicator lamp in the lamp switch comes on. | ||
===Hazard warning flasher=== | |||
The hazard warning flasher can be activated with the starter switched on or off. | |||
It is activated automatically when an airbag is deployed. | |||
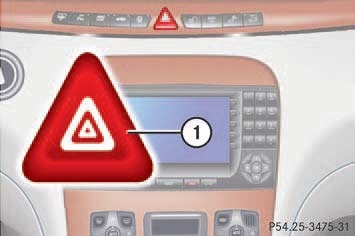
The switch is located on the center console. | |||
[[File:W220_hazard_warning_flasher_switch.jpg]] | |||
With the hazard warning flasher activated and the combination switch set for either left or right turn, | |||
only the respective left or right turn signals will operate when the SmartKey in the starter switch is in position '''1''' or '''2'''. | |||
== Replacing bulbs for front lamps == | == Replacing bulbs for front lamps == | ||
Revision as of 18:27, 30 August 2017
Introduction - Headlight Systems
HID Xenon Systems
HID stands for High-Intensity Discharge. Xenon is the type of gas inside the bulb. Xenon bulbs can produce a brighter, whiter light than a halogen car, and tend to have a longer lifespan. The bulb works in a different way to a halogen. Instead of a filament heating up and glowing, xenon headlights use electrodes to discharge the gas inside the bulb. This produces the light you see on the road. In order for xenon bulbs to work they require electronic ballasts, and ignitors to generate the high voltages required to discharge the gas.
HID xenon headlight systems come in two different types, xenon and bi-xenon.
HID Xenon Headlight Systems
HID xenon headlight systems use two separate bulbs for the high and low beam illumination. The main high beam system uses xenon bulbs, electronic ballasts, and ignitors. A separate conventional halogen bulb is also fitted for low beam.
HID Bi-xenon Headlight Systems
HID bi-xenon headlight systems use one bulb for both high and low beam illumination. To achieve low and high beam illumination with a single HID bi-xenon bulb, it is used in conjunction with a lens projector which has a solenoid/motor that is attached to a cutoff plate or shield. When the 'high beams' are activated a signal is sent to the solenoid and the motor will lower the cutoff plate/shield allowing more light to shine above the shield; hence high beams.
A pair of separate conventional halogen globes are also used to provide instant illumination and a support and backup to the bi-xenon system.
Halogen Systems
Halogen headlight systems use separate low beam and high beam bulbs in different locations. Sometimes dual filament bulbs are used to produce both high and low beams in one bulb. Halogen bulbs are cheap to manufacture, plus they’re very simple to replace. Inside the bulb is a filament made out of tungsten and halogen gas. The bulb lights up when electricity reaches the filament, heating up the tungsten which begins to glow. Most halogen headlamps produce a colour temperature between approximately 3200K and 5000K. The higher the Kelvin rating, the cooler and bluer the light will be.
Be careful when replacing a halogen bulb. It is popular to replace a standard halogen with an aftermarket bulb in order to achieve a white/blue tint. After market globes usually achieve this by applying a blue coating to the bulb, which the light then shines through. However, this can compromise the light output of the bulb as the blue coating can obscure the amount of light that can penetrate it. Some after market halogens are now turning to a clever xenon and halogen gas mix, which helps to produce a whiter light than the halogen gas can on its own. Be sure to use the same wattage as the original.
LED Systems
Modern LED bulbs are proving to be very popular as they can produce an extremely white light. They are much more efficient, due to their long lifetime and the low wattage they require to work. LED bulbs were never fitted as original equipment for W220 high or low beams. Fitting them to W220s as after market equipment poses problems due to the sophisticated bulb monitoring system built into the W220. Due to their low current draw they will be detected as blown globes and may even flash instead of producing constant light. They also need to be cooled from the back of the bulb and may require a redesign of the lens assembly.
Description
W220's were built with two completely different main headlight systems, namely;
- High Intensity Discharge (HID) systems using bi-xenon bulbs with electronic ballasts, ignitors and motorised lens projectors for both high beam and low beam, and
- Halogen systems using conventional bulbs.
Facelift
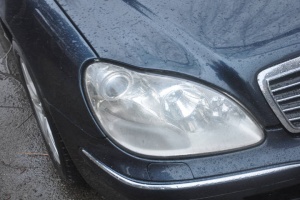
Pre-facelift
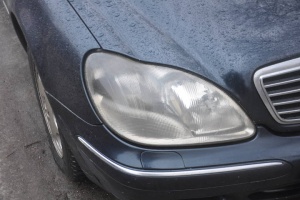
Locations
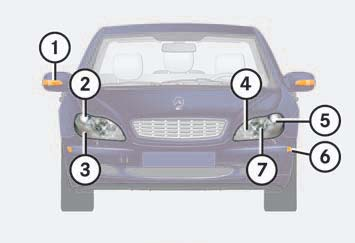
HID Headlight Locations
Halogen Headlight Locations
Operating Lights
Exterior lamp switch
If you drive in countries where vehicles drive on the other side of the road than the country in which the vehicle is registered, you must have the headlamps modified for symmetrical low beams. Relevant information can be obtained at your authorized Mercedes-Benz Center.
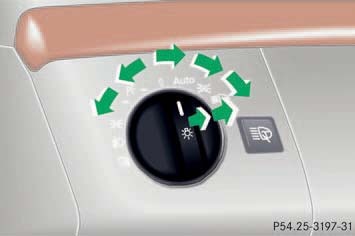
The exterior lamp switch is located on the dashboard to the left of the steering wheel.
- 0 - Off
- AUTO - Automatic headlamp mode
- Parking lamps (also side marker lamps, tail lamps, license plate lamps, instrument panel lamps). Canada only: When engine is running, the low beam is also switched on.
- Parking lamps plus low beam or high beam headlamps (combination switch pushed forward).
- Standing lamps, right (turn left one stop)
- Standing lamps, left (turn left two stops)
If you remove the SmartKey and open the driver's door while the parking lamps or low beam headlamps are switched on, then a warning sounds and a bulb appears in the multifunction display with the message "SWITCH OFF LIGHTS!".
With the daytime running lamp mode activated and the engine running, the low beam headlamps cannot be switched off manually. To activate the daytime running lamp mode, see "Setting daytime running lamp mode (USA only)".
Manual headlamp mode
The low beam headlamps and parking lamps can be switched on and off with the exterior lamp switch.
Automatic headlamp mode
The parking lamps, low beam headlamps and license plate lamps switch on and off automatically depending on the brightness of the ambient light. Turn the exterior lamp switch to AUTO.
Warning: If the exterior lamp switch is set to AUTO, the headlamps may switch off unexpectedly when the system senses bright ambient light, for example light from oncoming traffic. The headlamps will not be automatically switched on under foggy conditions.
To minimize risk to you and to others, activate headlamps by turning exterior lamp switch when driving or when traffic and/or ambient lighting conditions require you to do so. In low ambient lighting conditions, only switch from position AUTO with the vehicle at a standstill. Switching from AUTO will briefly switch off the headlamps. Doing so while driving in low ambient lighting conditions may result in an accident.
With the daytime running lamp mode activated, the low beam headlamps will not switch off automatically.
Daytime running lamp mode
Turn exterior lamp switch to position 0 or AUTO. When the engine is running, the low beam headlamps are automatically switched on. In low ambient light conditions, the parking lamps will also switch on.
Canada only: When you shift from a driving position to position N or P, the low beam switches off (with a three-minute delay). For nighttime driving you should turn the exterior lamp switch to permit activation of the high beam headlamps.
USA only: The high beam headlamps can also be activated when driving with the daytime running lamp mode activated and exterior lamp switch in position 0. To activate the daytime running lamp mode, see "Setting daytime running lamp mode (USA only)".
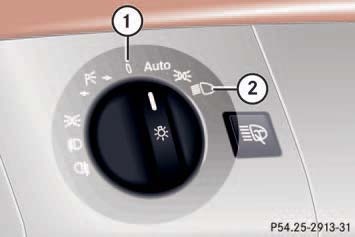
Switching on headlamps using exterior lamp switch
- (1) Off
- (2) Low beam headlamps on
With the SmartKey removed and the driver’s door open, a warning sounds if the vehicle’s exterior lamps are not switched off.
Turn signals
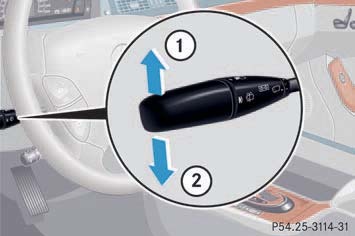
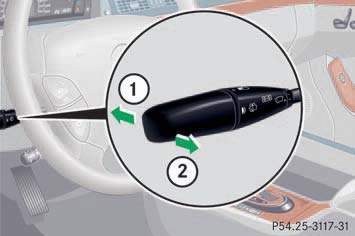
Combination switch
The combination switch is located on the left of the steering column.
- (1) Turn signals, right
- (2) Turn signals, left
To signal minor directional changes, move combination switch to point of resistance only and release. The turn signal flashes three times.
Switching on high beams
The combination switch is located on the left side of the steering column.
- (1) High beam
- (2) High beam flasher
To switch on high beams turn exterior lamp switch. Push the combination switch in direction (1). The high beam indicator on the instrument cluster comes on.
For high beam flasher pull the combination switch briefly in direction (2).
Switching on fog lamps
Fog lamps will operate with the parking lamps and/or the low beam headlamps on. Fog lamps should only be used in conjunction with low beam headlamps. Consult your State or Province Motor Vehicle Regulations regarding permissible lamp operation.
The front fog lamps and rear fog lamp cannot be switched on manually with exterior lamp switch in position AUTO. To activate the fog lamps, turn exterior lamp switch and pull the exterior lamp switch to first or second stop.
To switch on front fog lamps make sure the low beam headlamps are switched on. Pull out exterior lamp switch to first stop. The green indicator lamp in the lamp switch comes on.
To switch on rear fog lamp make sure the low beam headlamps are switched on. Pull out exterior lamp switch to second stop. The yellow indicator lamp in the lamp switch comes on.
Hazard warning flasher
The hazard warning flasher can be activated with the starter switched on or off. It is activated automatically when an airbag is deployed. The switch is located on the center console.
With the hazard warning flasher activated and the combination switch set for either left or right turn, only the respective left or right turn signals will operate when the SmartKey in the starter switch is in position 1 or 2.
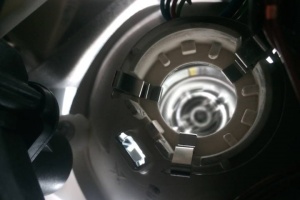
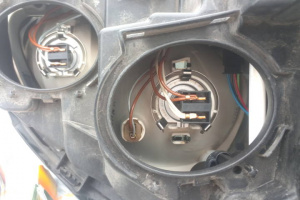
Replacing bulbs for front lamps
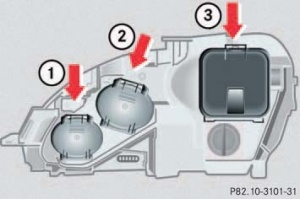
|
|
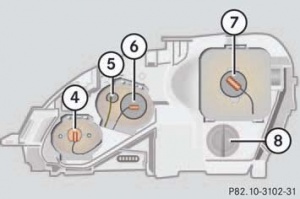
|
|
 |
 |
Bi-Xenon headlamp
The headlamps in W220 facelift differ from the previous xenon headlamps on account of their entirely new lighting technology development, which the xenon light uses for low and high beam lights. The new lighting technology, known as Bi-Xenon, is located in the outer headlamps.
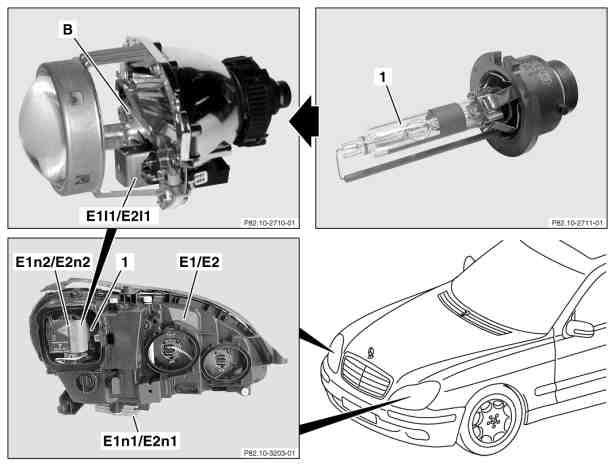
When the low beam lamps are switched on the xenon headlamp control module (E1n1, E2n1) activates the xenon headlamp control module and ignition module (E1n2, E2n2) via the control voltage within a few milliseconds. A high-voltage surge from the ignition device ignites the xenon lamps, and in doing so an electric arc is formed between the electrodes. If an electric arc of sufficient stability is detected the control circuit switches the control modules (E1n1, E2n1) over to power-limiting mode.
With the bi-xenon headlamps, the light generated in the previous manner in a gas discharge lamp (D2S lamp) travels directly through the optical system without being reflected.
A voltage converter generates the required voltage for the reliable function of the xenon headlamp.
For technical reasons the xenon lamp has a timed startup characteristic. After switch on, 50 % of the luminosity is reached within 1 to 2 seconds and full luminosity is achieved after another approx. 30 seconds.
The entire luminous flux is made available for the high-beam lights. When switching over to low-beam operation a screen is moved into position between the gas-discharge lamp and the lens, which covers up the luminous flux directed into the distance and thus helps to prevent oncoming traffic from being dazzled.
The shield (B) is controlled electro-mechanically by the solenoids in the right and left high beams (E1l1, E2l1).
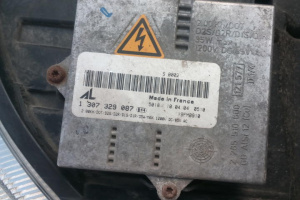
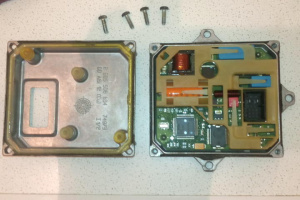
Xenon headlamp control module (ballast)
 |
 |
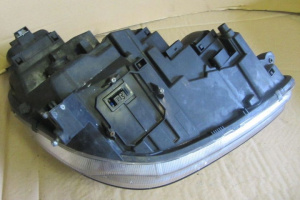 |
The xenon headlamp control module (E1n1, E2n1) activates the xenon headlamp control module and ignition module (E1n2, E2n2) via the control voltage and regulates the voltage supply to the xenon headlamps.
The same control module is used on both sides. The MB part number is not identified on the part, however, the control module is ECU and MB part number can be obtained by establishing connection to the headlamp control module using DAS.
Other ballasts (e.g., 1307329072/A2038202526 from C-class) will also light up the bulb, but may report headlamp range adjustment errors (tested in vehicle without ABC).
| Part No. | Notes |
|---|---|
| A2208203785 | [614/618] From 30/09/2002, replaced by A2208207085 |
| A2208207085 | [614/618] From 30/09/2002 |
| A2208203885 | [614/618 +487] From 30/09/2002, replaced by A2208207185 |
| A2208207185 | [614/618 +487] From 30/09/2002 |
| A2308201926 | [614/494 +-487] From 30/09/2002, replaced by A2308208426 |
| A2308208426 | [614/494 +-487] From 30/09/2002 |
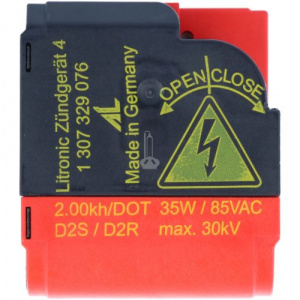
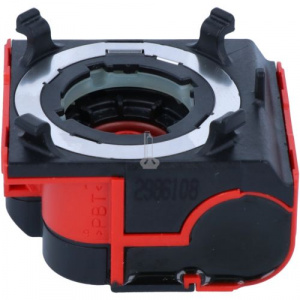
Xenon headlamp ignition unit
The xenon headlamp ignition device (A2208204985 - EUR 100), (E1n2, E2n2) ignites the xenon lamps by means of a high-voltage surge.
 |
 |
Headlamp range control (HRC)
Electric headlamp range adjustment is required by law for vehicles with xenon headlamps to prevent dazzling oncoming traffic. The headlamp range adjustment automatically keeps the inclination angle of the low beams within the legally defined limit regardless of how the vehicle is loaded.
The headlamp range adjustment control module utilizes the signals from the level sensors on the front and rear axles for control and adjustment of the low beams. The pneumatic suspension control module processes the signals from the level sensors and transfers these to the headlamp range adjustment control module via the data bus (CAN). The headlamp range adjustment control module compares the signals with the headlamp adjustment and, if necessary actuates the headlamp range adjustment motors in the headlamps to correct the angle of inclination.
In addition to the signals from the level sensors the headlamp range adjustment control module also processes a wheel speed signal proportional to the vehicle speed transferred on the data bus from the ASR/ESP control module. Evaluation of this wheel speed signal indicates to the headlamp range adjustment control module whether the vehicle is driving at constant speed, accelerating or decelerating. At constant vehicle speed the headlamp range adjustment operates in the "static mode" with minimum headlamp motor adjustment speed. During acceleration or deceleration the "dynamic mode" with high adjustment speed is actuated.
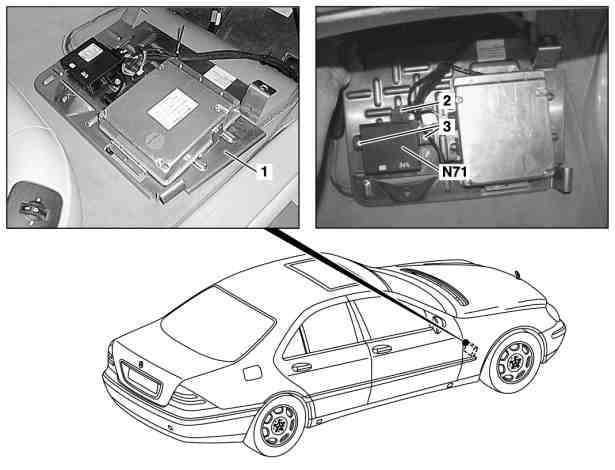
Headlamp range adjustment control module
|
|
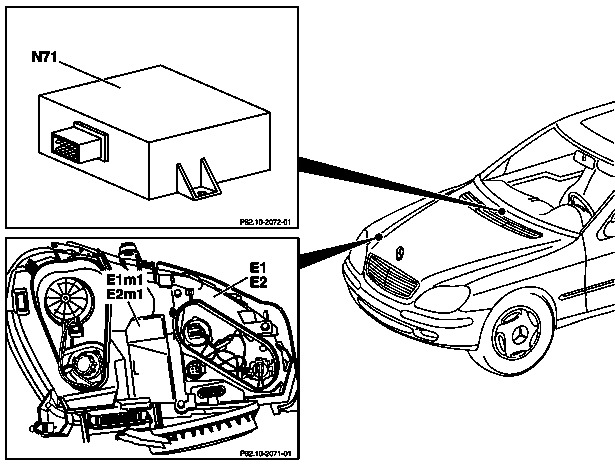
The control module evaluates the signals from the pneumatic suspension control modules and ABS/ASP control modules as well as the headlamp range adjustment motors. It actuates the headlamp range adjustment motors depending on the vehicle load, vehicle status and position of the headlamps.
Headlamp range adjustment motors
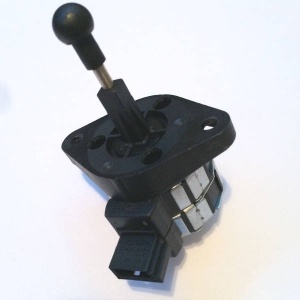
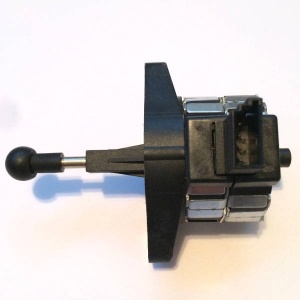
The headlamp range adjustment motors in the left and right headlamps adjust the inclination angle of the reflectors depending on the actuation by the control module. The position of the reflectors is indicated to the control module by potentiometers in the motors.
|
|
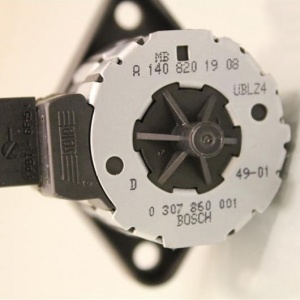
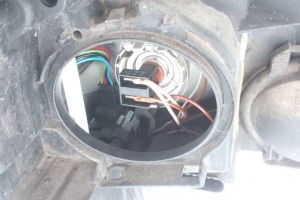
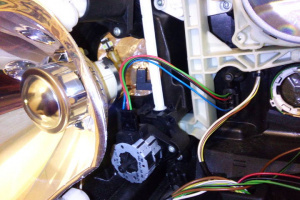
Both headlamps (left and right) contain headlamp range adjustment motor part number A1408201908.
 |
 |
 |
 |
 |
| Error Code | Generated By | Description |
|---|---|---|
| B1480 | HRA - Headlamp rangeadjustment | Component M36 (Left headlamp range adjustment motor) has Short circuit or open circuit |
| B1481 | HRA - Headlamp rangeadjustment | Component M37 (Right headlamp range adjustment motor) has Short circuit or open circuit. |
For the last two error codes a dead motor is rarely a cause. Disconnected plug is the most common cause.
Washer
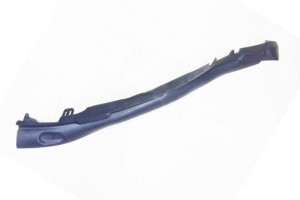
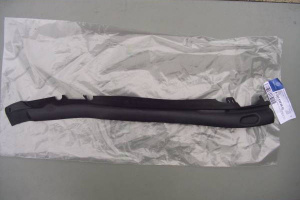
Washer (~EUR 40) for bi-xenon headlamps is A2208260791 (left) and A2208260891 (right). Washer from the pre-facelift headlamps will not fit. After years of use the rubber becomes fragile and breaks easily. From the practical perspective there does not seem to be any function of this washer, because the water is prevented from entering the headlamp with the sealing used to attach the lens to the headlamp.
 |
 |
Wiring
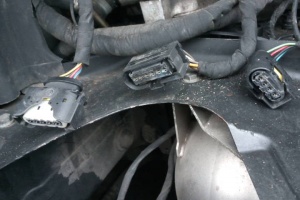
Part numbers
| Part No. | Notes |
|---|---|
| A2208202861 | [614+494-487] right, right hand traffic. From 30/09/2002, replaced by A2208205261 |
| A2208203661 | [614+494+487] right, right hand traffic. From 30/09/2002, replaced by A2208205261 |
| A2208205261 | [614+494+-487] right, right hand traffic. From 30/09/2002 |
| A2208202761 | [614+494-487] left, right hand traffic. From 30/09/2002, replaced by A2208205161 |
| A2208203561 | [614+494+487] left, right hand traffic. From 30/09/2002, replaced by A2208205161 |
| A2208205161 | [614+494+-487] left, right hand traffic. From 30/09/2002 |
| Part No. | Notes |
|---|---|
| A2208202361 | [614/612] left, right hand traffic. From 30/09/2002, replaced by A2208204361 |
| A2208204361 | [614/612] left, right hand traffic. From 30/09/2002 |
| A2208202461 | [614] right, right hand traffic. From 30/09/2002, replaced by A2208204461 |
| A2208204461 | [614] right, right hand traffic. From 30/09/2002 |
| Part No. | Notes |
|---|---|
| A2208203161 | [614+487] left, right hand traffic. From 30/09/2002, replaced by A2208204761 |
| A2208204761 | [614+487] left, right hand traffic. From 30/09/2002 |
| A2208203261 | [614+487] right, right hand traffic. From 30/09/2002, replaced by A2208204861 |
| A2208204861 | [614+487] right, right hand traffic. From 30/09/2002 |
Dissecting Bi-Xenon headlamp
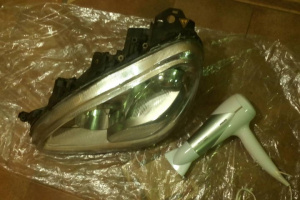
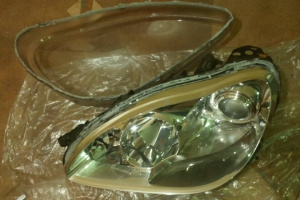
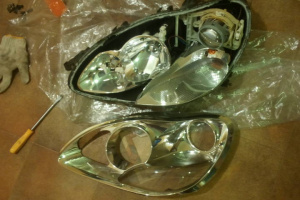
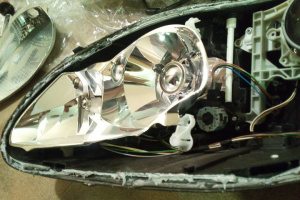
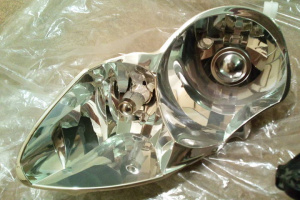
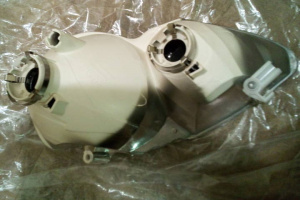
The pictures below show dissecting process of left Bi-Xenon headlamp (A2208202361 - right-hand traffic without ABC).
- Remove the metal clamps holding lens to the headlamp.
- Using the heat gun soften the sealing mastic where the lens attaches to the headlamp.
- Detach the lens slowly cutting the sealing mastic to not smear the reflectors.
- At this point the lens and reflectors can be cleaned. Use cotton wool and spirit. Touch the reflectors lightly otherwise the reflecting layer will come off.
 |
 |
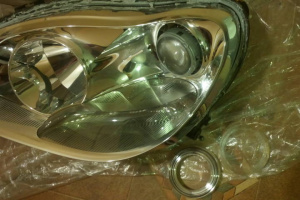
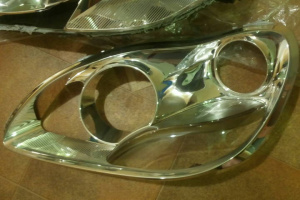
- Remove the reflecting and plastic ring from the xenon lamp. It is clipped on - use force. Use gloves to not damage the reflecting ring.
- The overlay reflector now can be removed.
- The transparent turn signal part of the overlay reflector is a separate part, however, it is hard to remove it without breaking the clips.
 |
 |
 |
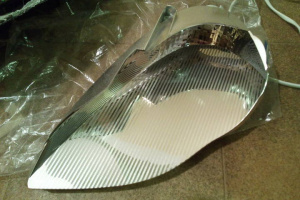
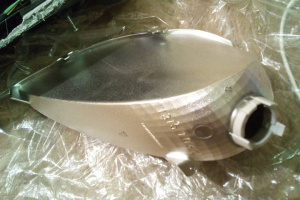
- The turn signal reflector can now be removed.
- Remove the turn signal bulb and unscrew the screw holding the turn signal reflector.
 |
 |
- To remove the fog and high beam reflector, unscrew the screw holding the reflector in the bottom right corner of the reflector.
- Unscrew the reflector mount from the top left corner.
- Slide the reflector out of the bottom left mount.
 |
 |
 |
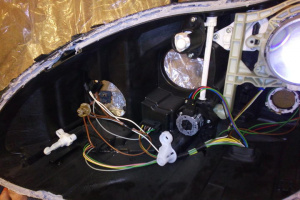
Bi-Xenon headlamp for vehicles with ABC
The headlamp for ABC vehicles does not use the third connector to control range adjustment motor. The motor is controlled by the headlamp control module as can be seen in the pictures below.
 |
 |
H7 Upgrade
LED Upgrade
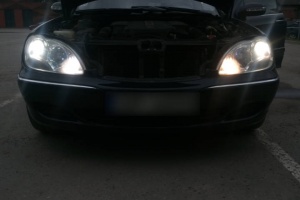
Due to the sophisticated bulb monitoring system built into the W220, even the LED H7-format bulbs reported as "error free" will not work in W220 unless additional load resistors are installed.
PHIPILS Diamondvision
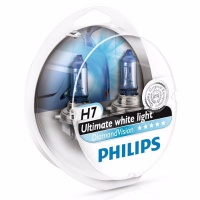
PHILIPS offers Diamond Vision 5000K white light H7 bulbs (~30 EUR/pair).
 |
 |
Parking and Standing Lamp Upgrade
LED Upgrade
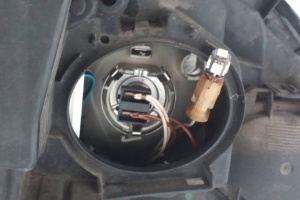
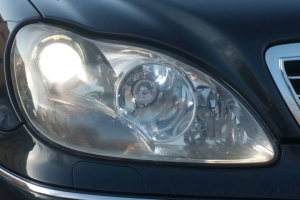
Due to the sophisticated bulb monitoring system built into the W220, even the bulbs reported as "error free" may blink or burn-out quickly if installed as replacement in W5W bulb socket. There has been partial success (some of the bulbs have broken apart probably from the heat) using the LED bulb shown in the picture below.
 |
 |
