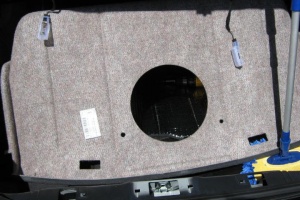
Trunk
Emergency Opening
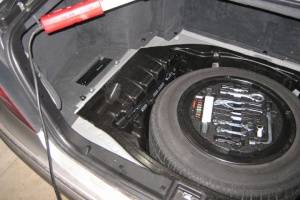
Trunk opening with a dead battery
A completely dead battery prevents the boot lid from being electrically opened. A jump start is not possible if you cannot access the battery as the W220 does not have accessible jump ports.
If the trunk is locked and the battery is dead try these techniques for opening the trunk lid.
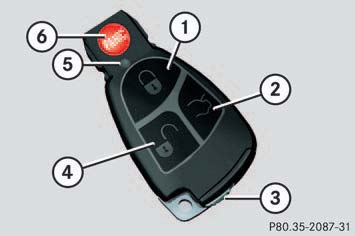
Solution 1: Extract the mechanical key from the SmartKey and use it to open the trunk.
Solution 2: If the mechanical key doesn't work you may have to charge the battery prior to jump starting the car.
|
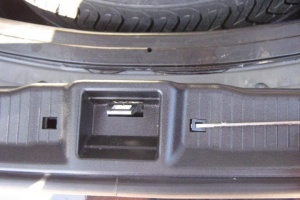
Trunk opening without a key (pre-facelift)
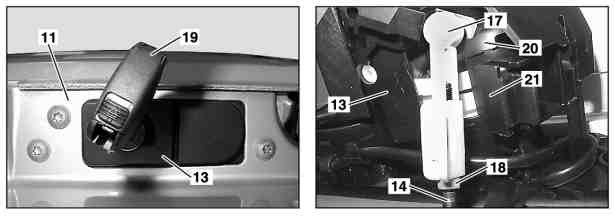
To open the trunk if for some reason it cannot be opened using smartkey or mechanical key, you can use this method which will cause only minor damage of the lid covering.
- 1. Detach the licence plate from the trunk lid covering.
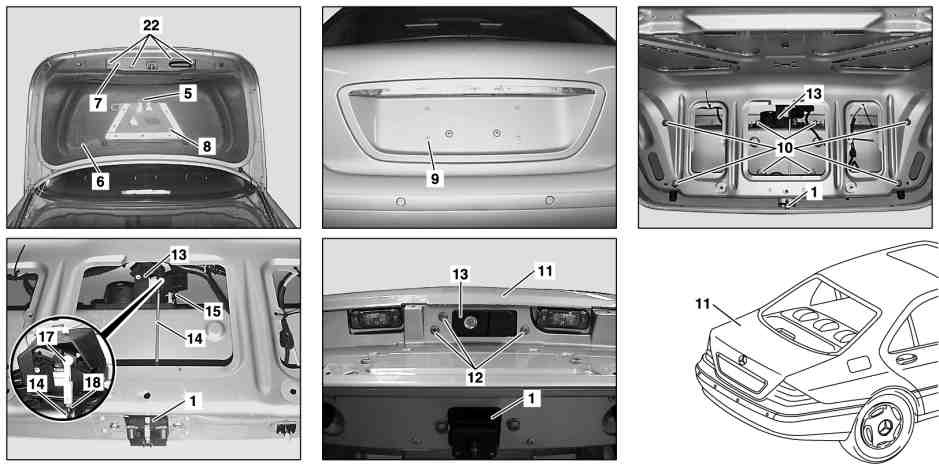
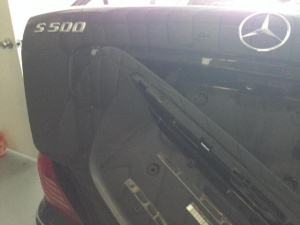
- 2. The covering (9) is a big plastic part mounted on the lid. Remove the covering. You will see two screws in the middle of covering (9). Remove them. You have to remove covering by force using plastic molding remover tool. Note, that there are 7 bolts (10) that are tightened from the inside to hold the covering (9) in place. You will damage plastic housing for these bolts in the covering. However, it is very common to see these housings already damaged. Furthermore, the covering holds to the lid just fine only using the two central screws.
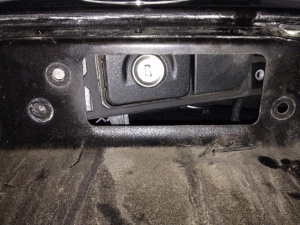
- 3. After covering is removed you will see three T30 torx bolts (12) holding the trunk lid handle. Unscrew them.
- 4. Push the whole trunk lid handle inside through the hole while pushing the button.
- 5. You will hear the pop noise. Trunk lid is open.
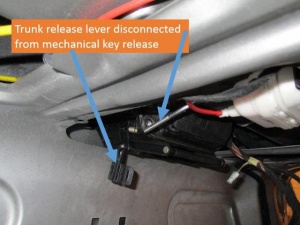
- 6. In case the release rod (14) that connects the trunk lid lock (1) to the trunk lid handle (13) is disconnected, you can use a needled nose pliers to release the rod and open the trunk.
 |
 |
 |
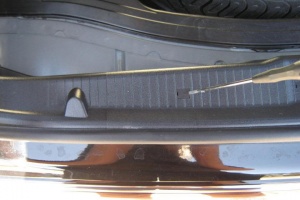
Trunk opening without a key (facelift)
To open the trunk if for some reason it cannot be opened using smartkey or mechanical key, you can use this method which will cause only minor damage of the lid covering.
- 1. Detach the licence plate from the trunk lid covering.
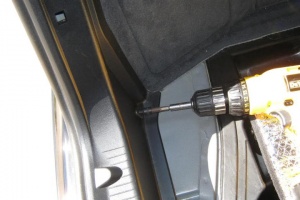
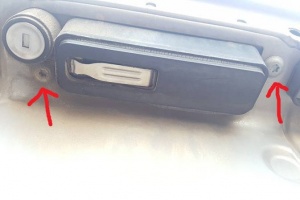
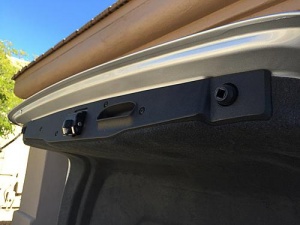
- 2. Remove the covering. The covering is a big plastic part mounted on the lid. Note, that there are 8 clips and one bolt in the center tightened from the inside that hold the covering in place. You have to drill off the head of center bolt holding the covering. This bolt is not crucial, since the covering holds to the lid just fine using only the clips. It is possible that in the process of drilling, the covering hole will get wider and the screw will get loose instead of losing its flat head.
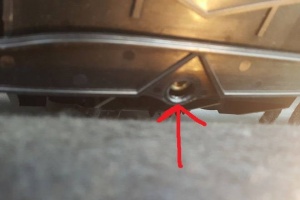
- 3. After trunk lid covering is removed the lock and its 2 screws can be reached. After loosing them the lock will not fall inside the trunk, but will only move an inch to the left or the right. This is because there is third screw holding the lock in place inside the trunk.
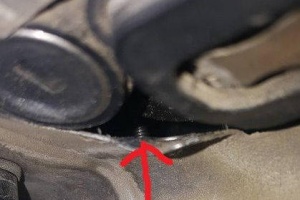
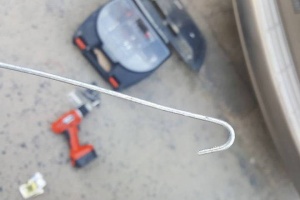
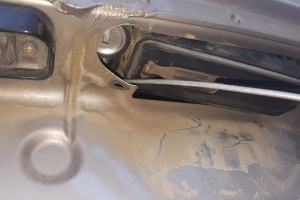
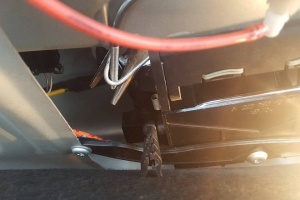
- 4. Now the trunk release rod can be observed. It must be catched with a pincer or pliers and pulled up. A hook can be used to prevent the rod from sliding out of pliers. After pulling the rod up the trunk lid will open.
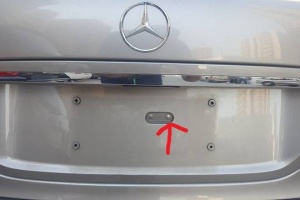 |
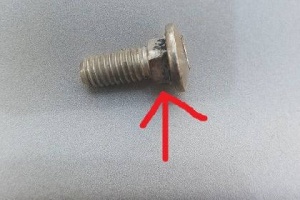 |
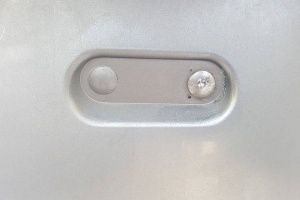 |
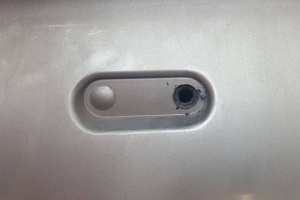 |
 |
 |
 |
 |
 |
 |
Normal Opening
WARNING: A minimum height clearance of 6 ft. (1.85 m) is required to open the trunk lid fully.
Unlocking and opening the trunk lid using SmartKey
Press and hold trunk lid unlock button (2) on the SmartKey until trunk unlocks and begins to open.
If the trunk lid does not open, it is still locked separately (see below).
Delay in trunk/boot lid opening
When you press the open trunk button on the SmartKey, it can take anywhere from a quarter of a second to several seconds before the trunk opens. The time delay is adjustable using STAR DAS. See Section 'DIY 9 - Procedure to Change Time Delay in Trunk Opening' below.
Opening the trunk lid from the inside
You can open the trunk from the inside if the vehicle is stationary.
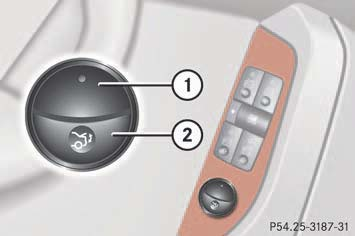
The switch is located on the driver's door.
- (1) Indicator lamp
- (2) Remote trunk lid release switch
Pull remote trunk lid switch (2) until trunk begins to open. The trunk lid opens. The indicator lamp (1) comes on and remains lit until the trunk is closed.
Even with the SmartKey removed from the starter switch or the SmartKey with KEYLESS-GO removed from the vehicle, the remote trunk lid switch can be operated.
If the vehicle was previously centrally locked, the trunk lid will lock automatically when closed. The turn signals will flash three times to confirm locking.
Opening the trunk lid using emergency release
Some W220 S-Class vehicles have an emergency release button so that you do not get trapped inside.
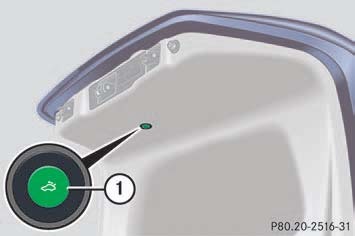
The emergency release button is located on the inside of the trunk lid. Briefly press emergency release button (1). The trunk unlocks and the trunk lid opens. The emergency release button unlocks and opens the trunk while the vehicle is standing or driving. The emergency release button does not open the trunk lid if the vehicle battery is discharged or disconnected.
Illumination of the emergency release button:
- The button will flash for 30 minutes after opening the trunk.
- The button will flash for 60 minutes after closing the trunk.
If the emergency release button is pressed and the vehicle was centrally locked, the exterior lamps will flash and the alarm will sound as the trunk lid opens.
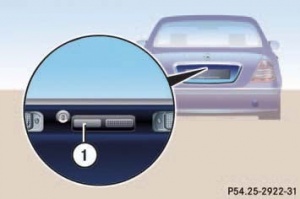
Opening the trunk lid from the outside
 |
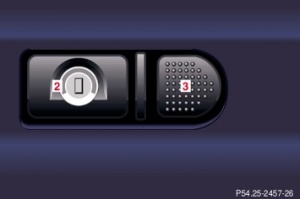 |
The trunk lid open button is located in the rear license plate recess. Press the outer left-hand side of trunk lid button (1). The trunk lid opens.
Vehicles with KEYLESS-GO: If the vehicle was previously centrally locked, the trunk lid will lock automatically after closing it.
Normal Closing
WARNING: Do not place the SmartKey in the open trunk. You may lock yourself out.
Vehicles with KEYLESS-GO: To prevent a possible inadvertent lockout, the trunk lid will open automatically if a SmartKey with KEYLESS-GO is recognized inside the vehicle or in the trunk.
Closing the trunk lid using handle
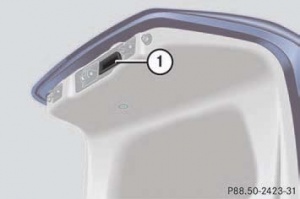 |
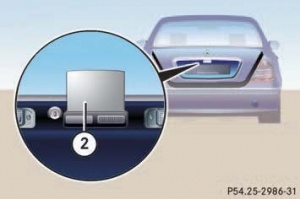 |
On vehicles without option code 881 - REMOTE TRUNK LOCKING the trunk lid can be lowered by pulling firmly on handle (1) or using the extending handle (Retractable Trunk Grip (RTG)) built into the trunk lid handle (2) (available only on facelift vehicles). Push the trunk lid down gently at the extending handle (2) until it engages into the lock. The extending handle (2) is retracted after a few seconds. The power closing assist automatically ensures that the lid is pulled closed completely.
Remote Closing
On vehicles with option code 881 - REMOTE TRUNK LOCKING the trunk lid can be closed by a press of button.
If the trunk lid comes into contact with an object while closing (e.g. luggage that has been piled too high) in the upper motion sequence, the closing procedure is stopped and the trunk reopens slightly.
The trunk lid opening height can be limited when transporting goods on a roof rack (e.g. presence of an MB sport luggage container).
When activated, the trunk lid opens to approximately the height of the roof edge.
You can activate the limiting opening height of trunk lid using the control system.
The closing procedure can be stopped at any time by pressing the trunk lid closing switch (on the driver's door), the trunk lid closing switch (1), or the "trunk lid unlock" button on the SmartKey.
Closing from the outside
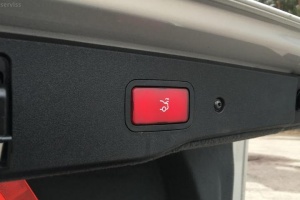 |
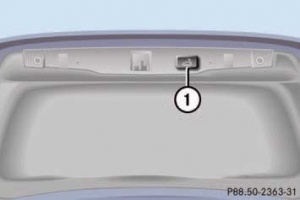 |
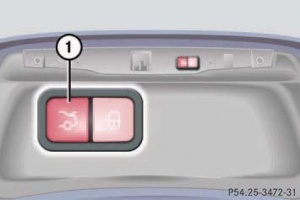
Press trunk lid closing switch (1) briefly. The trunk lid closes.
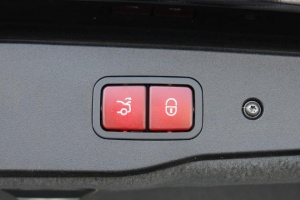
On vehicles with trunk lid closing system and KEYLESS-GO, you can close the trunk lid and lock the vehicle simultaneously using the second button on the switch.
 |
 |
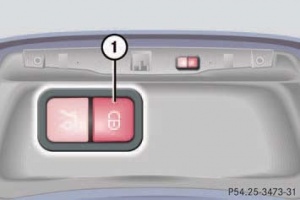 |
Make sure you have the SmartKey with KEYLESS-GO with you. Press trunk lid closing switch (1) (in the second picture) briefly. The vehicle is locked and the trunk lid closes automatically. The turn signals flash three times to confirm locking.
Closing from the inside
The trunk lid can be closed from the inside using the opening switch if the vehicle is stationary.
Press remote trunk lid switch (2) until the indicator lamp (1) goes out and trunk lid is closed. To interrupt the closing procedure release remote trunk lid switch (2).
Restricting Access with Additional Locking Mechanism
Vehicles equipped with option code 884 - TRUNK LID ADDITIONAL LOCKING MECHANISM (HZS) have a function permitting the separate locking of the trunk using the mechanical key. If present, this feature can permit you to deny any unauthorized person access to the trunk by locking the trunk separately and leaving the SmartKey less the mechanical key with the vehicle.
To verify the presence of this feature, use the mechanical key to lock the trunk and then attempt to open the trunk by pressing the trunk lid button after the vehicle has been centrally unlocked with the SmartKey.
The lock is located next to the recessed handle.
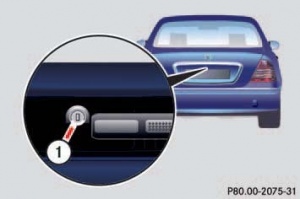
Close the trunk lid. Pull the mechanical key out of the SmartKey. Insert the mechanical key into the trunk lid lock. Turn the mechanical key clockwise to vertical position. The trunk remains locked even when the vehicle is centrally unlocked. You can only cancel the separate trunk locking mode by means of the mechanical key.
Trunk Lid

|
|
|
|
Trunk lid covering
There are differences between pre-facelift and facelift vehicles in how trunk lid covering attached to the trunk lid.
Pre-facelift
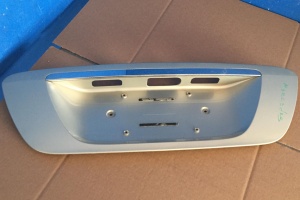
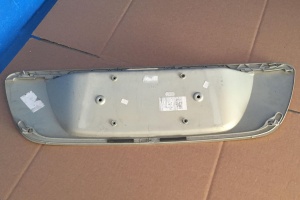
Pre-facelift vehicles (To Date: 01/09/2002) have lid covering A2207500081 which is attached to the lid with two screws in center tightened from outside and 7 screws tightened from inside.
 |
 |
Facelift
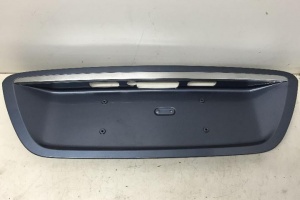
Facelift vehicles (From Date: 30/09/2002) have lid covering A2207500281 which is attached to the lid with one bolt in center tightened from inside and 8 retaining clips. The covering has also different trunk lid handle opening modified for retractable trunk lid grip.
 |
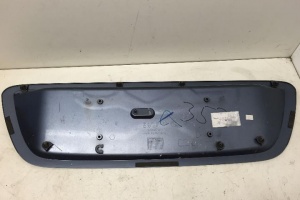 |
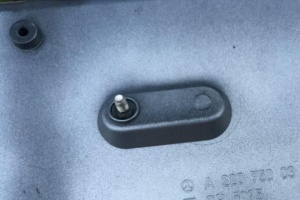 |
The U.S. version A2207500381 has smaller distance between licence plate mounting holes.
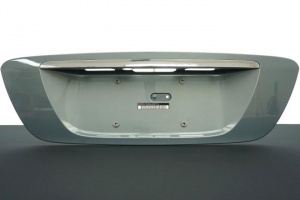 |
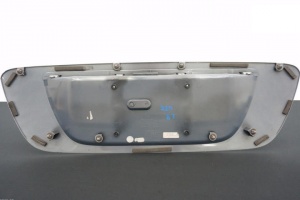 |
Trunk Lid Handle
| Part No. | Notes |
|---|---|
| A2207500091 | To Date: 30/06/2000 |
| A2207500391 | From Date: 30/06/2000 To Date: 01/09/2002 |
| A2207500893 | From Date: 30/09/2002 To Date: 04/11/2003 |
| A2207501293 | From Date: 04/11/2003 |
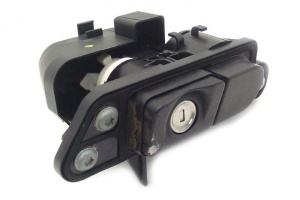 |
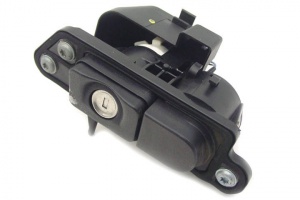 |
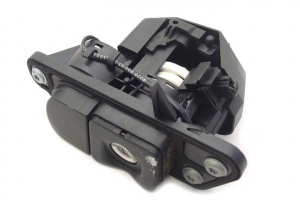 |
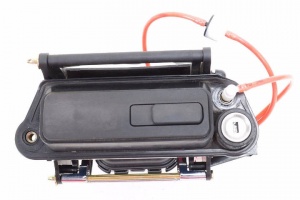 |
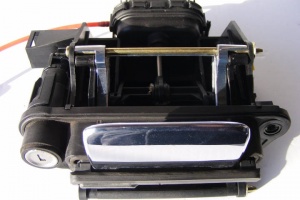 |
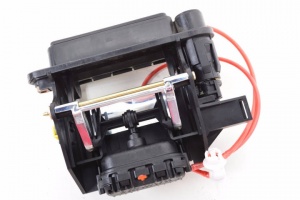 |
For vehicles with option code 889 - KEYLESS-GO:
| Part No. | Notes |
|---|---|
| A2207500291 | To Date: 30/06/2000 |
| A2207500491 | From Date: 30/06/2000 To Date: 01/09/2002 |
| A2207500993 | From Date: 30/09/2002 To Date: 04/11/2003 |
| A2207501393 | From Date: 04/11/2003 |
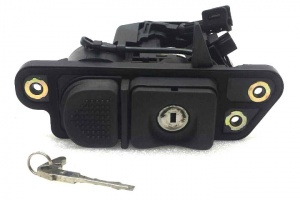 |
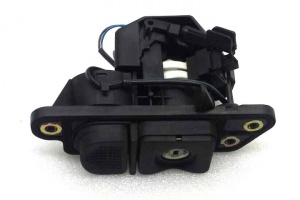 |
 |
 |
 |
 |
For vehicles with option code 881 - REMOTE TRUNK LOCKING:
| Part No. | Notes |
|---|---|
| A2207501093 | From Date: 30/09/2002 To Date: 04/11/2003 |
| A2207501493 | From Date: 04/11/2003 |
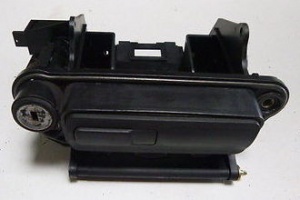
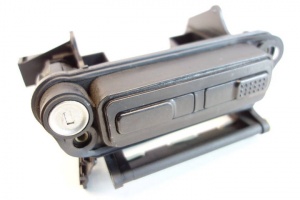
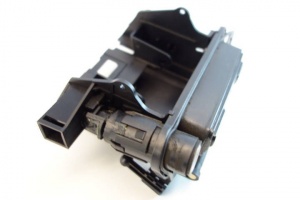
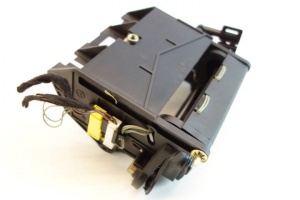
For vehicles with option code 881 - REMOTE TRUNK LOCKING and 889 - KEYLESS-GO:
| Part No. | Notes |
|---|---|
| A2207501193 | From Date: 30/09/2002 To Date: 04/11/2003 |
| A2207501593 | From Date: 04/11/2003 |
 |
 |
 |
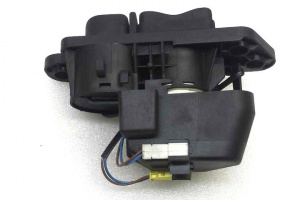
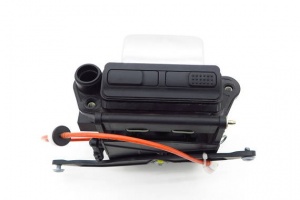
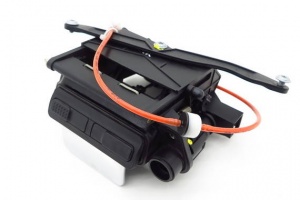
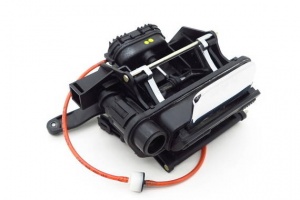
Locking Mechanism Actuator
Functions - Trunk Locking Mechanism
The W220 trunk lid mechanism consists of two mechanisms coupled together.
- Trunk latch mechanism and
- Retractable Trunk Grip (RTG) or hidden chrome handle and external release switch mechanism.
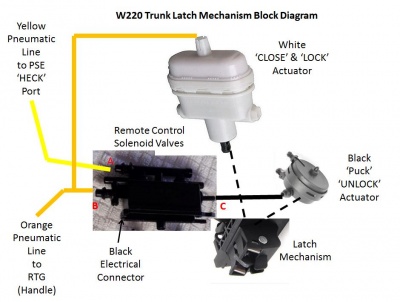
Both W220 trunk lid mechanisms are pneumatically controlled and can have some or all of the following functions:
- Auto opening (all vehicles)
- Manual opening via external release switch.
- Manual opening via emergency mechanical key.
- Auto or self closing (vehicles with option code 881)
- Extension and retraction of trunk lid handle (facelift vehicles)
The positive and negative pressures required for the pneumatic control of the Trunk/Boot Lid functions are generated by the Pneumatic System Equipment (PSE) Pump.
Part Numbers - Trunk Locking Mechanism
- Whole Assembly - Trunk Locking Mechanism Actuator
- Type 1 TBD
220 750 06 84, 2207500684. (Previous version of this part was 220 750 05 84, 2207500584.)
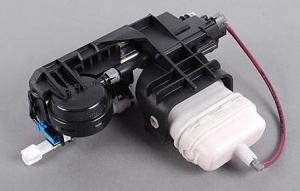
- Type 2 For W220s with remote control trunk lid unlocking. 220 750 01 85, 2207500185.
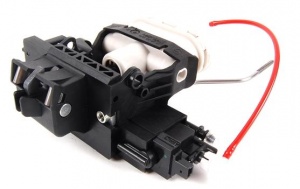
- Vacuum Servo Only (Black) - Trunk Locking Mechanism Actuator. TBD.
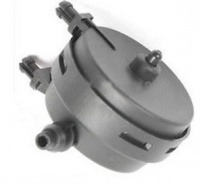
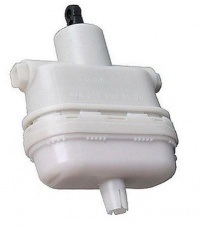
- Air Servo Only (White) - Trunk Locking Mechanism Actuator. 220 800 05 75, 2208000575.
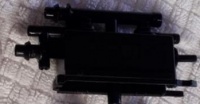
- Remote Control Solenoid Module. 230 800 01 78
Issues
Common issues relating to the trunk/boot lid functions are;
- Hissing Sound on Trunk Opening or Closure can occur due to a leak in either the
- Retractable Trunk Lid Grip (RTG) or in the
- Trunk Latch Remote Control, Solenoid Valve Module see Section 'DIY 6 Repair of Trunk Lid Actuator Pneumatic Solenoid Valves' here; [1]
- Cracked or broken pneumatic line where it enters the Trunk/Boot. Control click to see Issues - Retractable Trunk Lid Grip here [2]
- Broken or Failed Pneumatic Actuators. See DIY 4 - Repair of Broken Trunk Lid Actuator 01 and DIY 5 - Repair of Broken Trunk Lid Actuator 02.
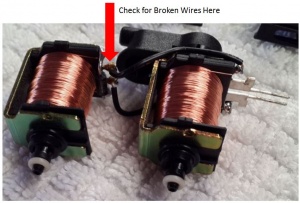
- Broken wires in Pneumatic Solenoid Valves. After many opening and closing of the trunk the wires between the two Pneumatic Solenoid Valves fatigue and break. They can be easily resoldered once the mechanism is dismantled. See DIY 6 - Repair of Trunk Lid Actuator Pneumatic Solenoid Valves.
- Cracked or broken pneumatic lines.
- Cannot remove the actuator rod to get the locking mechanism out of the trunk
- Leakage of water into the trunk because the power closing assist fails to pull the lid closed completely.
- Cannot open the trunk when the battery is dead.
DIY Procedures
Before starting DIY procedures consider to reset the Trunk/Boot CPU by doing the following:
- Remove the 20A yellow fuse from under the rear right passenger seat fuse box.
- Leave it out for about 5 mins.
- Then put it back in and then test the Trunk/Boot functions.
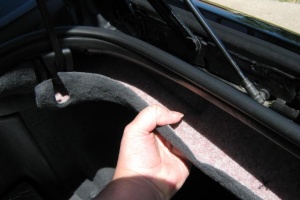
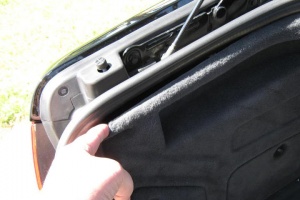
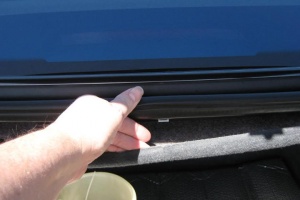
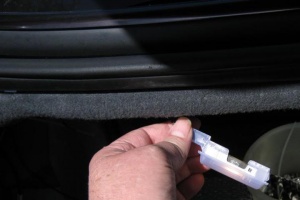
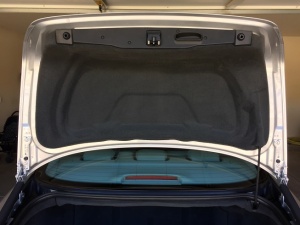
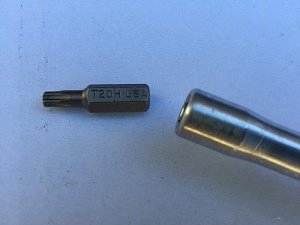
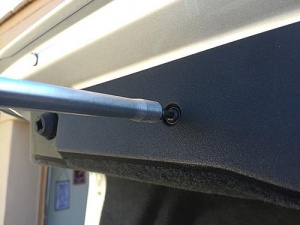
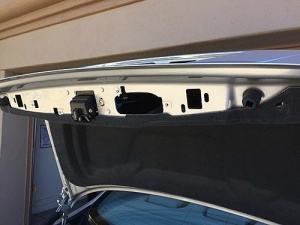
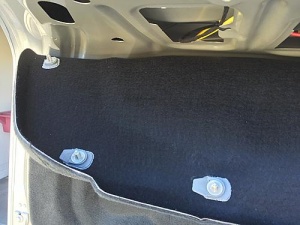
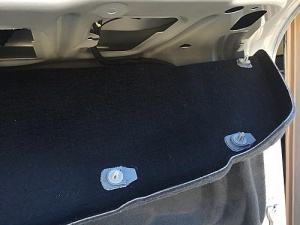
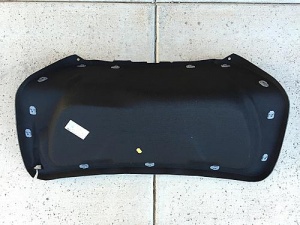
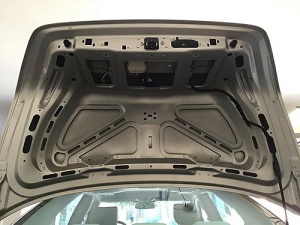
DIY 1 - Removing trunk lid lining
 |
 |
 |
 |
 |
 |
 |
 |
 |
DIY 2 - Removing trunk lining
DIY 3 - Welding trunk lid covering holes
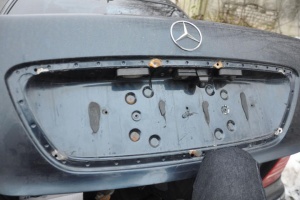
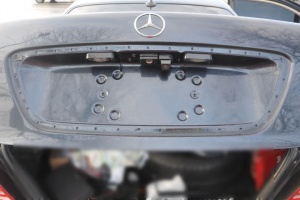
Trunk lid has 7 (pre-facelift) or 8 (facelift) holes which are used to attach the trunk covering (9) to the trunk lid. It is common to see these holes being a source for moisture and rust inside the trunk lid. As an anti-rust measure these holes can be closed by welding. The trunk covering still remains attached to the trunk lid by two central screws (pre-facelift) or one central screw (facelift), although double sided type is recommended to prevent vibration of the covering.
 |
 |
DIY 4 - Repair of broken trunk lid actuator (1)
With thanks to BenzWorld member 'subscriber' for posting an excellent description of his repair of a broken locking mechanism pneumatic actuator.
Note the broken plastic tabs on the perimeter of the actuator.
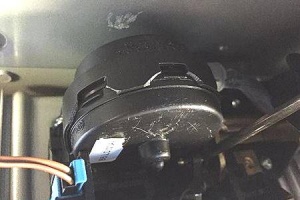
See http://www.benzworld.org/forums/w220-s-class/2532833-repair-part-220-750-0684-trunk.html
DIY 5 - Repair of broken trunk lid actuator (2)
See WIS 88.52 Retractable Trunk Lid Grip (RTG) for a DIY repair of a broken actuator.
DIY 6 - Repair of trunk lid actuator pneumatic solenoid valves
In the trunk latch mechanism there are two solenoid valves which distribute the pneumatic pressure to the relevant actuator depending on the required result.
Function - Trunk Latch Mechanism
The Trunk Latch Mechanism has the following functions;
- Switch to detect when the trunk lid is closed. It can be identified by the blue coloured electrical connector (with wires Brown, Brown/Black). The switch is electrically open ie high resistance when the trunk lid is either partially closed (first click) or fully closed. The switch is electrically zero resistance when the trunk lid is open.
- Pneumatic actuator (white) to pull the trunk lid fully closed after the lid is placed manually in the partially closed position.
- Pneumatic actuator (black) which is commonly referred to as a 'puck' which releases the latch mechanism to unlock the trunk lid which thus allowing it to open.
- Remote opening of the trunk lid via two solenoid valves which can be identified by the black coloured electrical connector (with wires (Brown, Brown/blue). The solenoid valves are normally unenergised when the trunk lid is closed. When a remote open command is given, for example by the button on the remote key fob, +12V is applied to the solenoid valves for 1 second which energises both valves and unlocks the trunk lid and allows it to open.
A detailed description of the opening and closing sequences follows: (Reference: HECK function on Pneumatic System Equipment (PSE) Pump.
- When the Boot/Trunk Lid is closed manually to the first position as identified by a loud click, the PSE HECK port provides +ve pressure (27KPa or 4psi) to the Boot/Trunk Lid Solenoid Valve Assembly and hence to the Large White Actuator which pulls the boot closed tightly, then the PSE HECK port changes to –ve pressure (19”Hg vacuum), which retracts the Handle (RTG), then returns the line to atmospheric pressure.
- When the Boot/Trunk Lid is commanded to open either by remote control on the key fob, by pressing the Boot/Trunk Lid button, or by pulling the internal Boot/Trunk Lid release button on the driver's door, the PSE HECK port provides +ve pressure (27KPa or 4psi) to the Boot/Trunk Lid Solenoid Valve Assembly and hence to the Small Black Actuator or "Hockey Puck" which opens the locking latch, thus releasing the lid which fully opens. +ve Pressure is also applied to the RTG Handle, which extends the Handle. After all this is finished the pneumatic line returns to atmospheric pressure.
Issue - Trunk Latch Mechanism
A common failure mode is for the Remote Control Solenoid Valve Module to crack and leak.
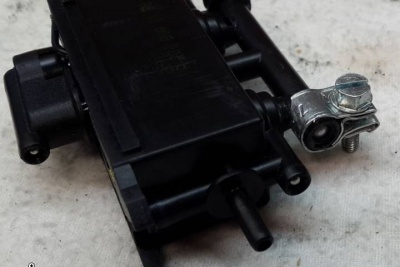
In this example the plugged end of the inlet manifold has cracked. During manufacture a ball bearing was pressed into the manifold to seal it off. With age it has eventually cracked and even though not a large crack, it caused a very loud hissing noise as the air escaped when the trunk lid was opened.
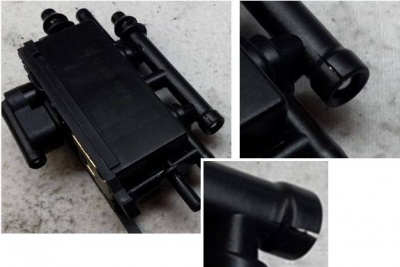
Leak Repair - Remote Control Solenoids
The small crack shown in the example above was easily repaired using super glue and a small hose clamp.
DIY 7 - Clean and Regrease Trunk Lid Actuator Pneumatic Solenoid Valves
Once the Boot/Trunk Lid Pneumatic Actuator is removed from the vehicle it can be dismantled on the work bench. See WIS 88.52 Retractable Trunk Lid Grip (RTG) for the removal method.
- Press in the two small plastic tabs and the Pneumatic Solenoid Valve Assembly can be with drawn. Note there is no mechanical coupling between the Remote Control Solenoids and the Latch Mechanism even though it looks like there might be.
- Remove the top front cover over the electrical connector.
- Then press in two small plastic tabs and remove the top rear cover.
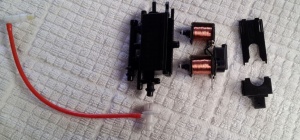
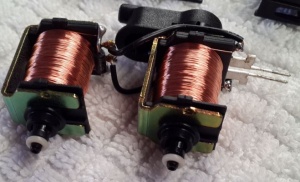
- Before reassembly check the electrical pneumatic solenoid valves.
- Reassemble in the reverse order but apply silicon dielectric or vacuum grease to the pneumatic seals before assembly.
DIY 8 - Check Electrical Performance Trunk Lid Pneumatic Solenoid Valves
The electrical circuit diagram is very simple with the two coils just connected in parallel. A diode is also connected across the coils to reduce current surge when the coils are switched off. (Here is the theory: The magnetic energy stored in energised coils can generate a large spark across the operating switch when it is opened and consequently burn the electrical contacts in the switch. A diode provides a path for this excess energy to dissipate harmlessly.) The downside of having a diode in the circuit is that the electrical contacts are now polarised and correct polarity of any applied test voltage must be observed otherwise the diode will burn out. This just means that the '+' and '-' signs on the next diagram must be observed when applying a 12 Volt DC test voltage.
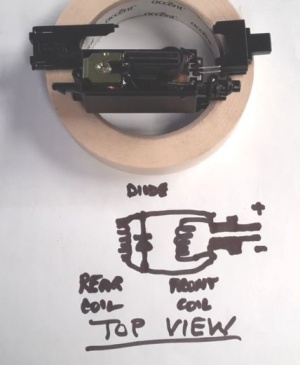
Each valve coil has a resistance of 36 Ohms, therefore the combined resistance for the two coils in parallel as measured across the black electrical connector is 18 Ohms. Note that there is a diode across the coils so that may influence the measurement obtained with some Digital Multi Meters.
DIY 9 - Changing time delay in trunk opening
When the trunk release button is pressed in order to open the trunk there is a time delay before the trunk actually opens. It is possible to change the time delay that occurs using STAR. The default time is 0.25 seconds (TBC).
- Connect the STAR System to the car.
- Initialize Xentry and enter the car information.
- Start DAS.
- Start "Control Units" function.
- Start "Body"
- Start "PSE - Pneumatic system equipment"
- Start "Control unit adaptations"
- Start "Read coding and change if necessary"
- Start "Trunk lid remote release"
- Start "Delay time of..."
- Click on the down caret at the delay time menu item and adjust the delay as desired.
